Propeller Pillow | by Suzy Quilts

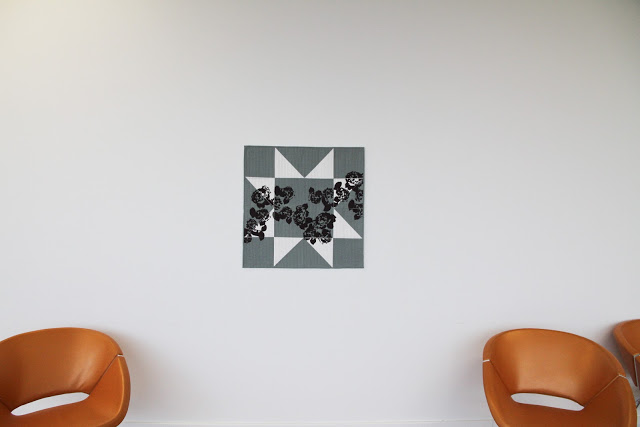
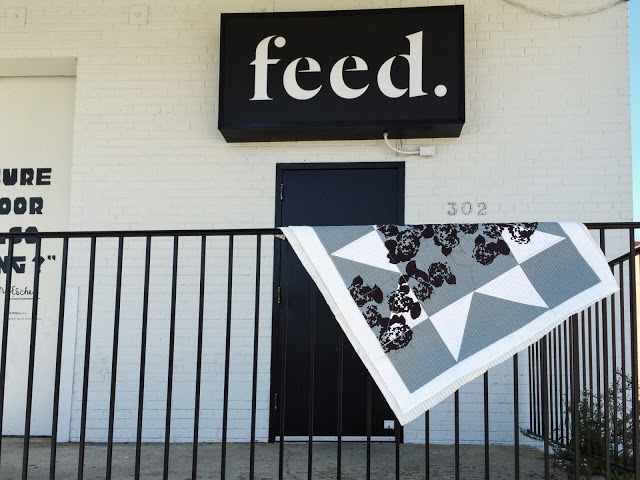
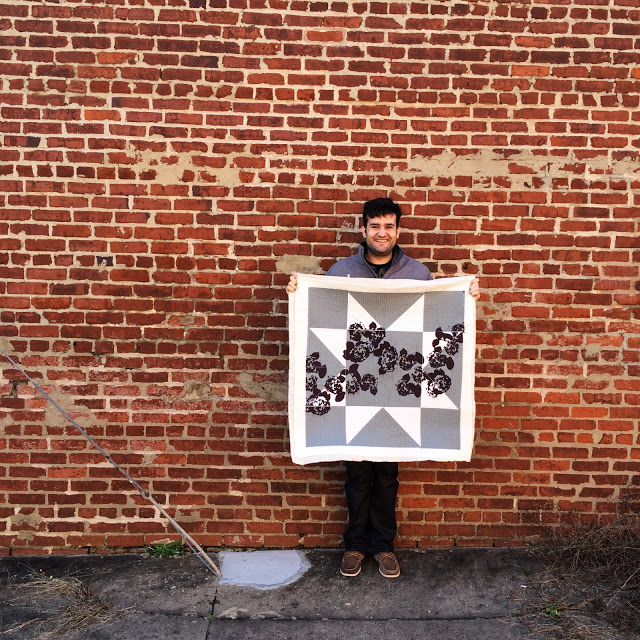
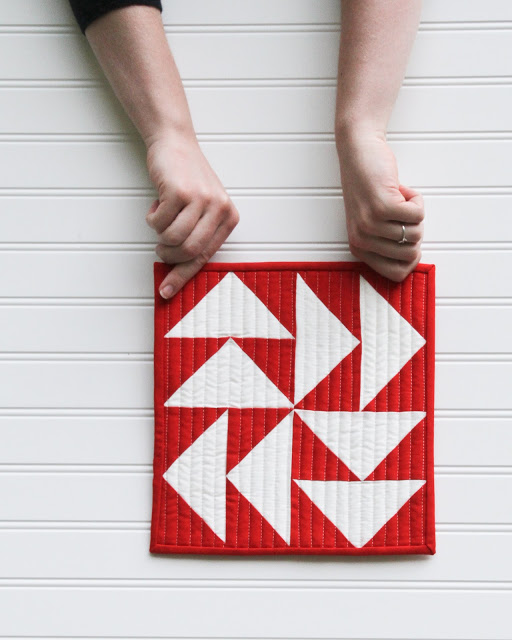
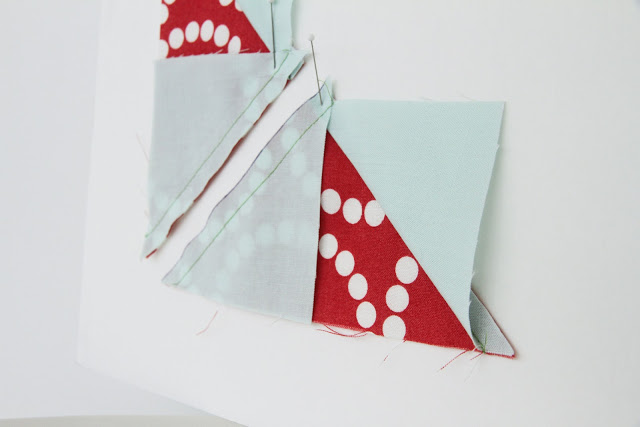
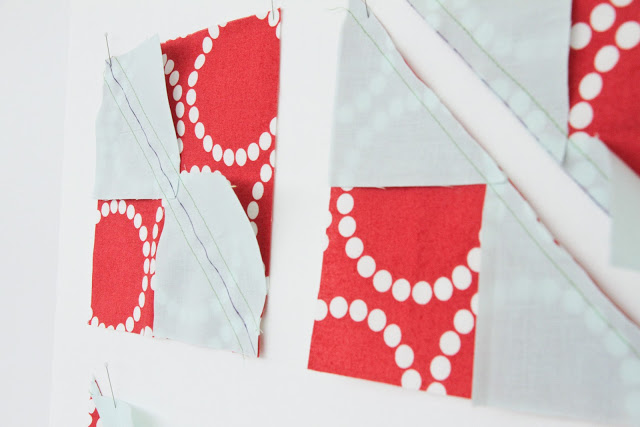
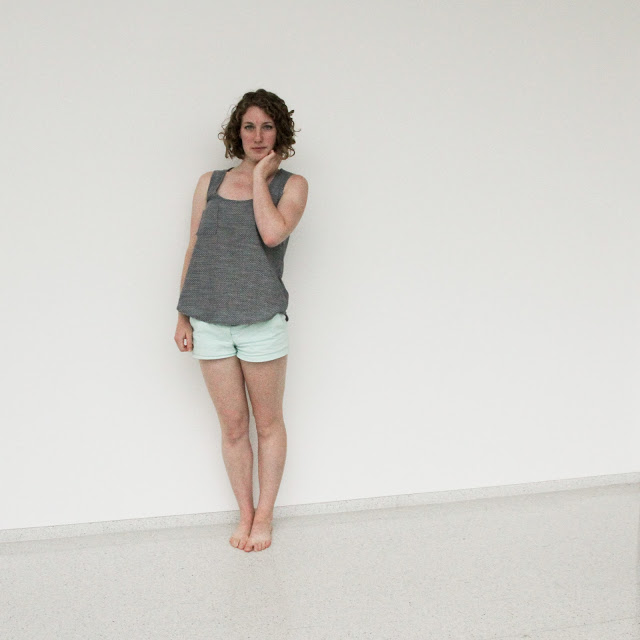
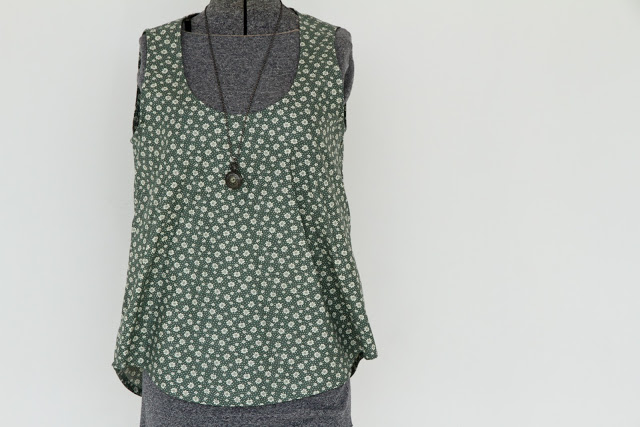
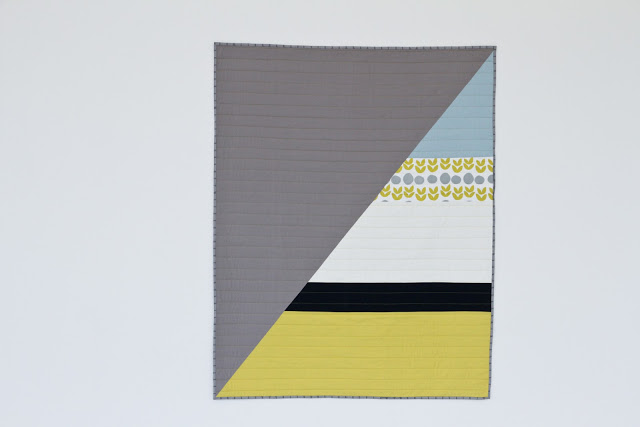
When Suzy of SuzyQuilts posted her new pattern the Propeller Quilt pattern, I knew I had to try it. Bright, fun, and geometric, this pattern goes together in a cinch. As I was pulling out fabrics for this quilt, the hand-printed Maze and Vale fabrics that my mom gave me for Christmas fell from the shelf. I decided it was a sign. Beautiful fabric is meant to be used. 

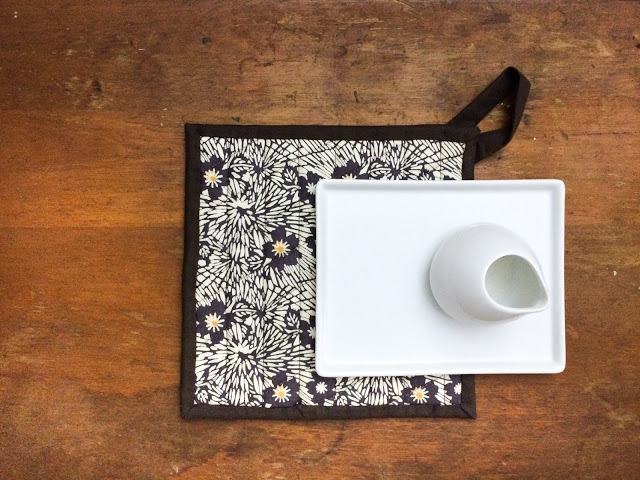
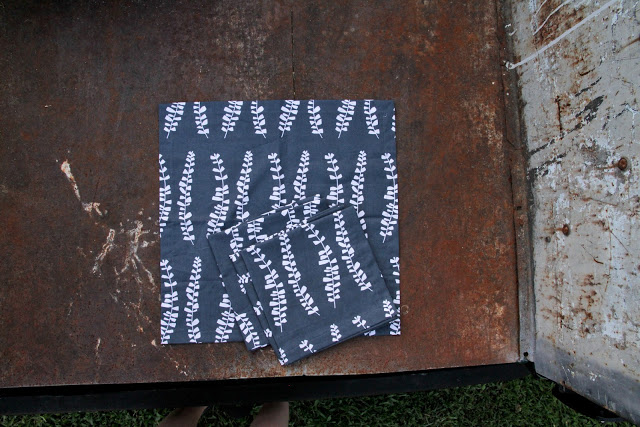
That grey and white dash is one of my favorites of hers; it hurt to cut into (can you say fabric hoarder?) but now I get to enjoy it on my couch everyday! The mustard and white dandelion is a Maze and Vale print as well, and it went so well with my own hand-printed citron pistachio fabric, that I knew they needed to come together in this pillow.

Plus, this is my year of sewing my stash. (Yes, last year might have been as well, but we didn't make any progress on that so here we are again...) I am looking forward to using up all the yummy design goodness that I have stored away in boxes on my shelves. I'm coming for you, you gorgeous Lotta, April Rhodes, and Cotton + Steel.

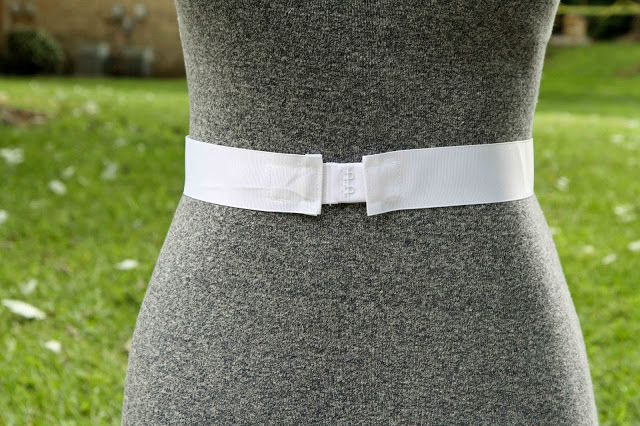
The piecing flew! It's amazing how much faster it is to quilt when you are following a pattern and not designing at every step! My finished block was 20" x 20," (I modified those corner pieces to be large enough to fit my pillow) but even at 14" square, the blocks are a nice size to whip up a larger quilt in no time. What little weekend projects have you made time for recently? Have you committed to sewing your stash in 2016?

Eggplant Modern Printed Quilt Finish

Last January, my aunt commissioned a quilt for above her fireplace. We chatted about color schemes and styles, and I pieced this large grey and white morning star quilt block. Then I stalled. For months. But in December, knowing that I would be flying to the west side of Michigan for a baby shower for my cousin, I decided that this quilt would be my next completion. And here it is: completed!

Modern Screen-printed Grey and White Wall Quilt | Lovely and Enough

It is based off of Morning Star, a quilt from my senior collection, "She Can Laugh at the Days to Come." The deep eggplant printing lends a stronger graphic quality to the final composition. I also experimented with a dark navy straight-line quilting thread instead of matching the grey, and the pop balances the blooms, I think. At just under 30" square, this quilt is a bit of an up-size from the original Morning Star, and I love the final product.

I bound this baby using my new clover binding clips while watching Ellen's Design Challenge with Brent. Talk about a good evening, and a good finish. I just dropped it off at its new home this past weekend, and I can't wait to get a picture of it above the mantle!

Modern Screen-printed Grey and White Wall Quilt | Lovely and Enough

Follow the progress of this quilt with the links below:

Inspiration

Sandwiching

Straight-line Quilting

Modern Quilted Pot Holder

DIY modern quilted pot holder | Lovely and Enough

I'm usually a complete supporter of purchasing from the wedding registry. Get the happy couple what they want not what you want, for crying out loud. But after buying from the registry for a shower, I decided to go handmade for the ceremony, and I am so happy I did.

For over a year, I've been wanting to try out Purl Soho's Liberty Hot Pad tutorial, and this felt like the perfect opportunity. Plus, I am sewing my stash this year! (The goal is to go from nine boxes to six in 2016. Big dreams.) The tutorial calls for pretty colored twill tape of which Joann does not really carry, so I opted for my own binding. (Plus, I have not mastered the machine-sewn beautiful-on-both-sides binding as of yet. I end up with a wobbly uneven mess. C'est la vie.) I made a little bit of extra binding and sewed it closed and then insided it out for a loop that got stitched right into the binding.

modern fabric pull with stripes and florals | Lovely and Enough
modern quilted triangles | Lovely and Enough

I just love the triangular pockets on the back of the one. Such fun.

And

 I'm a sucker for stripes and florals. You begin to understand why I could not say no to this project!

DIY modern quilted pot holder | Lovely and Enough

The pattern calls for straight-line quilting and then quilting at 30º. Now this is a tad ambiguous, so I ended up with one potholder that is 30º and one that is 60º depending where you measure from. Oh well, both look good. And most importantly, the happy now married couple were thrilled with their handmade gift. Day made.

DIY modern quilted pot holder | Lovely and Enough

Straight-line Quilting + Eggplant Printing

Straight-line quilting on the modern eggplant-printed quilt is complete! I whipped out the second half last Wednesday at sewing night while watching the Philadelphia auditions for American Idol. My current idol favorite is Jenn Blosil. She is hilarious and unique and such a hoot but so great to listen to as well. Have you been keeping up with the auditions? They make for good sewing tv, except that as soon as someone starts singing, I feel like I should stop adding the chug chug of my machine to the mix.

Brent was a doll and held up my quilt for me this weekend since I am out of masking tape. I guess it's time to swing by Target! (Alert: danger zone. Target also has a quilted men's sweatshirt I'm kind of dying to have but since Brent already owns it...I'm not sure if I'm allowed to buy it as well...) The next step is tying all of those threads to the back. Then it will be free-motion quilting time. I decided to try lines first this time to achieve a flatter quilt with less chances of puckers. So far so good.

I've been wanting to get back into posting progress photos, but if I post them on their own, then the finished post doesn't have any progress photos...dilemma. What do you think?

Follow the progress of this quilt with the links below:

Inspiration

Sandwiching

Finish

I'm linking up to WIP Wednesday today over at Freshly Pieced. Hop over there to see some more unfinished beauties.

Eggplant Modern Printed Quilt

My aunt requested a printed quilt for her mantle an embarrassingly long time ago, so I decided it should be my first finish of 2016. (After it failed to be my final finish of 2015, but we don't have to talk about that.) This Saturday evening, I turned on Ice Age 2 and straight-line quilted a whole half of the quilt. Ice Age 2, you ask? Well, I needed a movie that I didn't love, so that I wouldn't be tempted to look up from my machine and take long pauses between lines. Success.

Floral Printed Grey and White Morning Star Modern Quilt with straight-line quilting | Lovely and Enough

I'm greatly enjoying the process of this quilt and plan to finish it in time to deliver it to her in person February 6th at my cousin's baby shower. Baby shower, of course, means baby quilt! My mom and I are tag-teaming on this one, and I sent her some of my mint flamingo fabric. I haven't actually used that in a project yet (can you say fabric hoarder?), so I can't wait to see the final product!

straight-line modern quilting | Lovely and Enough

The printing on this quilt is a dark eggplant. It turned out a little darker than expected but makes for a striking quilt. I decided on a blue grey thread that is a little darker than I used on the previous incarnation of this quilt. It should balance out the dark blooms nicely.

Floral Printed Grey and White Morning Star Modern Quilt | Lovely and Enough

Follow the progress of this quilt with the links below:

Inspiration

Straight-line Quilting

Finish

I am linking up to WIP Wednesday over at Freshly Pieced for the first time in a long time. Head over to see other masterpieces in the making.

Stone + Bloom: QuiltCon

There are simply too many ideas rolling around inside my head to have enough time to quilt them all. QuiltCon was a great opportunity to actually realize one. I have been experimenting with screen printing on quilts for almost two years now, and it was time to scale up. Measuring about 3' x 3', this is my largest printed quilt yet. Big isn't actually all that much slower to piece and sandwich, but quilting it does become a bigger beast.

red and grey modern minimal screen-printed quilt | Lovely and Enough

I began with free-motion quilting the blooms one Wednesday. It seemed like the logical place to begin, and then I stalled. I always forget the number of hours I can spend staring at a quilt deciding how to quilt it. Eventually, I decided on matchstick quilting the white bars, but stopped at the edge of the printed blooms.

red and grey modern minimal screen-printed quilt with matchstick quilting | Lovely and Enough

The grey was more difficult. Beginning with 1-inch spaced straight lines, I wasn't happy with the wrinkles and how much the pistachios faded from the design. After several more hours of staring at it taped to the dining room wall over Thanksgiving, I added more quilting to the the solid grey to achieve half-inch spacing.

red and grey modern minimal screen-printed quilt with matchstick quilting | Lovely and Enough

The whole quilt was a little wonky after quilting, so I pinned it to my printing board and blocked it with a spritz bottle and then began the Great Binding Debate. (Did you know that I have had multiple quilts that arrive at this step and never make it further because every binding I audition feels like it will ruin the design? #perfectionistquilterproblems) Eventually, I decided red but with bits of grey. That way red wouldn't touch the red blooms along the edge. I still think light grey could have been zen...or boring...we will never know.

I also can't decide which side I like up. What do you think? Horizontal or vertical bars?

red and grey modern minimal screen-printed quilt | Lovely and Enough

Follow the progress of this quilt with the links below:

Inspiration

Progress

QuiltCon Making in Spare Moments

loose free-motion quilting in red on modern printed minimal quilt | Lovely and Enough

In the spare moments between class and collaborations, I have been working my way towards my first submission to Quilt Con. I'm pretty pumped. It is a scale up of a Lenten Twelve (below) from this spring combined with some of the quilt printing I have been experimenting with, such as Lenten Twelve II and Evening Star.

modern minimalist neutral mini quilt | by Lovely and Enough

I wanted higher impact, so I scaled up to 3' x 3.' It's funny because piecing it took just as much time as the little one, but voila: more bang for your buck! I say that now, but I know that it will take me longer to quilt it...

minimalist modern wall quilt in grey and white | Lovely and Enough

Then I printed it with my iconic hydrangea print and blocked out the white bars from being printed. (Iconic is my way of saying that I have used that hydrangea print for so many projects now that...well...I am looking forward to designing new patterns.) I bit the bullet and loosely free-motion quilted around all of the printed hydrangeas, and now the past two evenings have been spent staring at the quilt trying to decide how to proceed with the quilting.

loose free-motion quilting in red on modern printed minimal quilt | Lovely and Enough

I have two questions for you:

1. Is there a specific way that you must tie off your quilting on the back for an exhibition? Must we bury our threads on the back? Can we reverse a little? Is it personal preference?

2. How big is too big of an area to have un-quilted on a quilt?

I hope your QuiltCon making is going smoothly and wrapping up! Or that you are enjoying watching everyone else sweat while you stay above the scramble.

Best,

Kelsey

Follow the progress of this quilt with the links below:

Inspiration

Finish

DIY Professional Quilt Labels

If you've been wanting to make professional quilt labels from the comfort of your home, this is for you. In a matter of an hour, you will have color-fast printed labels to stitch onto backings or into bindings! My favorite part about this version is that I don't have to rely on my hand-writing; I can design my labels with real fonts, which lends a crisp and professional look to the labels.

Supplies:

  • freezer paper

  • fabric

  • computer + inkjet printer with black ink

  • rotary cutter + cutting board

Step One: Design and Test Print

Design your labels and test print them on a piece of printer paper. Test printing is a good idea so that you catch mistakes before it is on your fabric! The design must be in black for it to be wash-fast.

You have options here: I like to fold my labels in half and sew them into the binding, so I leave a large portion blank below each label for the back. I also like to print cut lines, so that is is easy to trim the labels to the correct size. You can also print something on this side if you want! Or you can print labels that will remain flat and are stitched onto the backing. The sky is the limit.

Step Two: Cut

Cut freezer paper to 8.5" x 11"

Step Three: Iron

Iron your freezer paper to the back of the fabric you would like to print your labels onto. Give yourself a small margin of fabric around the edge of the paper. You want a warm dry iron (around the wool setting).

Step Four: Trim

Trim the fabric to the edge of the freezer paper. If you iron on the freezer paper before trimming, it minimizes fraying of the fabric which could jam up your printer.

Step Five: Print!

Run your freezer-paper-fabric combo through you inkjet printer just like a normal sheet of paper. Make sure you are printing on the fabric side!

Step Six: Peel and Heat-set

Peel the freezer paper off the back of your fabric and heat-set the black ink for washfastness. Simply press with a hot dry iron for ~30 seconds.

Step Seven: Cut

Cut out your labels!

Step Eight: Fold

(optional)

This step is optional depending on whether you are folding your labels or not, but I press mine in half.

Step Nine: Fray Check

Fray check the edge of your labels to avoid nasty fringes and fraying through the lifetime of the label.

And voila! You have made professional quilt labels from the comfort of your home for a fraction of the cost of ordering them from a company!

NOTE: DO NOT DO THIS WITH A LASER PRINTER.

THE FREEZER PAPER WILL MELT AND RUIN YOUR PRINTER.

DIY Quilt Labels | Make Your Own Professional Labels with Just a Printer and Freezer Paper

Special thanks to my mom who took all the photos for me and has made me my quilt labels the past two years. She is truly amazing.

Whole Cloth Quilt Collaboration with Salty Oat

Last Spring while trolling Instagram, I stumbled upon Caitlin Topham: the quilter and curator behind Salty Oat. Miracle of all miracles, she actually lived near me in North Carolina! Inspired by her gorgeous quilting and crisp modern embroidery, I reached out to her and we met up for coffee. If you mostly live with quilter's only via Instagram and the web, I cannot emphasize enough how amazing it is to spend time with quilty friends in person. We sipped lattes and chatted about fabric design and quilting. Both of us geeked out a bit, and nobody was bored or thought the other was odd!

Caitlin shared with me her current exploration of whole cloth quilts and then asked if I would be interested in designing a quilt for her. Of course, I said yes! And here is the result many months later. To read more about the design process and to check out the other curated whole cloth quilts in her series, head on over to the Salty Oat blog.

Backed in Carolyn Friedlander goodness and machine-bound to perfection, this modern gender-neutral baby quilt is the perfect gift for those modern expecting parents in your life.

Find it in her shop!

Say "Hello" to the Quilter's Planner

Say Hello to the answer to creative and real-life scheduling disasters. Sometimes it feels like I have to carry around a book of lists to keep track of my projects, a sketchbook for spur of the moment inspiration, and a planner for the rest of my life, but Stephanie of LateNightQuilter has solved just that problem with the Quilter Planner.

I have had the honor to work with Stephanie on this project, consulting and creating the logo as well as artwork to be interspersed throughout the planner. Her hard work and thoughtful considerations shine through in the gorgeous final product she has produced.

What's Inside:

  • Monthly calendars

  • Weekly calendars

  • Project planning pages

  • Swatch saver

  • Graph paper

  • Free motion quilting practice pages

  • Goal-setting prompts

  • 8 full quilt patterns from amazing designers (Cheryl Brickey (Meadowmist Designs), Yvonne Fuchs (Quilting Jetgirl), Amy Garro (13 Spools), Lee Heinrich (Freshly Pieced), Mandy Leins (Mandalei Quilts), Pat Sloan (Pat Sloan), Kitty Wilkin (Night Quilter) and Stephanie).

  • 52 original quilt block designs from awesome quilt bloggers

  • Gorgeous artwork pull-outs by me!

  • Reference section for quilting calculations and common construction techniques

The planner is minimal in design with modern touches of color, allowing you to stamp, highlight, doodle, and hand-letter your life into perfect organization.

Plus, it has helpful references in the back for those things you are always googling!

How to Order:

By now, you're probably wondering how you can get your hands on this planner. Well, here's how! Just head on over to Indiegogo and put in your order.

Because sharing is caring and one of the best ways to get this project off the ground, Stephanie is offering prizes to those of you who share the project the most using the Indiegogo sharing options. And you have so many options! From embedding in a blog post to sharing on facebook and more.

Check out the new Quilter’s Planner website to read more about the Quilter Planner, the story behind it, and the project details! Or follow the link below to see the Indiegogo campaign!

A Personal Side Note and Apology:

My my, how blogging has been left by the wayside. Life and projects (such as the Quilter Planner!) however have soldiered on! I am sorry for this lapse, and I am committed and excited to get back to posting every week from now until Christmas. Work has been demanding a fair amount of writing from me lately, which tends to discourage me from doing it in my free-time or breaks (e.g. for blogging). The next couple months will likely be photo heavy and text light. Better a visual post than not one at all, though, right? Thanks for stopping by!

-Kelsey

Waist Stays and Weddings

Two weeks ago, I had the great fun of traveling up to Chicago to see one of my close friends get married! Her elegant and classic taste had me scrambling for the perfect dress to wear to the occasion. Good news: the dress was already in my closet. Bad news: it was strapless...and I can't keep up strapless dresses. I blame it on my long waist.

As the day approached, I found myself web searching for the best method of making a strapless stay put. I hear tape. I heard rubber glue. I heard (in my own head) the sigh of frustration as I hiked my taped and glued dress up for the umpteenth time. And then I heard waist stay and extended boning.

Don't get me wrong; I am a supporter of bandaids. But when it comes to an option that might suffice or one that will ultimately solve the problem, I vote problem solver! By extending the boning and adding a waist stay (a loop of ribbon that hooks around the narrowest part of your waist and is sewn to the bottom of the boning), I could allow the dress to sit on my waist, simultaneously eliminating slippage and taking strain off of the zipper. I followed Jenna's tutorial and voilà! The dress could withstanding jumping and dancing and raising of arms! Even raising my arms above my head while I jumped and danced!! Problem solved.

I did make three edits to the tutorial:

1. Minimize the Hand Sewing:

Instead of hand-sewing my hooks and eyes, I opted for a bra mending kit that provided me with two size options and no hand-sewing.

2. Flatten that boning.

Following Tasia's instruction on Sewaholic, I soaked my boning in boiling water for ten minutes to allow the plastic to relax from its curled state and then pressed the pieces under a book for another ten minutes to ensure flatness.

3. Keep the anti-slip from slipping.

Somehow the boning I purchased had "anti-slip" cords wrapped around the plastic boning. When I removed the boning from the fabric casing, I had trouble getting the cords to not slip and unravel. Worse, as I fed the boning into the channels of my gown, the cords would bunch up.  My simplest solution was to dab a little elmer's glue on the ends to hold it in place, and that worked like a charm.

It's that easy. (And bear in mind that I am not a clothes sewist.) If you have a structured dress you absolutely love that simply doesn't stay up, I would encourage you to try this! It took me one Saturday morning, and now I have a go-to favorite dress that I feel comfortable wearing to swish away the night. Absolute win.

Beginner Quilting Class Next Week

A short week from today, I will be teaching my first quilting class at the lovely gift shop and co-working space Gather downtown Cary, NC. If you have a yen to quilt but feel intimidated by the many steps, this is the class for you!

Dive into modern quilting, and join us for a fun evening of sewing. A beginner class, we will specifically explore flying geese—the building block of many a quilt pattern—as we piece a mini wall quilt or potholder from starting design to final binding stitch. This hands-on experience is sure to introduce you to every step of the quilting process and prepare you to embark on quilting adventures of your own.

If you're interested in signing up, register on the Gather website. I can't wait to meet you!

I've spent quite some time prepping for the class. From brainstorming project ideas to trying some out on my boyfriend to gauge class length time with a true beginner ;) it has been a blast. This past week was spent building a removable "Learn to Sew Flying Geese with No Waste" poster board that I'm pretty pumped about. I even consulted with my boyfriend's mother about what is the icing on the cake for a quilting class. The answer? Background music, snacks, and potentially some take home kits to practice again for yourself. I am a teensy bit nervous but mostly just unbelievably excited to get to share this skill with new quilter converts.

How many of you have taken a quilting or sewing class in person? What were parts that still remember today—the good and the bad? What is the icing on your porverbial quilting class cake?

Wiksten Tank and a Broken Pedal

It has been exactly fifty-one weeks, since I purchased this fabric and pattern from Sew to Speak on my roadtrip down to Raleigh, and it is finished at last! After whipping up a muslin to test the pattern about a month ago, I was pretty happy with the fit and pumped to do the real thing. With my boyfriend in town for a couple weeks, sewing progress slowed significantly, but I pulled him along to sewing night with me, and I knocked out the cutting, pockets, and French seams while he pieced three blocks for a charity quilt. That's my man :) 

Poised to stitch in the bias tape binding, I realized just how much my machine needs a little TLC. The foot has been going out for awhile, but it had reached the point where there was no slow and no medium speed. Just FAST. Imagine: push your foot down no motion, push your foot down no motion, just a little further no motion, then WHOOSH, OFF WE GO. The delicate striped fabric couldn't really handle such yanks, so I decided last Friday that it was finally time to bring the old Bernina into the shop.

The friendly man informed me that it might not be my foot but my machine, and that I would have to leave the whole kit and kaboodle there. I was heartbroken.

Well, heartbroken might be a slight exaggeration, but when he told me I needed to leave my machine and not just the foot (I have another foot, so I assumed I'd be able to keep sewing even with the one foot in the shop), my distressed response was emotive enough to turn heads in the shop. He wheeled my Bernina into the back room, and when I asked for the fourth or fifth time, if I had to leave the machine as well as the foot, he asked me why I didn't want to leave it. Simple, right? I wanted to sew that weekend!

Lights dancing in his eyes, he chuckled a little and said that I could simply borrow a machine from the shop. Free of charge. !!! He sent me home with a Bernina 350, the new new improved version of my machine! Trading up for the weekend. It was like butter sewing the bias tape binding. I followed Grainline Studio's tutorial for getting flat bias tape necklines, and of course forgot a step on the neckline that I remembered for the arm holes, but I don't care. It is finished.

All stories aside, I think it's important to remember, that no matter how polished someone's blog looks, everyone forgets steps, messes up, procrastinates fixing things, accidentally draws stares in the fabric store, and gets a bit of a grainy photo here and there. You're in good company.

Wiksten Muslin amidst Summer Adventures

My my, it's been much too long since I've been here. Life can get away from you like that sometimes, can't it? Well, I haven't been busy sewing, but since the summer quilting break was for enjoying life, I think I can consider it a successful July. 

I finished the muslin for my Wiksten tank with Olivia Pope and company battling away beside me. Our government may be a little more corrupt than I gave it credit for, but the tank fits better than I expected! (If you don't know what I'm talking about, check out the TV show Scandal. And yes, I know it's fiction, but it does make you lose a little faith in humanity and the President.) The Wiksten is pleasantly long and has a good neckline and strap width. I only thought it needed two alterations:

1. I took it in about a half inch at the natural waist on both sides.

2. I look forward to a more draped fit with the double gauze.

3. Okay, it might need to be taken in slightly at the back of the neck, but the double gauze could solve that as well.

I've already started sewing it up with the real fabric, and holy cow. Sewing with good quality fabric is dreamy. I have informed my boyfriend that we will be stopping at Sew to Speak on our roadtrip through Ohio to see if they have more lovely light-weight cottons to stitch up. I can't promise that I will be back here sooner than this last gap, but I will have a finished Wiksten Tank and some sand in between my toes. Back soon!

Lotta Napkins and Yogurt Pops

Every time I go into Joann for velcro or canvases or cheap fabric for pattern testing, I'm drawn to the Lotta Jansdotter and Cloud 9 fabrics there. Problem is: these days I just don't really sew with prints, and if I do, they're my own designs. This has been an unimaginably good way to stop me from buying fabric.

That said, I've also been wanting cloth napkins for quite some time. Bonnie teaches cloth napkins to the new sewists in our Wednesday night sewing group, and I've been itching to try. Up until now, quilting projects abounded, but what better time than a quilting hiatus to whip some up. And what better time to buy some Lotta fabric than with a 60% off coupon and a very specific project! Hello, no better time than the present, is what I'm sayin.'

I waited in the dreadful cutting table line (are all Joann's somewhat poorly managed?) and waited some more in that since-you-have-to-stand-here-look-at-some-crappy-things-that-only-cost-a-dollar line and at last, the Lotta was mine. Two hours of pressing seam allowances, marking out mitered corners, greek yogurt pops, and way to much chatting and giggling to make quick headway later (don't you love the good problems to have), here I have them: four cloth napkins!

And where better to sneak pictures than the cute old Ford truck bed parked outside my apartment?

Gosh I love projects that you can finish in one sitting.

Stone + Bloom : New Mini Quilt Collection

The new quilt collection is finally in the shop! These mini quilts are the perfect gift in all their crisp geometric organic goodness. Each quilt has been hand-printed with a bold and crisp design before being carefully free-motion and straight-line quilted. The quilt is bound with mitered facing and affixed to a 10"x10" stretched canvas with velcro. The canvas allows for simple hanging as well as a flattering shadow to highlight the piece. A shadow box can also be used to give the quilt added emphasis and dimension. Although the shadow box does not come with the quilt, it can be easily purchased from IKEA or your local frame shop.

These quilts are the perfect size to grace an office or a small wall in the home or at work. They make lovely gifts for that special teacher at the end of the year or to show a family member or friend how much they mean to you. From Mother's Day to weddings to house warming gifts, this modern and handmade treasure will brighten any room and express your love and appreciation.

What do you think? Where would you put it? Who would you give one to?

Find them in the shop here.

framed modern red printed quilt, crisp and gorgeous | by Lovely and Enough
modern red printed quilt with free motion and straight line quilting, crisp and gorgeous | by Lovely and Enough
modern mint printed ohio star quilt: crisp, subtle, and gorgeous | by Lovely and Enough
modern mint printed quilt with free motion and straight line quilting: crisp, subtle, and gorgeous | by Lovely and Enough
modern evergreen printed ohio star quilt: crisp and gorgeous | by Lovely and Enough
modern evergreen printed ohio star quilt with trellis and free motion quilting: crisp and gorgeous | by Lovely and Enough
modern cornflower printed ohio star quilt : crisp and gorgeous | by Lovely and Enough
modern cornflower printed ohio star quilt with straight line and free motion quilting : crisp and gorgeous | by Lovely and Enough

Follow the process here; from the first idea to the piecing to the printing.

I am linking up to TGIFF (Thank Goodness It's Finished Friday).

Wiksten Begins

preparations for beginning the wiksten tank with grey double gauze | Lovely and Enough

As the first project to kick off my quilting recess, I'm finally going to start the Wiksten Tank! I picked up the pattern from the lovely little shop Sew to Speak in Ohio on my roadtrip down to North Carolina last August along with some lovely double gauze. Unfortunately quilting has been stopping me from starting. No longer!

I can't wait to begin, and I imagine I might be wearing the top quite a bit with this hot summer we're having! Any tips for a sewist who hasn't tackled clothes in quite some time?

the popular wiksten tank pattern | Lovely and Enough
lovely neutral double gauze for a sewing project | Lovely and Enough
the popular wiksten tank pattern | Lovely and Enough

Art Prints: Chemistry + Flamingos

Last summer I was messing around with my flamingo screen from my very first screen-printed fabric design, and I ended up with some art prints. I took one with me and left three more at home, and when I came home for Christmas, one was framed in my room, one was hung in my sister's room, and one was pinned up in the studio!

That's when I started brainstorming. What if I exercised some of my pattern designing muscles toward art prints? I'm about halfway to a striking bison print that I'm pretty chuffed about, but I'm only halfway because... (well, honestly bc just like the rest of you, the lure of a new project tends to beat finishing an old one, but who's counting)...

I started working on a chemistry art print! In fact, I was in the middle of showing my grad school friends the bison and explaining what "vectorizing" means when I showed them some periodic element icons from an old project. Their faces lit up, and they exclaimed to me how they would love to see a chemistry poster. Then a couple weeks later with the preliminary design in hand, they called for t-shirts as well! So here it is.

The poster is a collection of thirty comic depictions of elements, and it is a fun puzzle for all. When brought to seminar, peers and professors alike crowded around to puzzle out the element that each icon represented, giggling at the sneaky ones and indignantly flustered with the obscure.

So, if you've been looking for a minimalist conversation starter for your office; a nerdy yet classy t-shirt to hang out in this summer; an engaging puzzle for the children in your classroom; or a gift for your Dad, brother, granddaughter, or friend, then look no further. Well-designed and mentally engaging, these prints and tees will make a smart and graphic statement on you and on your wall. I'm running a Kickstarter campaign for the month of June as a simple way to collect orders and gauge interest, so...

Check out the campaign. Watch the video. And if you know someone who might find it fun, pass it along!

I know this it outside the scope of my typical quilting and fabric design, but I guess my nerd is just showing. How could I not share my biggest most recent project with you all? Thanks for sticking it out to the end!! I promise there will be more sewing this weekend. Pinky promise.

PS I have since reprinted the flamingos art print, and I have about five more. Would there be any interest in having those up in my shop?

Hopewell Inspired Diagonal Quilt

I had a pretty horrible morning at work today, incredibly frustrating and not productive at all. Luckily, I'd already bribed myself into working on Saturday by packing my camera and a quilt that I've been meaning to photograph for many months now in the car this morning. When an appropriate lunch break hit, I set an experiment in motion and then scampered through the gorgeous 92º weather over to the even more beautiful Hunt library.

modern light blue, citron, and grey quilt | by Lovely and Enough

My mom and I collaborated on this quilt last summer. It was inspired by the Hopewell Workshop East-West quilts . All of their quilts were so gorgeous and contemporary in their simplicity, and this design does not fail to please.

It is a fantastically simple quilt to make, and taking photos of it has got me thinking about new color schemes and versions. Plus, you get two quilts in one go! Striking and modern, the quilt doesn't require any complicated piecing. In fact, it may just be the perfect way to whip up two charity quilts in one fell swoop. You can see my mom's half of the quilt over on her blog Fibermusing.

striking modern navy, citron, and grey quilt | by Lovely and Enough

Yes, as the quilt label says, I did actually finish this quilt in late 2014. I cannot believe how long it took me to photograph it. Initially, I kept waiting for family to be in town, so that I could have someone hold it up. Then I saw Yvonne's post about how she hangs her quilts for photos (even large ones), and I realized that I could do it by myself.

striking modern navy, citron, and grey quilt | by Lovely and Enough

I hope this inspires you to pull together a fast quilt for charity this summer. It is a great way to make use of fabrics you're not in love with anymore to clear space for new exciting ones! I guess today wasn't such a bummer of a day after all. Happy summer Saturday.

striking modern navy, citron, and grey quilt | by Lovely and Enough
a simple yet elegant and striking modern quilt that's a cinch to whip up, inspired by Hopewell Workshop | Lovely and Enough

Podcast Guest Next Week!

Hello all, I am so excited to tell you that I will be a guest on a podcast next week!

Not just any podcast but Pat Sloan's American Patchwork and Quilting podcast. Pat approached me a couple months ago about being interviewed on the show, and I was beyond excited. We chatted a little bit over email about topics and dates, and then life started again. I almost forgot about it in fact. Suddenly, it is June, and big day is finally here!

Next Monday, June 15th at 4:00 PM EST, Pat and I will chat live about my quilting and fabric design among other things. I am a tad nervous, it being live and everything, but the excitement outweighs the nerves.

I hope you will tune in and listen or download the podcast later for your listening pleasure to hear a little bit more about the creative adventure I am on and what has led me to where I am!

Follow this link to the podcast.