Modern Quilted Pot Holder

DIY modern quilted pot holder | Lovely and Enough

I'm usually a complete supporter of purchasing from the wedding registry. Get the happy couple what they want not what you want, for crying out loud. But after buying from the registry for a shower, I decided to go handmade for the ceremony, and I am so happy I did.

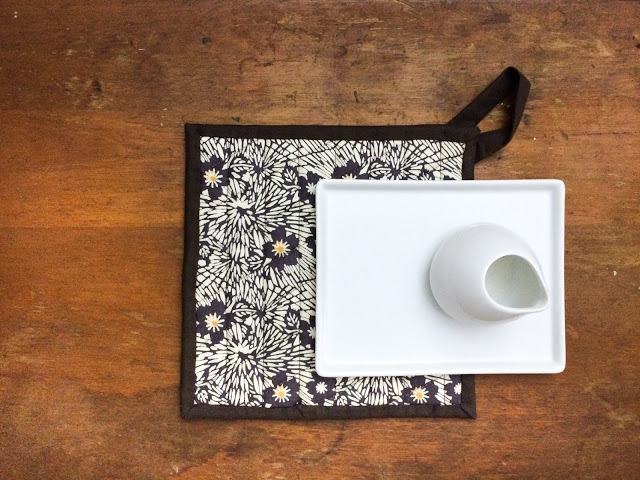
For over a year, I've been wanting to try out Purl Soho's Liberty Hot Pad tutorial, and this felt like the perfect opportunity. Plus, I am sewing my stash this year! (The goal is to go from nine boxes to six in 2016. Big dreams.) The tutorial calls for pretty colored twill tape of which Joann does not really carry, so I opted for my own binding. (Plus, I have not mastered the machine-sewn beautiful-on-both-sides binding as of yet. I end up with a wobbly uneven mess. C'est la vie.) I made a little bit of extra binding and sewed it closed and then insided it out for a loop that got stitched right into the binding.

modern fabric pull with stripes and florals | Lovely and Enough
modern quilted triangles | Lovely and Enough

I just love the triangular pockets on the back of the one. Such fun.

And

 I'm a sucker for stripes and florals. You begin to understand why I could not say no to this project!

DIY modern quilted pot holder | Lovely and Enough

The pattern calls for straight-line quilting and then quilting at 30º. Now this is a tad ambiguous, so I ended up with one potholder that is 30º and one that is 60º depending where you measure from. Oh well, both look good. And most importantly, the happy now married couple were thrilled with their handmade gift. Day made.

DIY modern quilted pot holder | Lovely and Enough

DIY Professional Quilt Labels

If you've been wanting to make professional quilt labels from the comfort of your home, this is for you. In a matter of an hour, you will have color-fast printed labels to stitch onto backings or into bindings! My favorite part about this version is that I don't have to rely on my hand-writing; I can design my labels with real fonts, which lends a crisp and professional look to the labels.

Supplies:

  • freezer paper

  • fabric

  • computer + inkjet printer with black ink

  • rotary cutter + cutting board

Step One: Design and Test Print

Design your labels and test print them on a piece of printer paper. Test printing is a good idea so that you catch mistakes before it is on your fabric! The design must be in black for it to be wash-fast.

You have options here: I like to fold my labels in half and sew them into the binding, so I leave a large portion blank below each label for the back. I also like to print cut lines, so that is is easy to trim the labels to the correct size. You can also print something on this side if you want! Or you can print labels that will remain flat and are stitched onto the backing. The sky is the limit.

Step Two: Cut

Cut freezer paper to 8.5" x 11"

Step Three: Iron

Iron your freezer paper to the back of the fabric you would like to print your labels onto. Give yourself a small margin of fabric around the edge of the paper. You want a warm dry iron (around the wool setting).

Step Four: Trim

Trim the fabric to the edge of the freezer paper. If you iron on the freezer paper before trimming, it minimizes fraying of the fabric which could jam up your printer.

Step Five: Print!

Run your freezer-paper-fabric combo through you inkjet printer just like a normal sheet of paper. Make sure you are printing on the fabric side!

Step Six: Peel and Heat-set

Peel the freezer paper off the back of your fabric and heat-set the black ink for washfastness. Simply press with a hot dry iron for ~30 seconds.

Step Seven: Cut

Cut out your labels!

Step Eight: Fold

(optional)

This step is optional depending on whether you are folding your labels or not, but I press mine in half.

Step Nine: Fray Check

Fray check the edge of your labels to avoid nasty fringes and fraying through the lifetime of the label.

And voila! You have made professional quilt labels from the comfort of your home for a fraction of the cost of ordering them from a company!

NOTE: DO NOT DO THIS WITH A LASER PRINTER.

THE FREEZER PAPER WILL MELT AND RUIN YOUR PRINTER.

DIY Quilt Labels | Make Your Own Professional Labels with Just a Printer and Freezer Paper

Special thanks to my mom who took all the photos for me and has made me my quilt labels the past two years. She is truly amazing.