
If you've been wanting to make professional quilt labels from the comfort of your home, this is for you. In a matter of an hour, you will have color-fast printed labels to stitch onto backings or into bindings! My favorite part about this version is that I don't have to rely on my hand-writing; I can design my labels with real fonts, which lends a crisp and professional look to the labels.

Supplies:
freezer paper
fabric
computer + inkjet printer with black ink
rotary cutter + cutting board
Step One: Design and Test Print
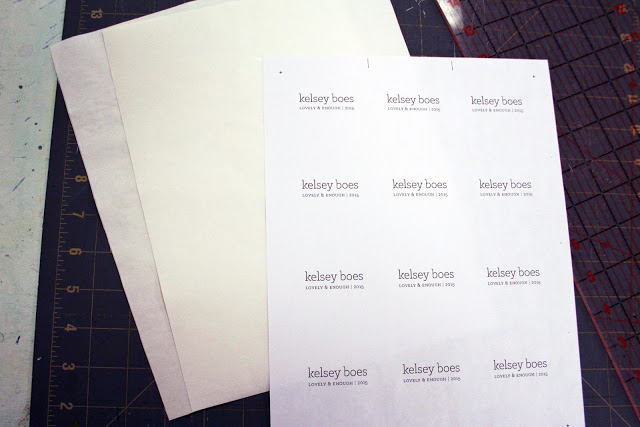
Design your labels and test print them on a piece of printer paper. Test printing is a good idea so that you catch mistakes before it is on your fabric! The design must be in black for it to be wash-fast.
You have options here: I like to fold my labels in half and sew them into the binding, so I leave a large portion blank below each label for the back. I also like to print cut lines, so that is is easy to trim the labels to the correct size. You can also print something on this side if you want! Or you can print labels that will remain flat and are stitched onto the backing. The sky is the limit.
Step Two: Cut
Cut freezer paper to 8.5" x 11"

Step Three: Iron
Iron your freezer paper to the back of the fabric you would like to print your labels onto. Give yourself a small margin of fabric around the edge of the paper. You want a warm dry iron (around the wool setting).

Step Four: Trim
Trim the fabric to the edge of the freezer paper. If you iron on the freezer paper before trimming, it minimizes fraying of the fabric which could jam up your printer.

Step Five: Print!
Run your freezer-paper-fabric combo through you inkjet printer just like a normal sheet of paper. Make sure you are printing on the fabric side!

Step Six: Peel and Heat-set
Peel the freezer paper off the back of your fabric and heat-set the black ink for washfastness. Simply press with a hot dry iron for ~30 seconds.

Step Seven: Cut
Cut out your labels!


Step Eight: Fold
(optional)
This step is optional depending on whether you are folding your labels or not, but I press mine in half.

Step Nine: Fray Check
Fray check the edge of your labels to avoid nasty fringes and fraying through the lifetime of the label.

And voila! You have made professional quilt labels from the comfort of your home for a fraction of the cost of ordering them from a company!
NOTE: DO NOT DO THIS WITH A LASER PRINTER.
THE FREEZER PAPER WILL MELT AND RUIN YOUR PRINTER.

Special thanks to my mom who took all the photos for me and has made me my quilt labels the past two years. She is truly amazing.