Lenten Twelves 2021 : Gilded Edges

Sometimes I can’t decide which I like more: the thrill and excitement of an experiment or the confidence of a sure thing. Experiments are full of possibilities, potential breakthroughs, innovative ideas. They also come with nervousness, the chance of failure, and many pauses for consideration. Tried and true methods, on the other hand, can be carried out with speed and confidence. Also, lest we forget, tried and true methods are not always boring or lacking in innovation; sometimes they are the successes born of experiments that have been perfected into common practice.

IMG_8034.jpg

Experiment : Gold Screen Printing

This week I picked up gold screen printing ink (experiment #1).

I have never printed with metallic before, but I have sketched and imagined the possibilities since visiting Prague and being inspired by the minimal gold accents adorning their many stone sculptures. A gold zucchetto graces a sandstone cleric blackened by pollution. A gilded halo floats above a blackened angel on the famous Charles Bridge. Saint Elizabeth wields a golden scepter over the tourists and locals.

Unfortunately, my local art shop was out of the small jars of gold textile screen printing ink. Not wanting to wait, I opted to dive in to this experiment with acrylic ink (experiment #2). The ink was silky smooth to print with (although I can’t be sure the texture difference between the acrylic gold ink and my textile ink isn’t age-related rather than substrate-related).

IMG_8079.jpg

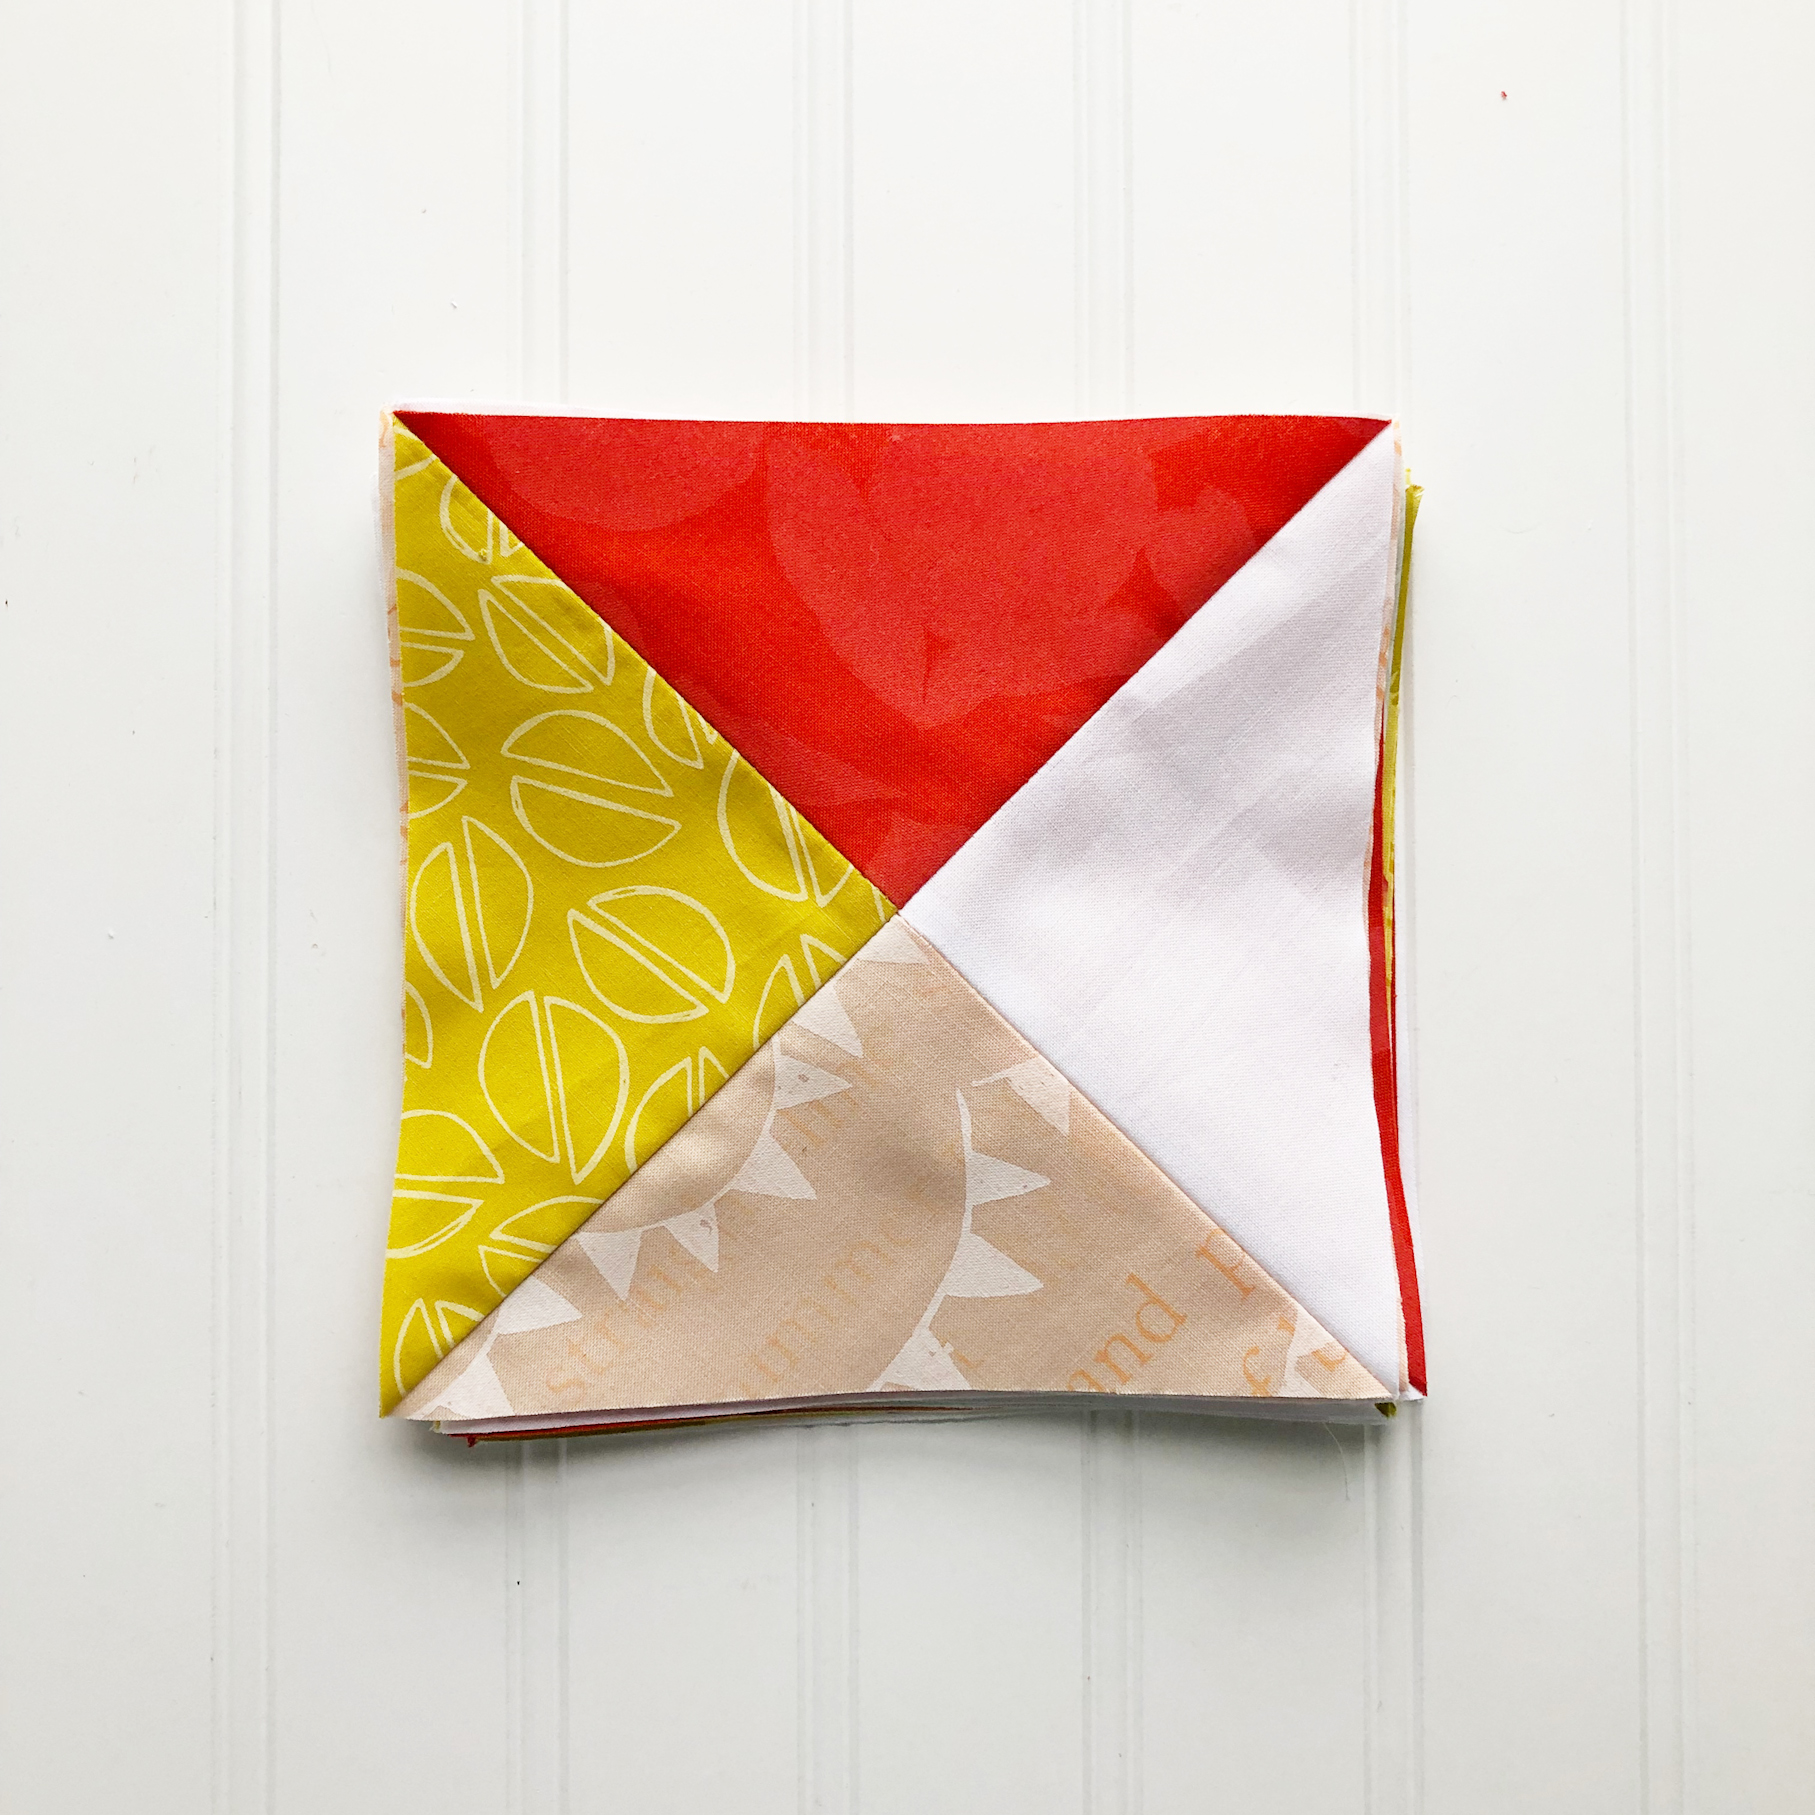
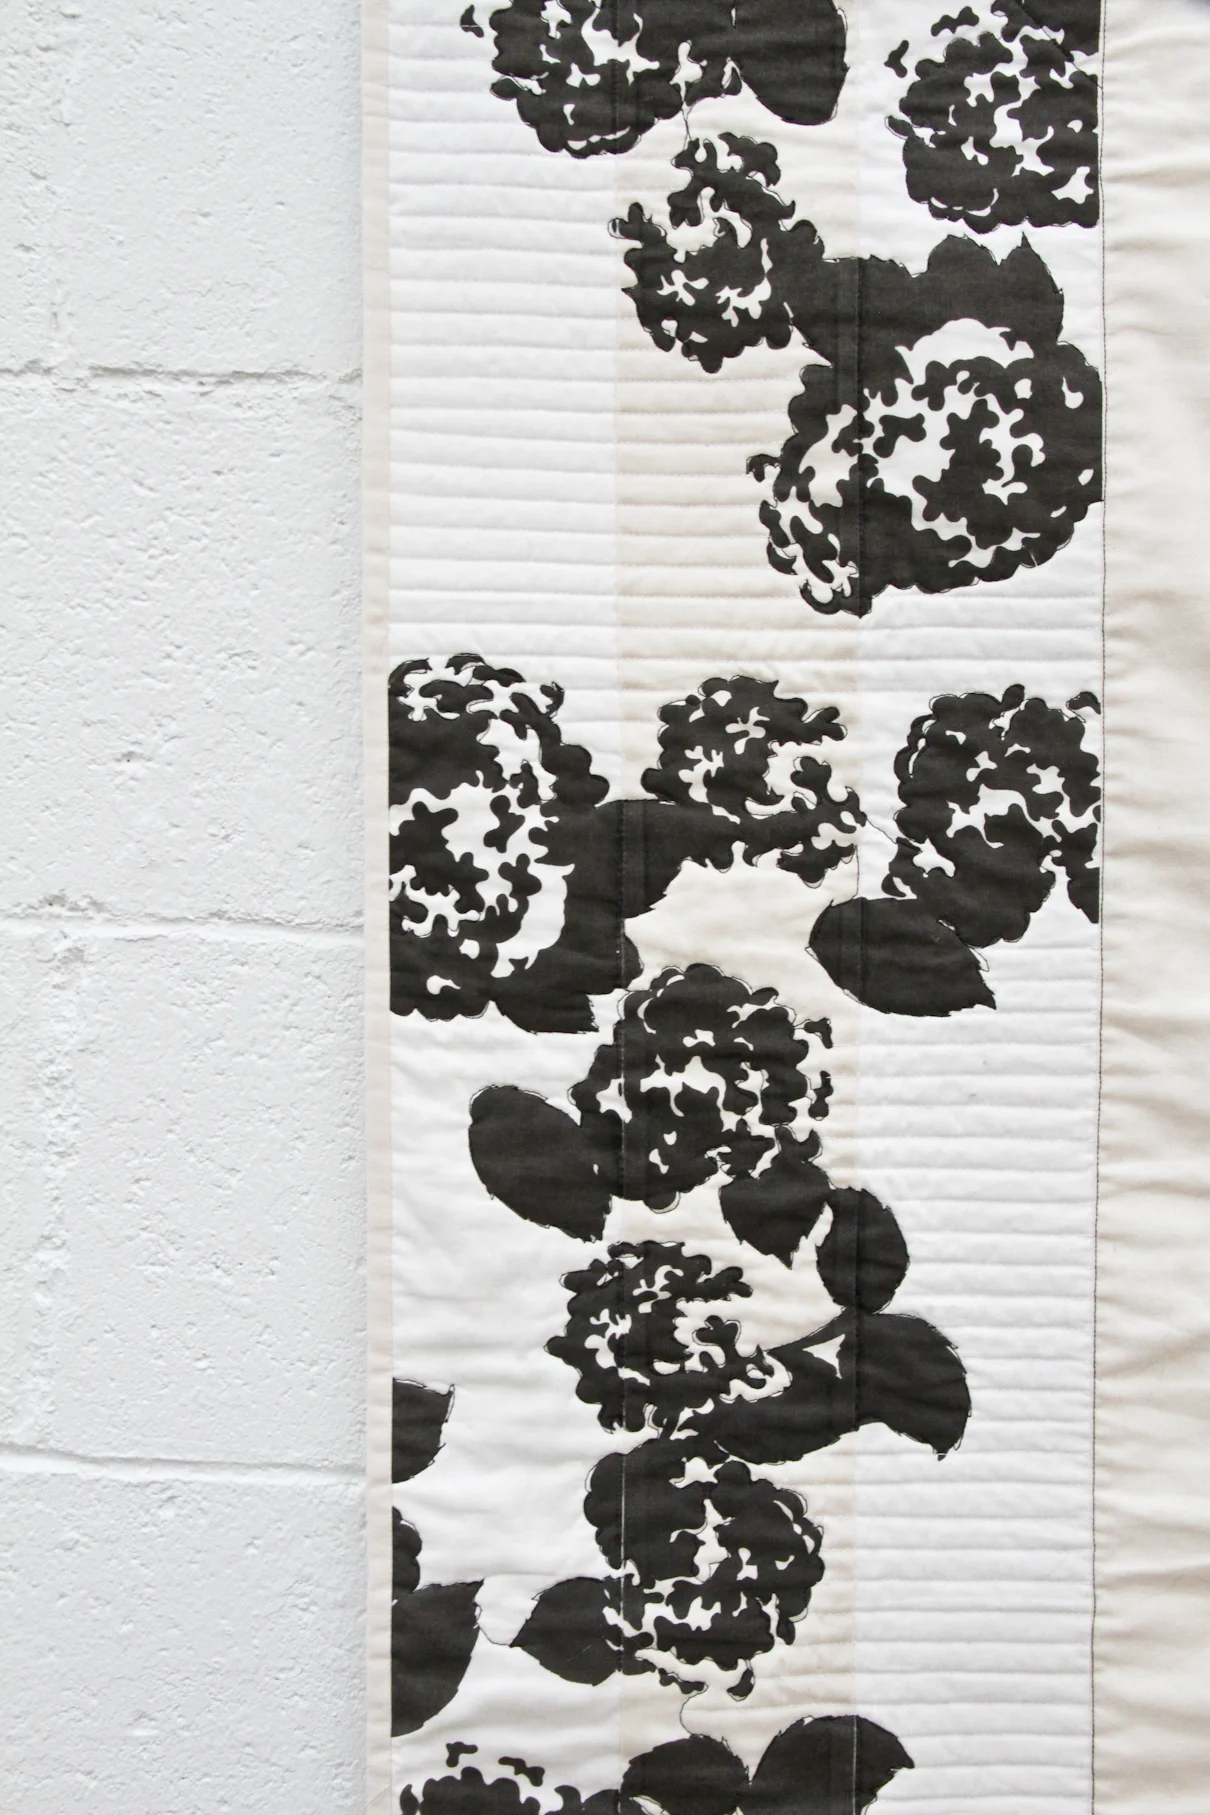
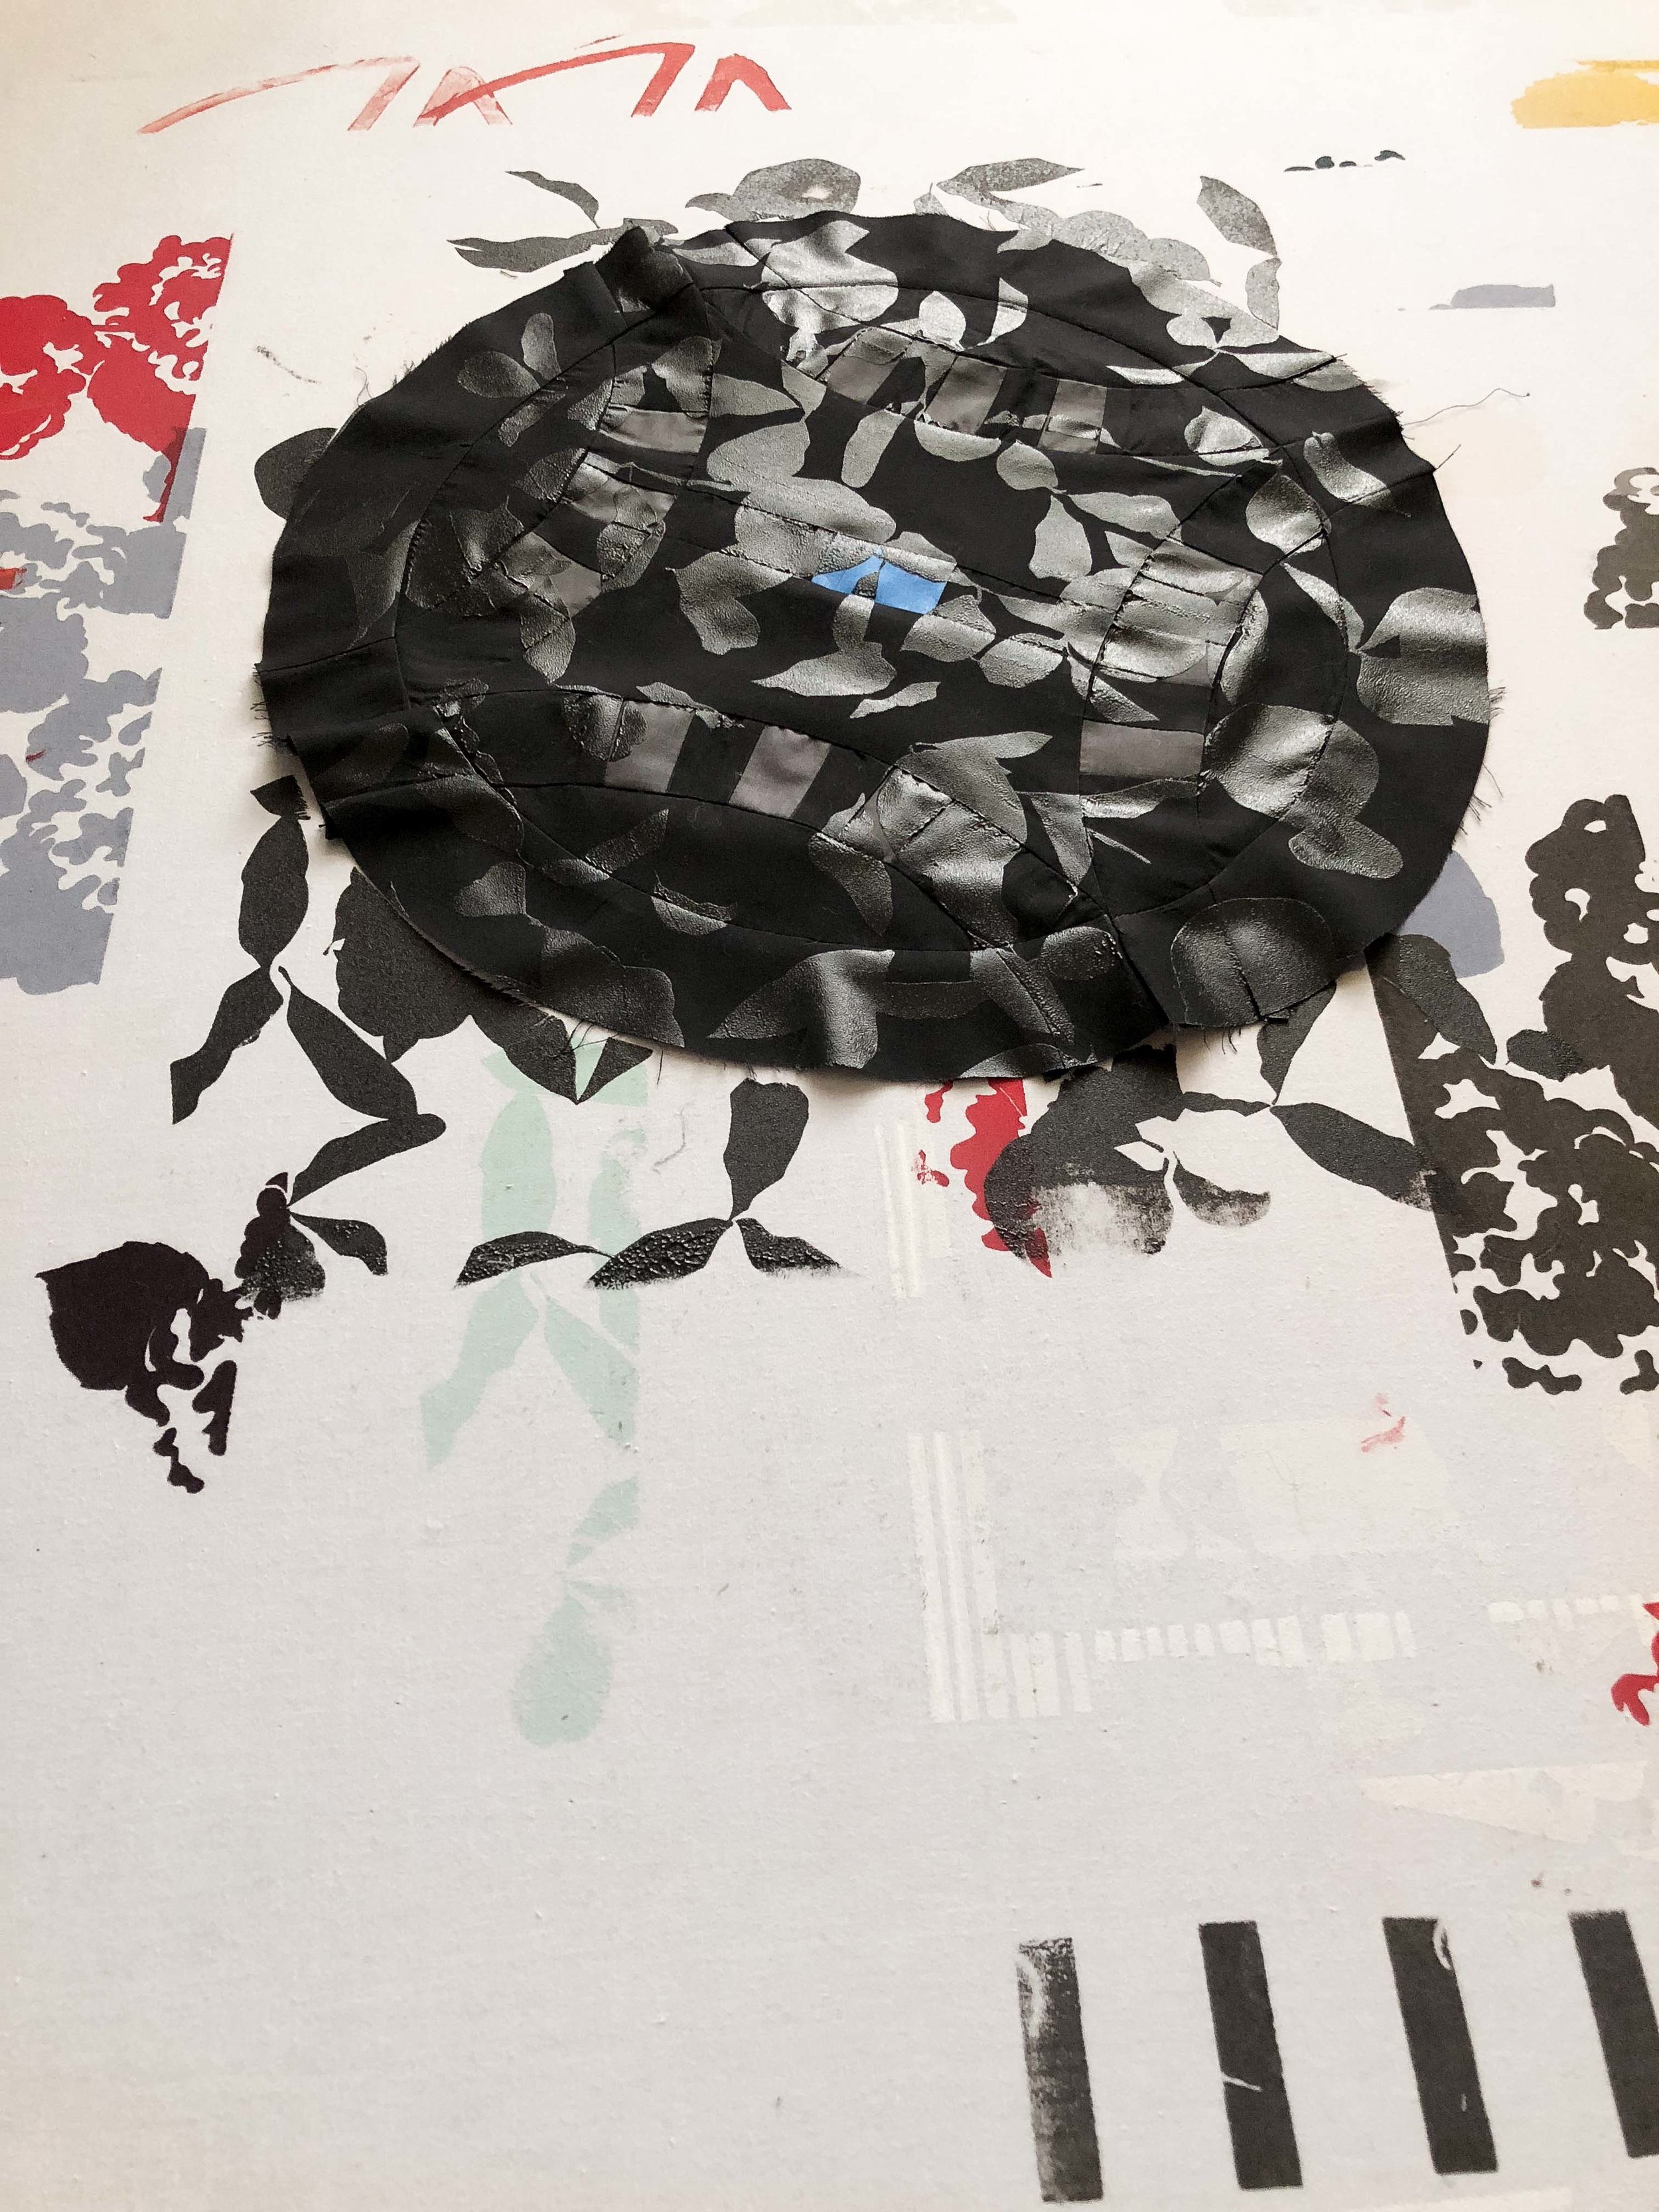
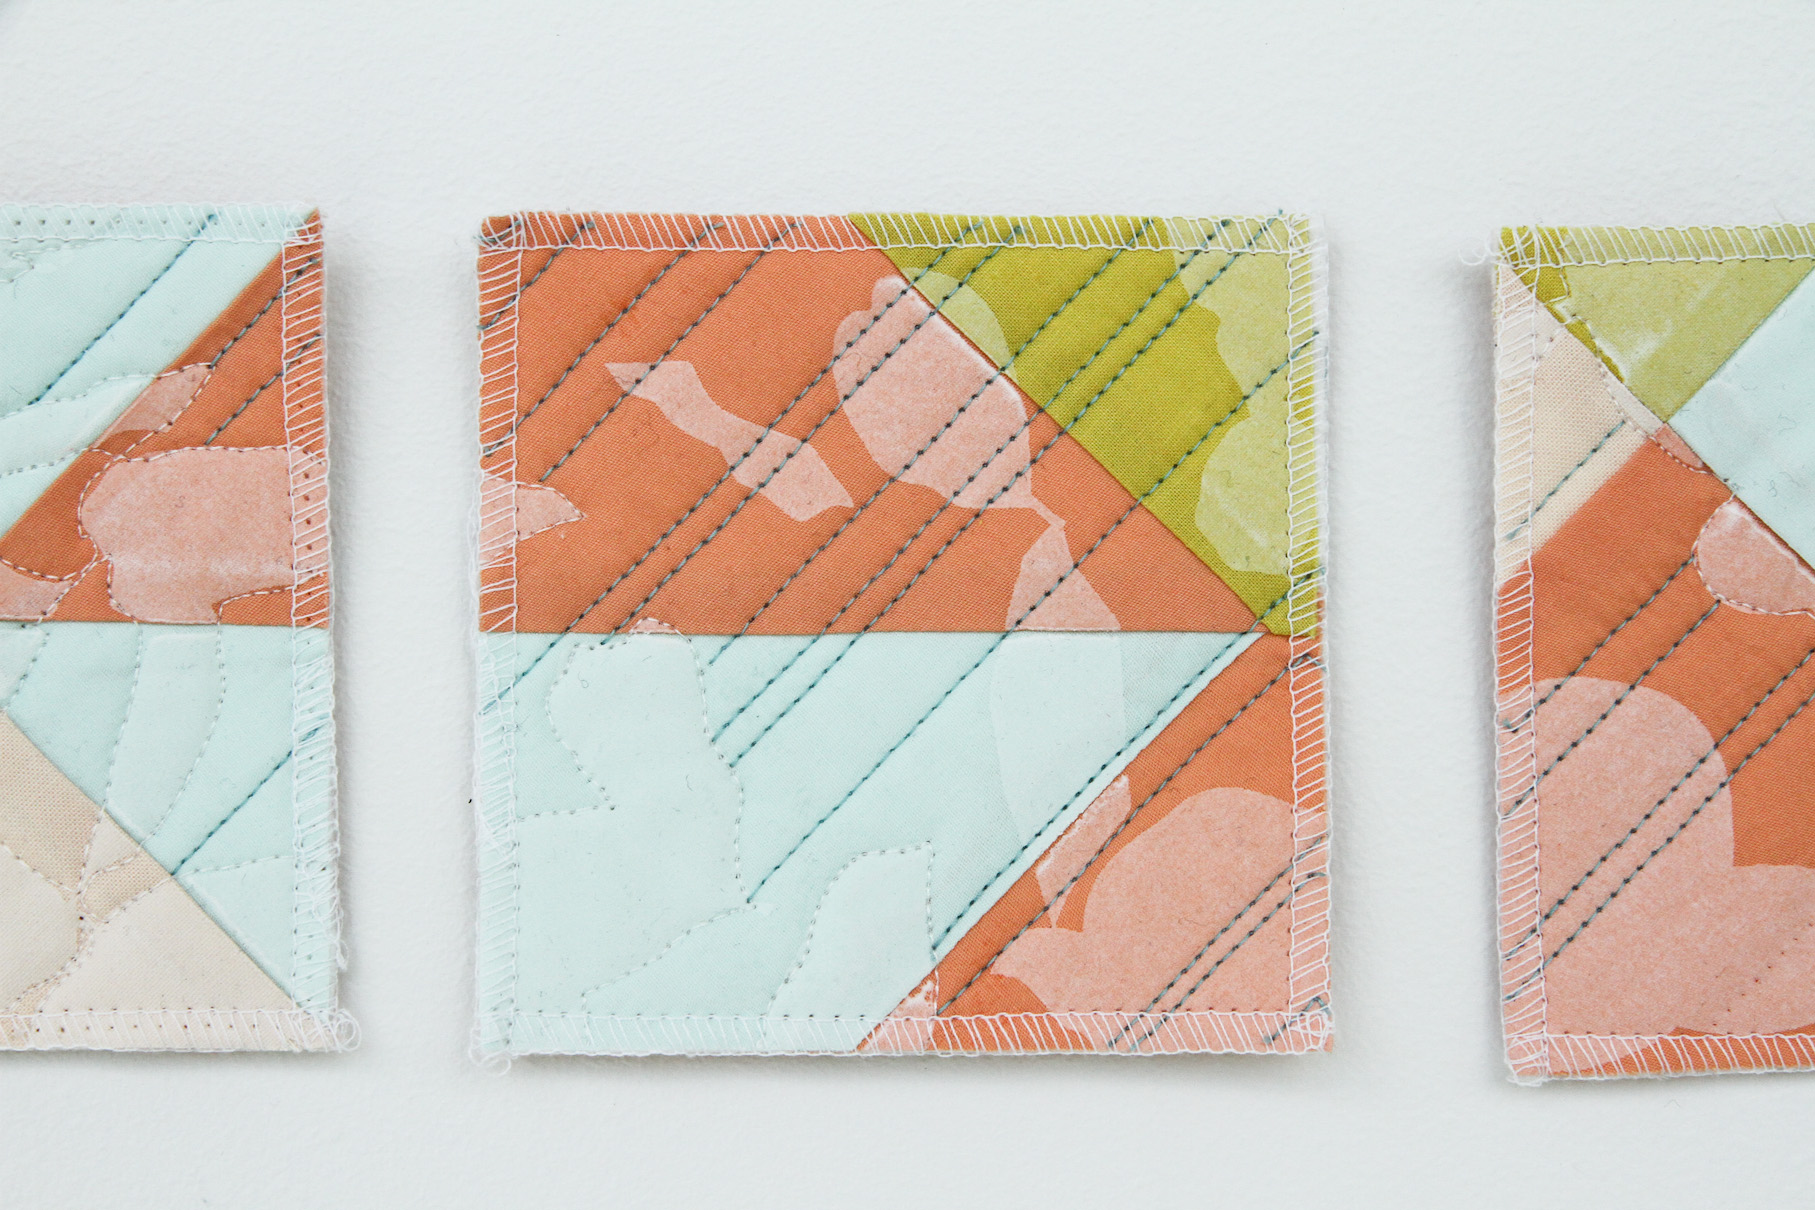
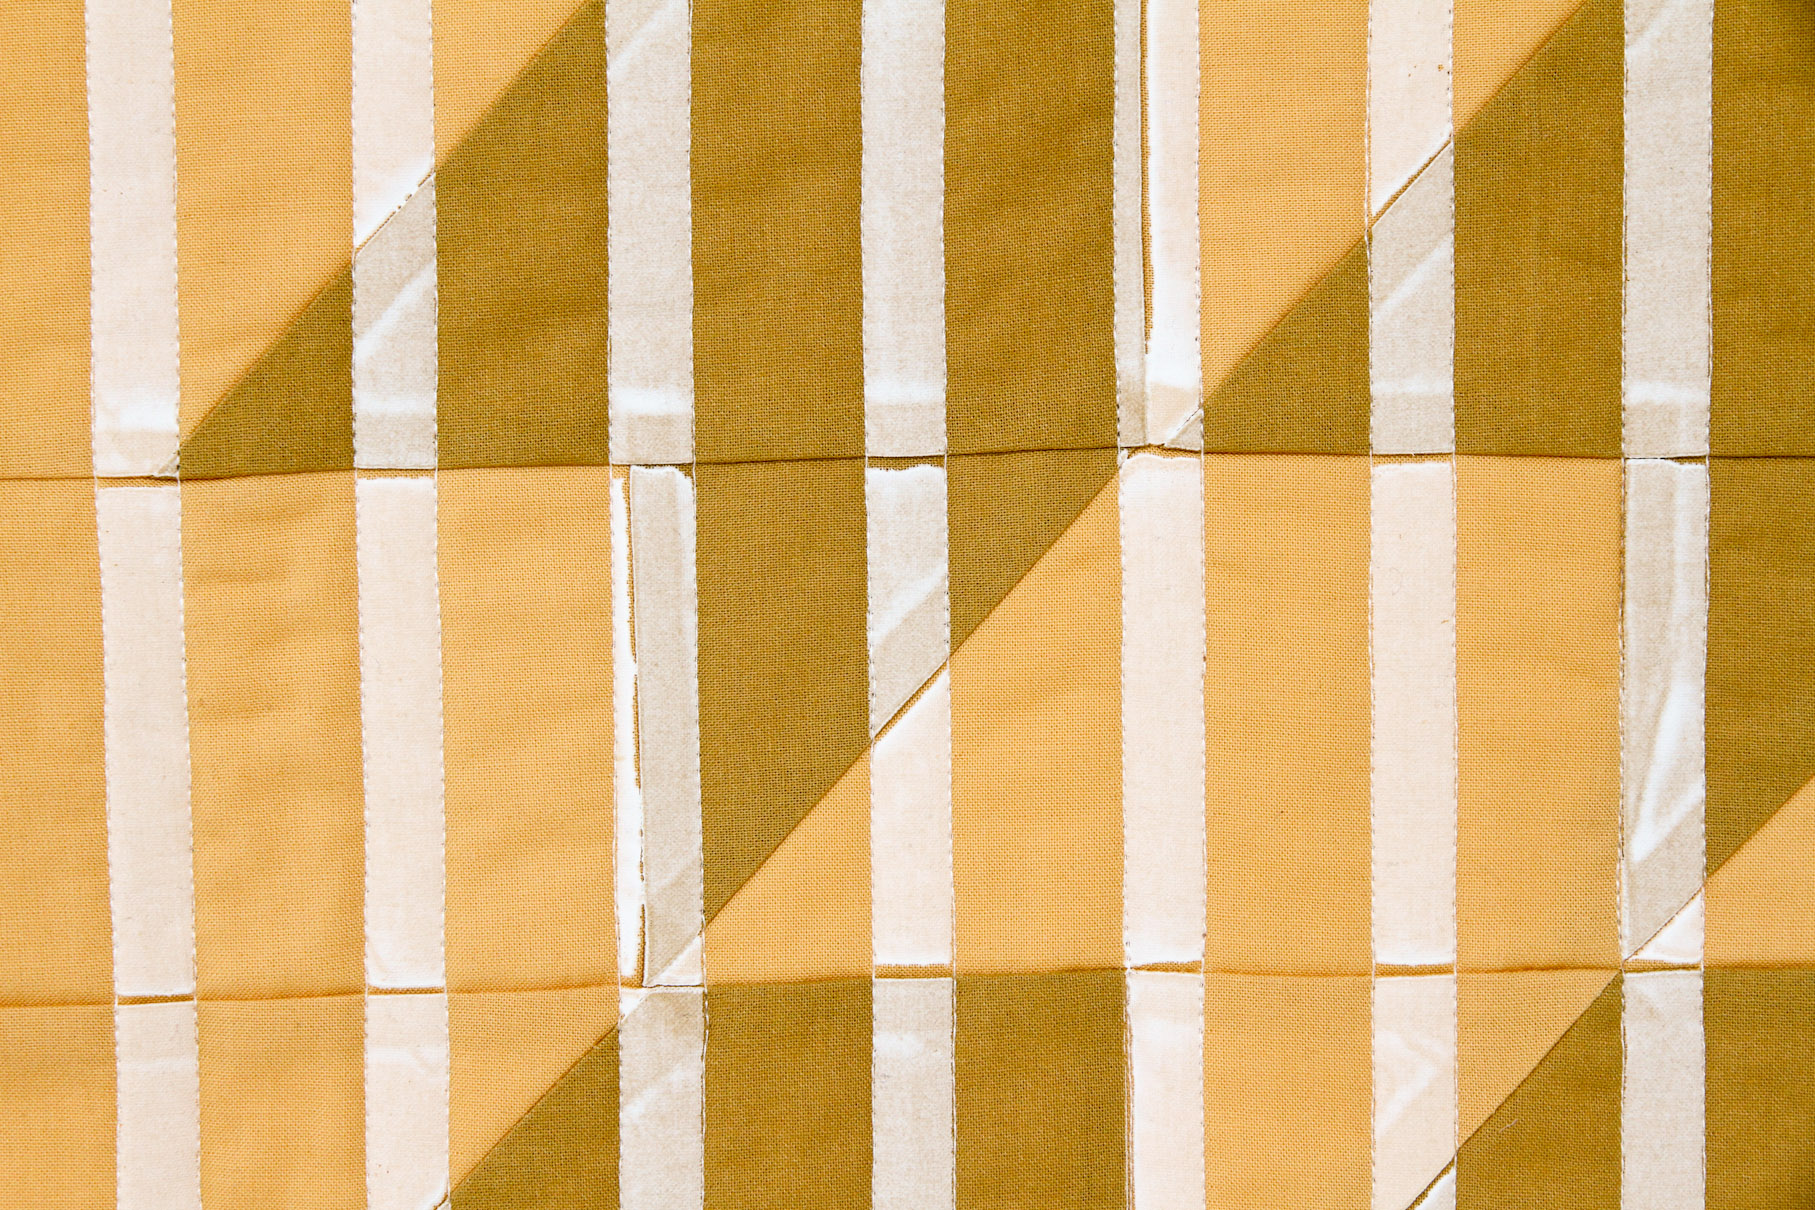
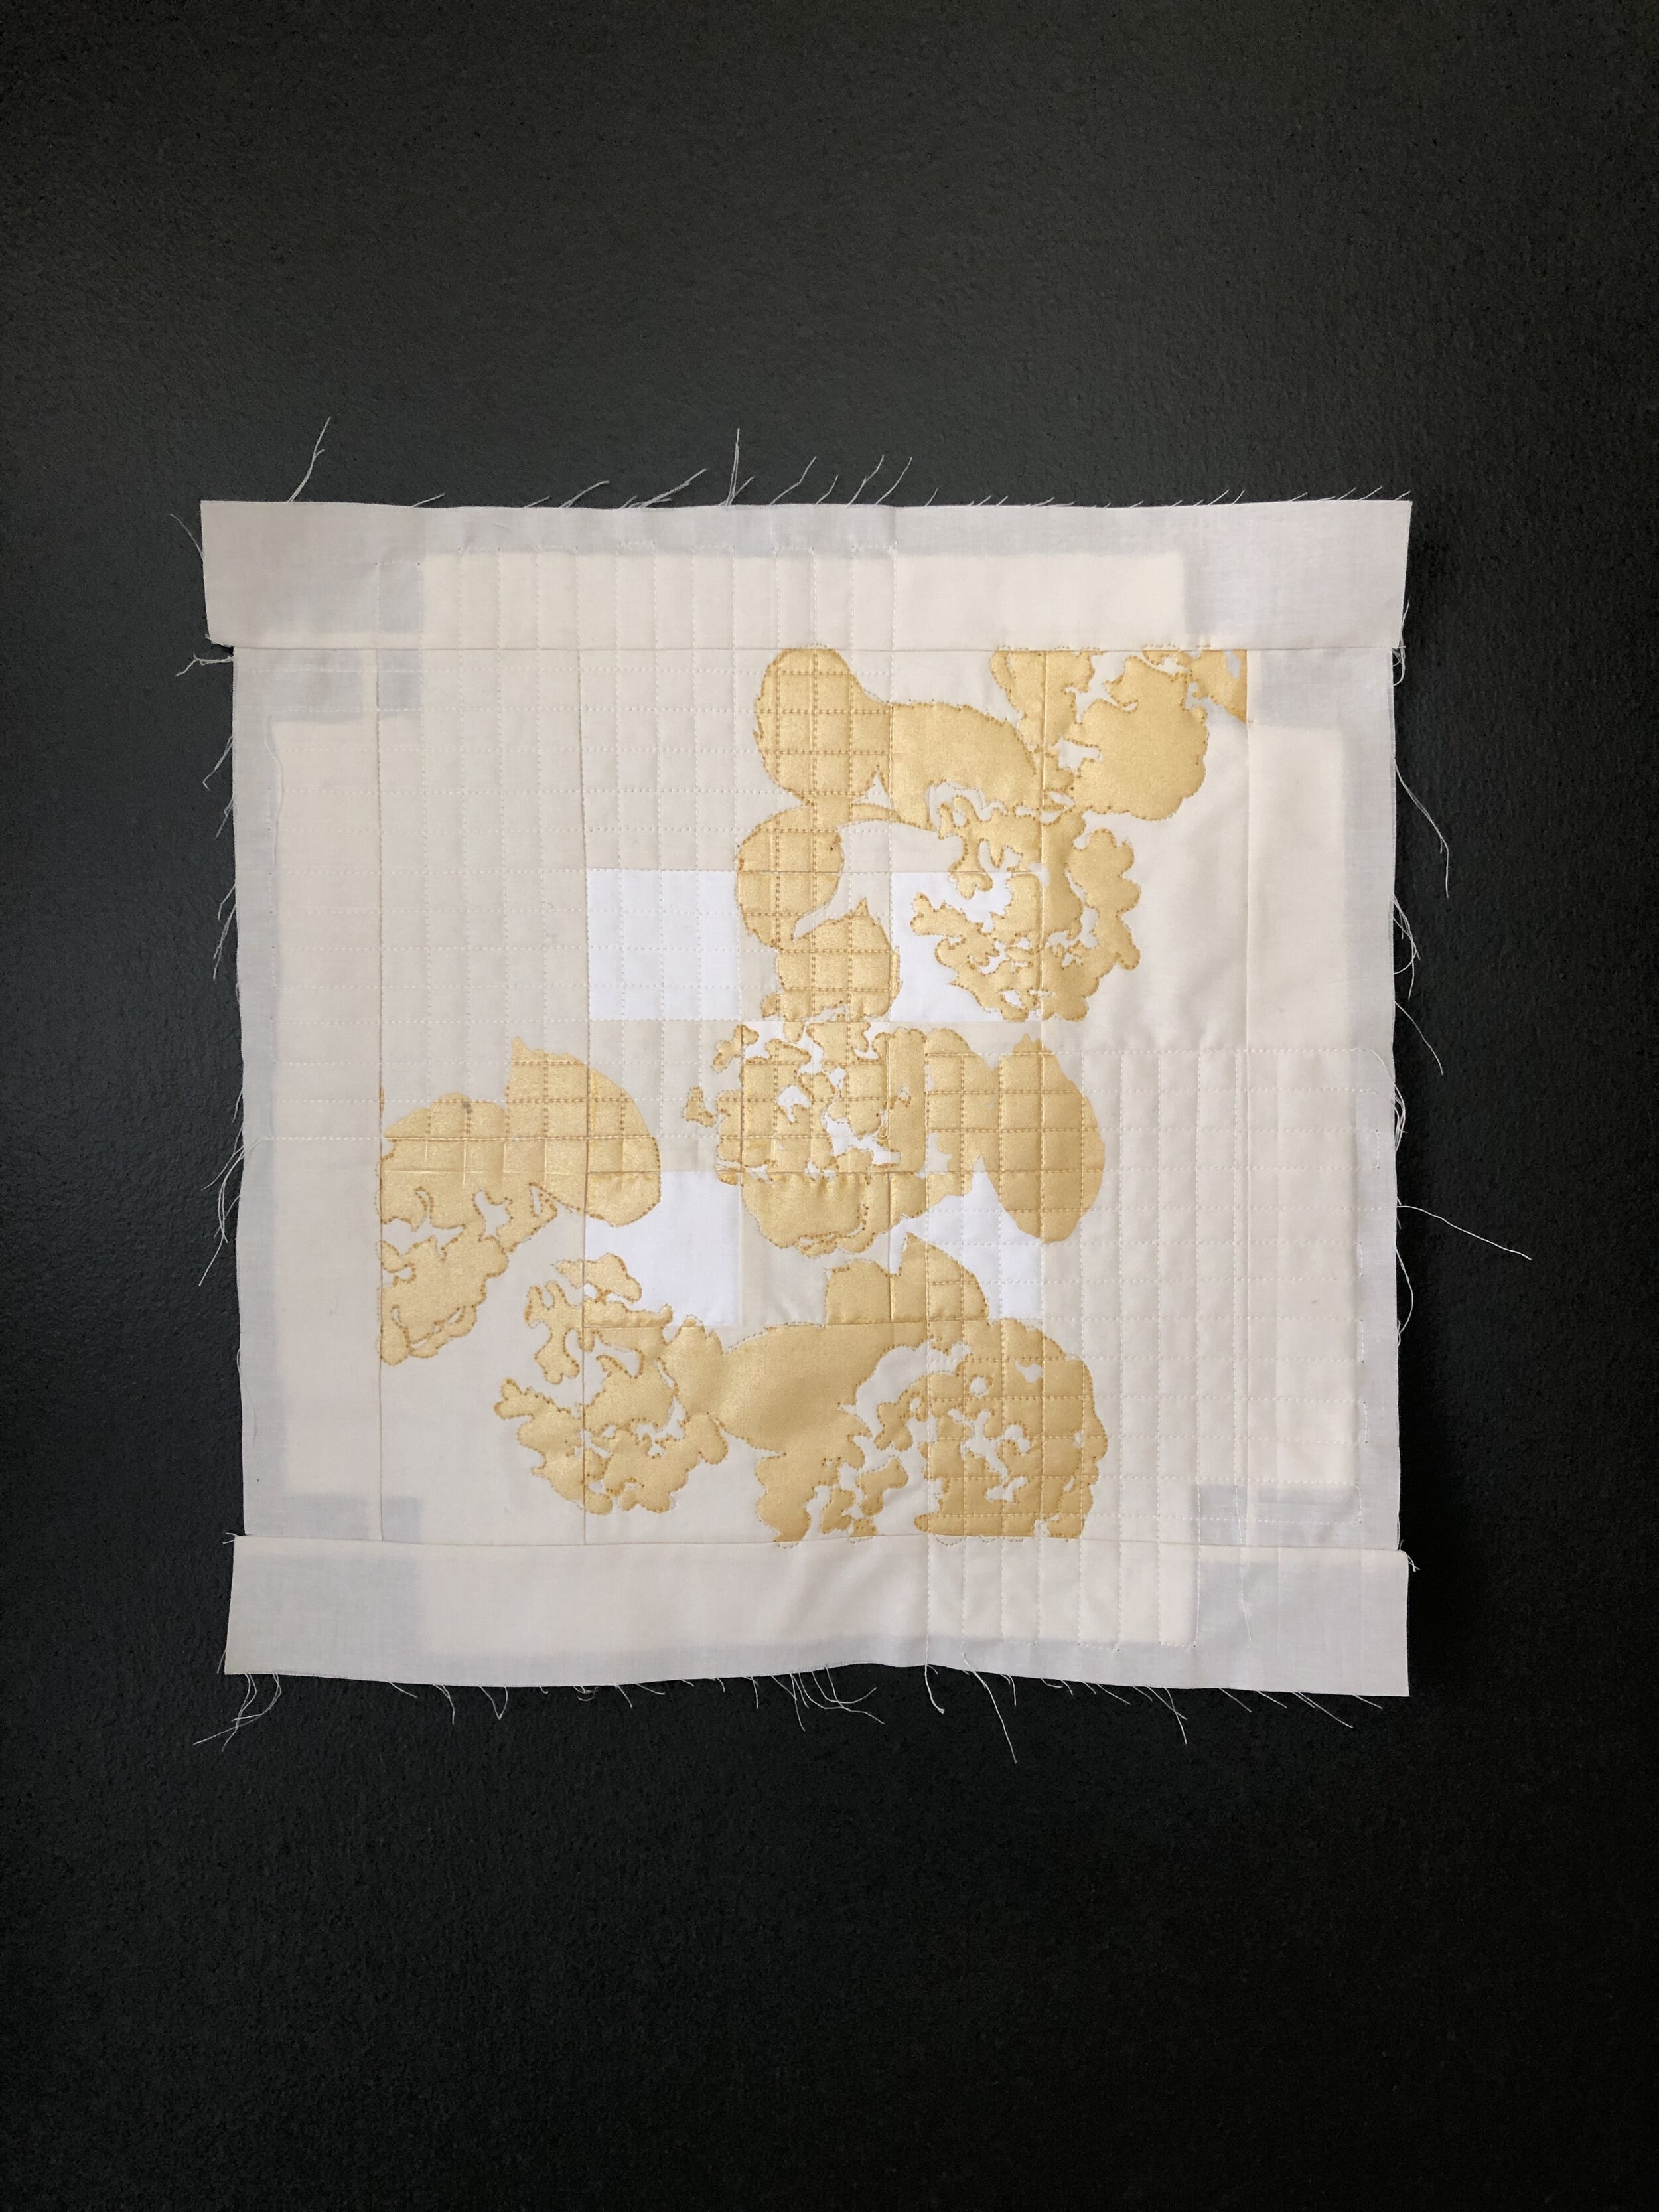
Results: beautiful gold printing

I still want to experiment with the gold ink more to really grasp its versatility and uses, but so far, I would consider it a success. Due to its metallic nature, the gold ink looks darker from some angles and lighter and more subtle from others. I would be curious to see how it plays off darker fabrics.

IMG_8111.jpg
 

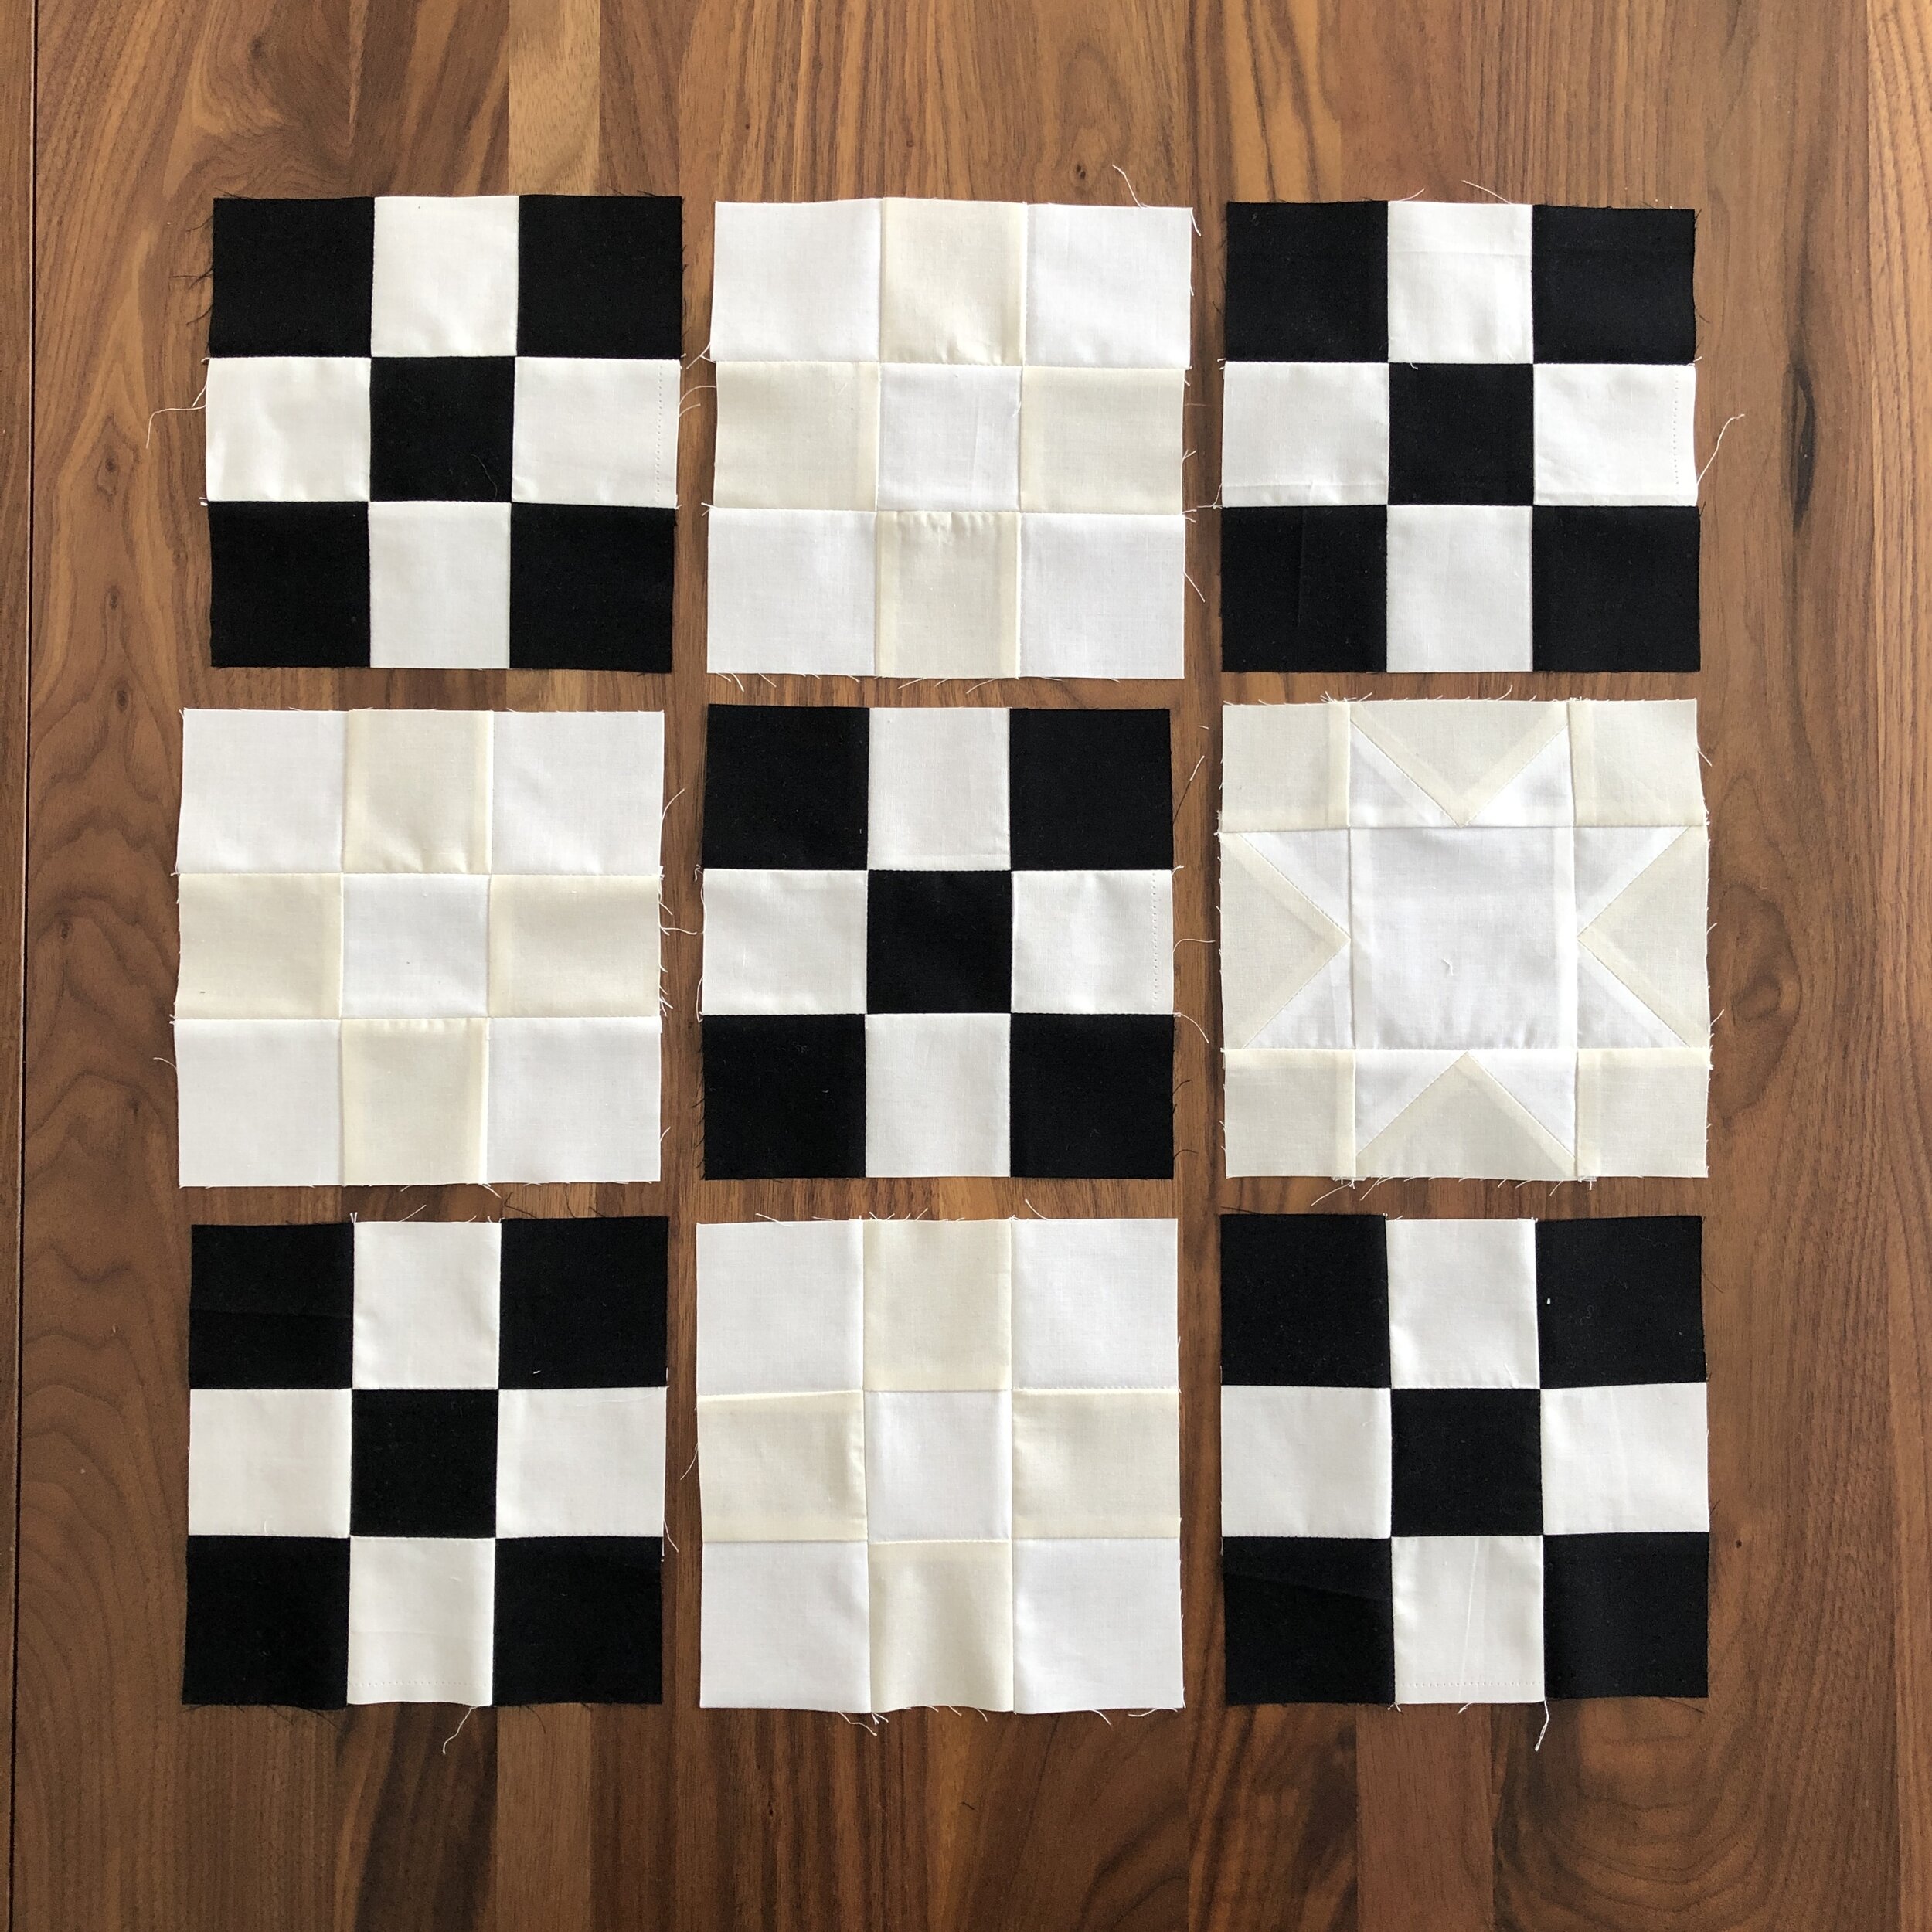
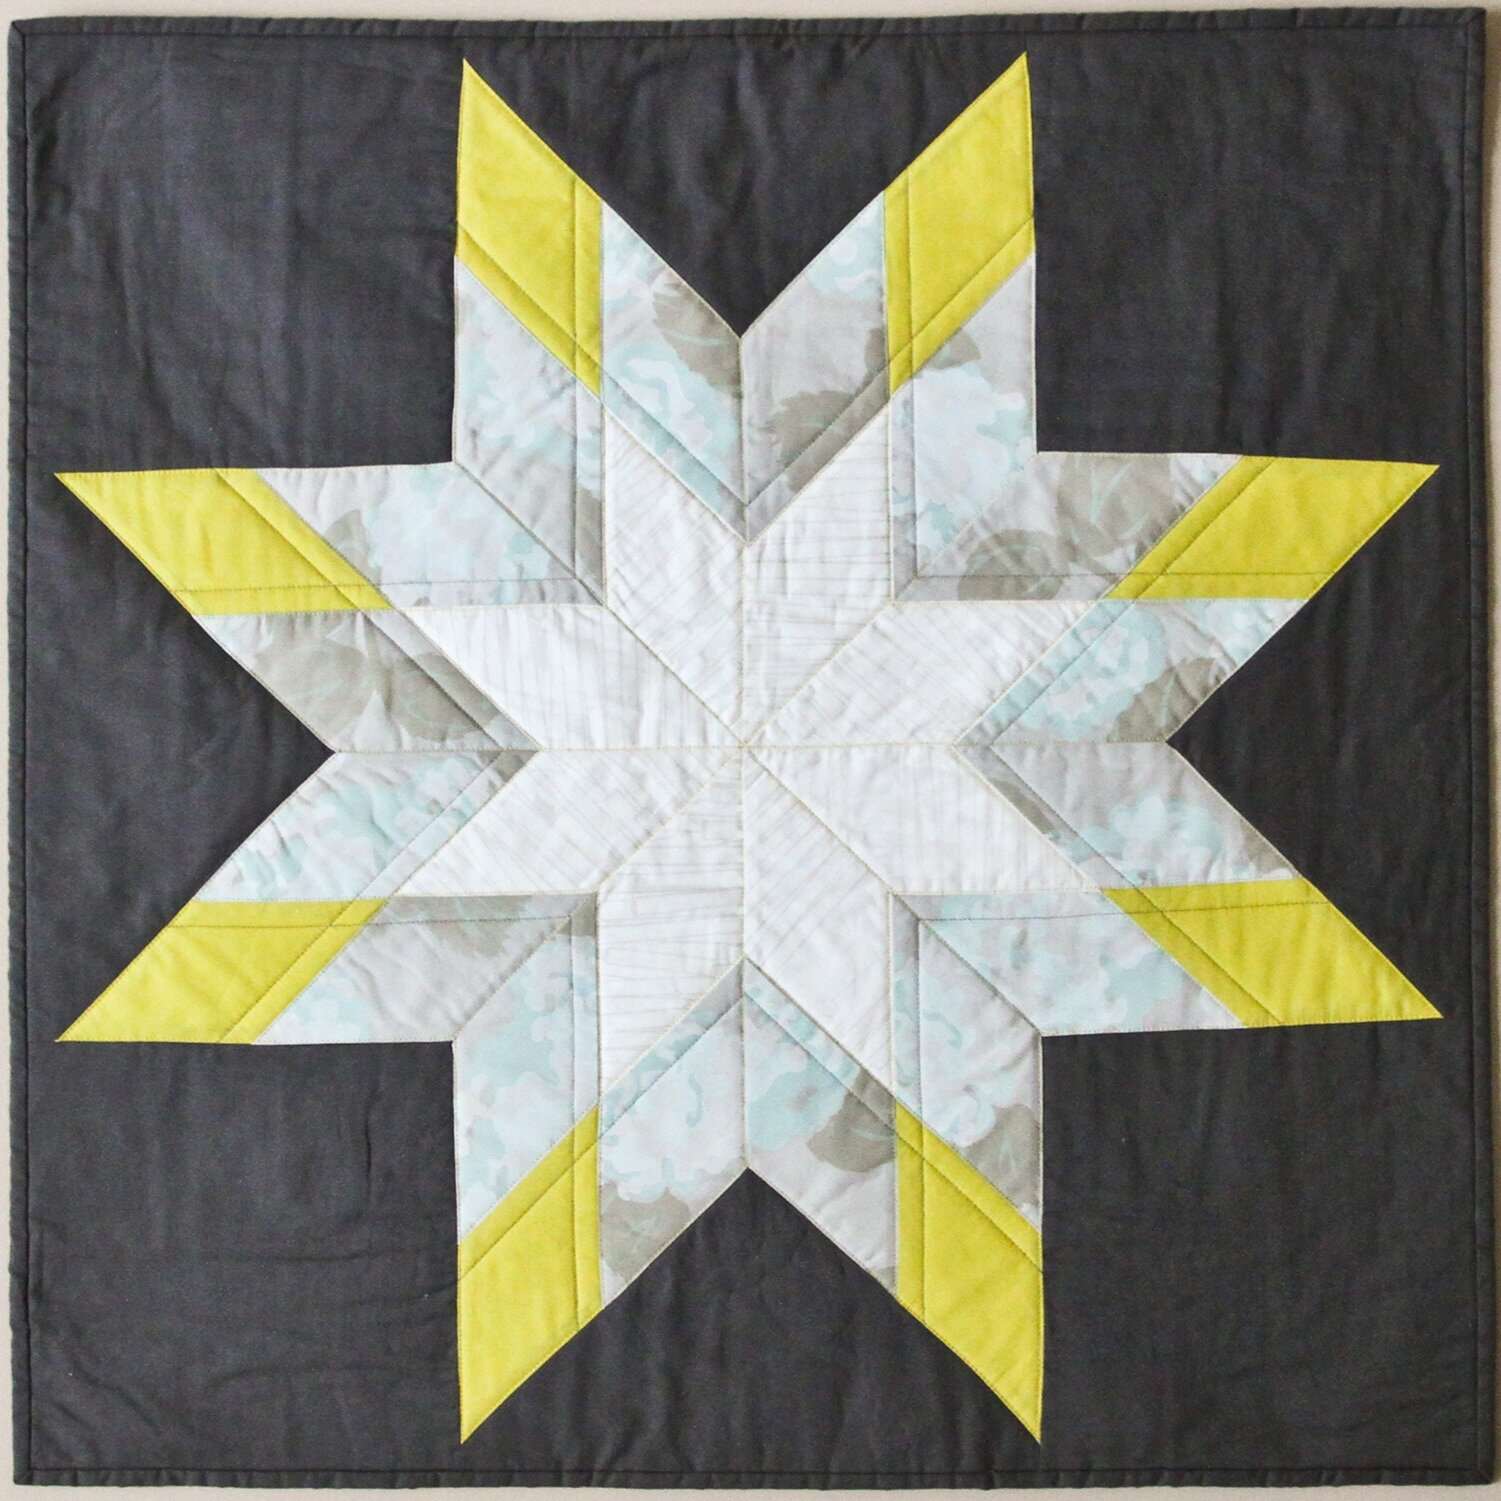
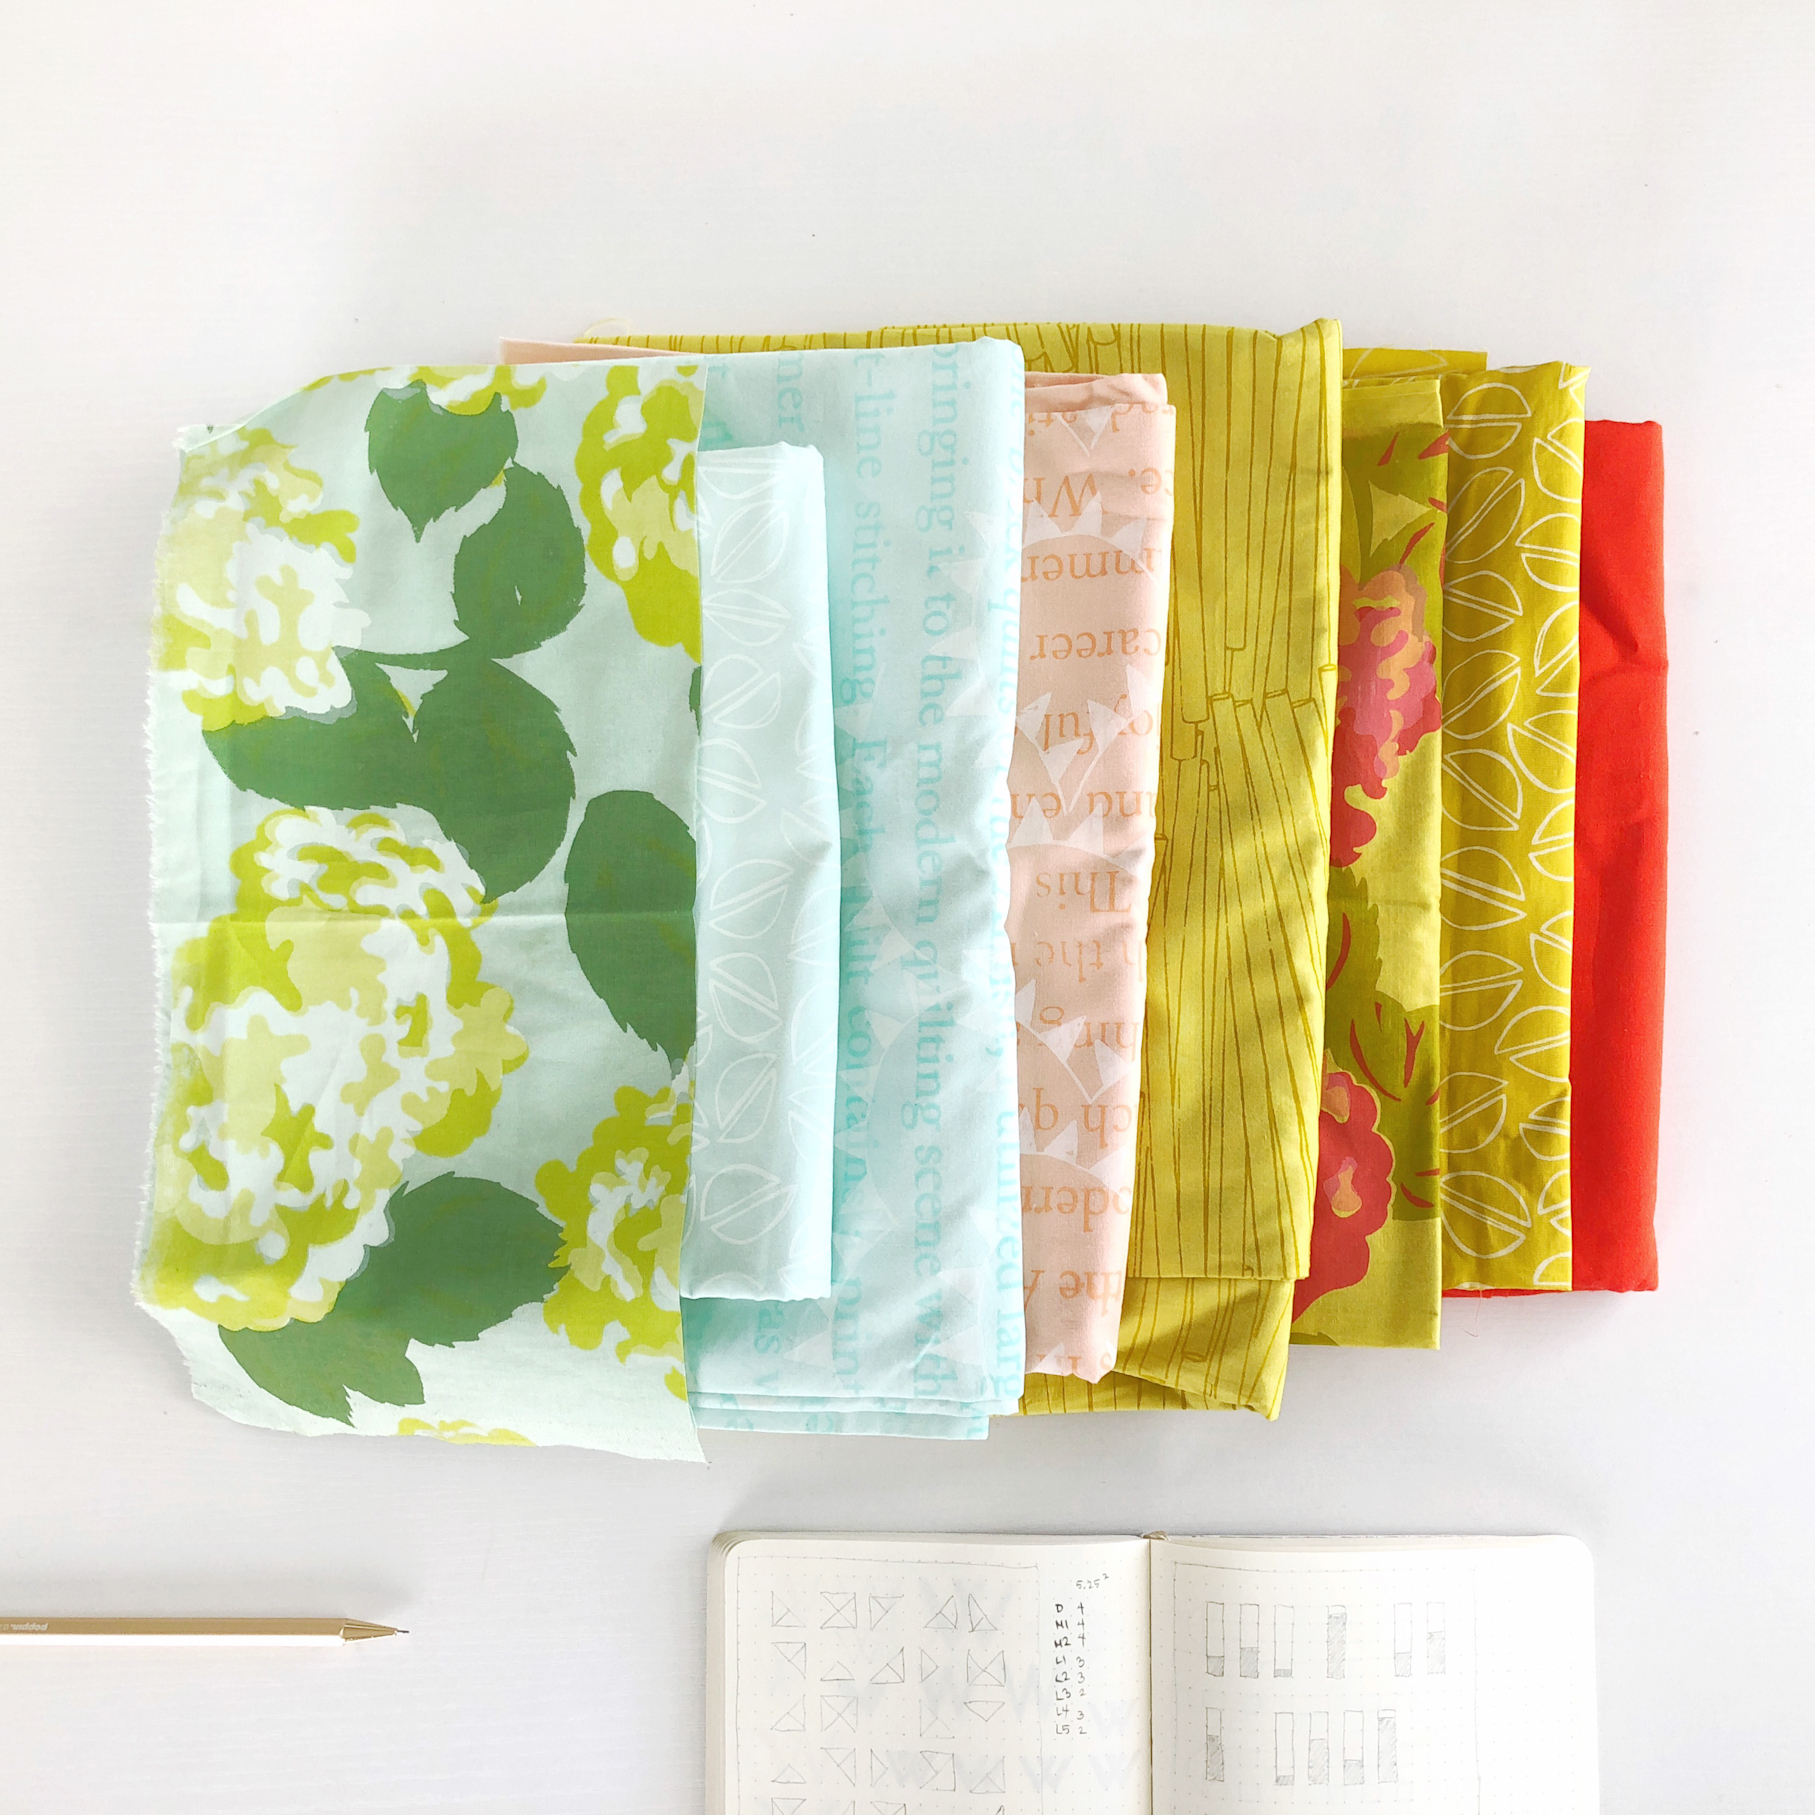
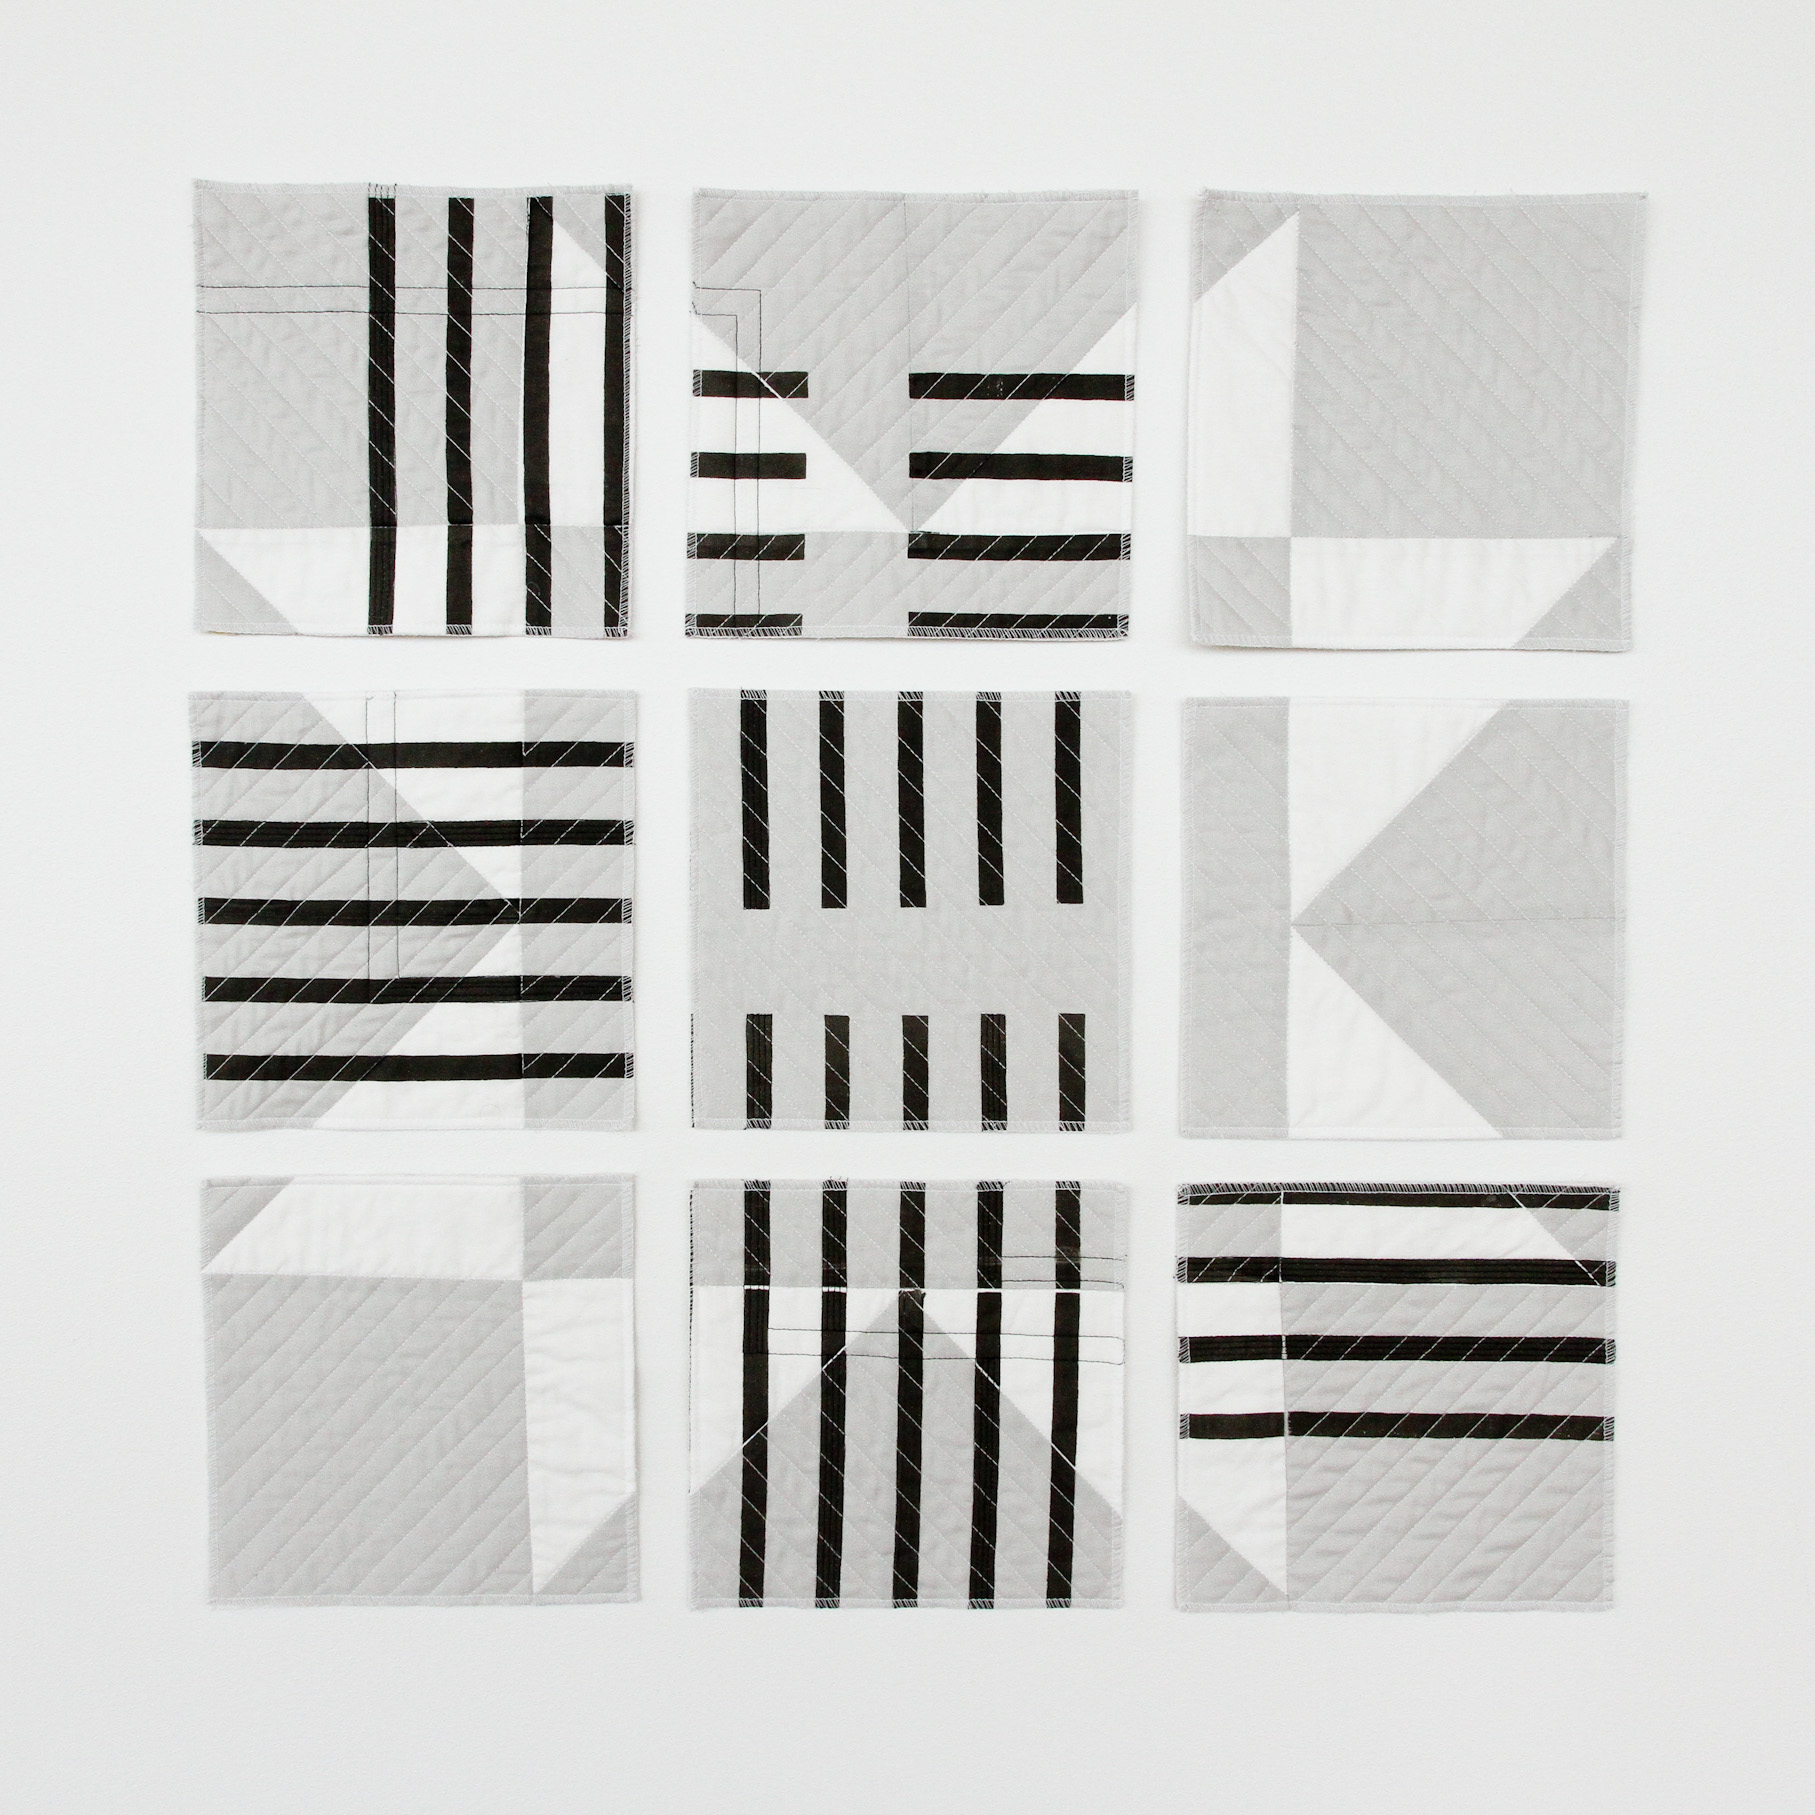
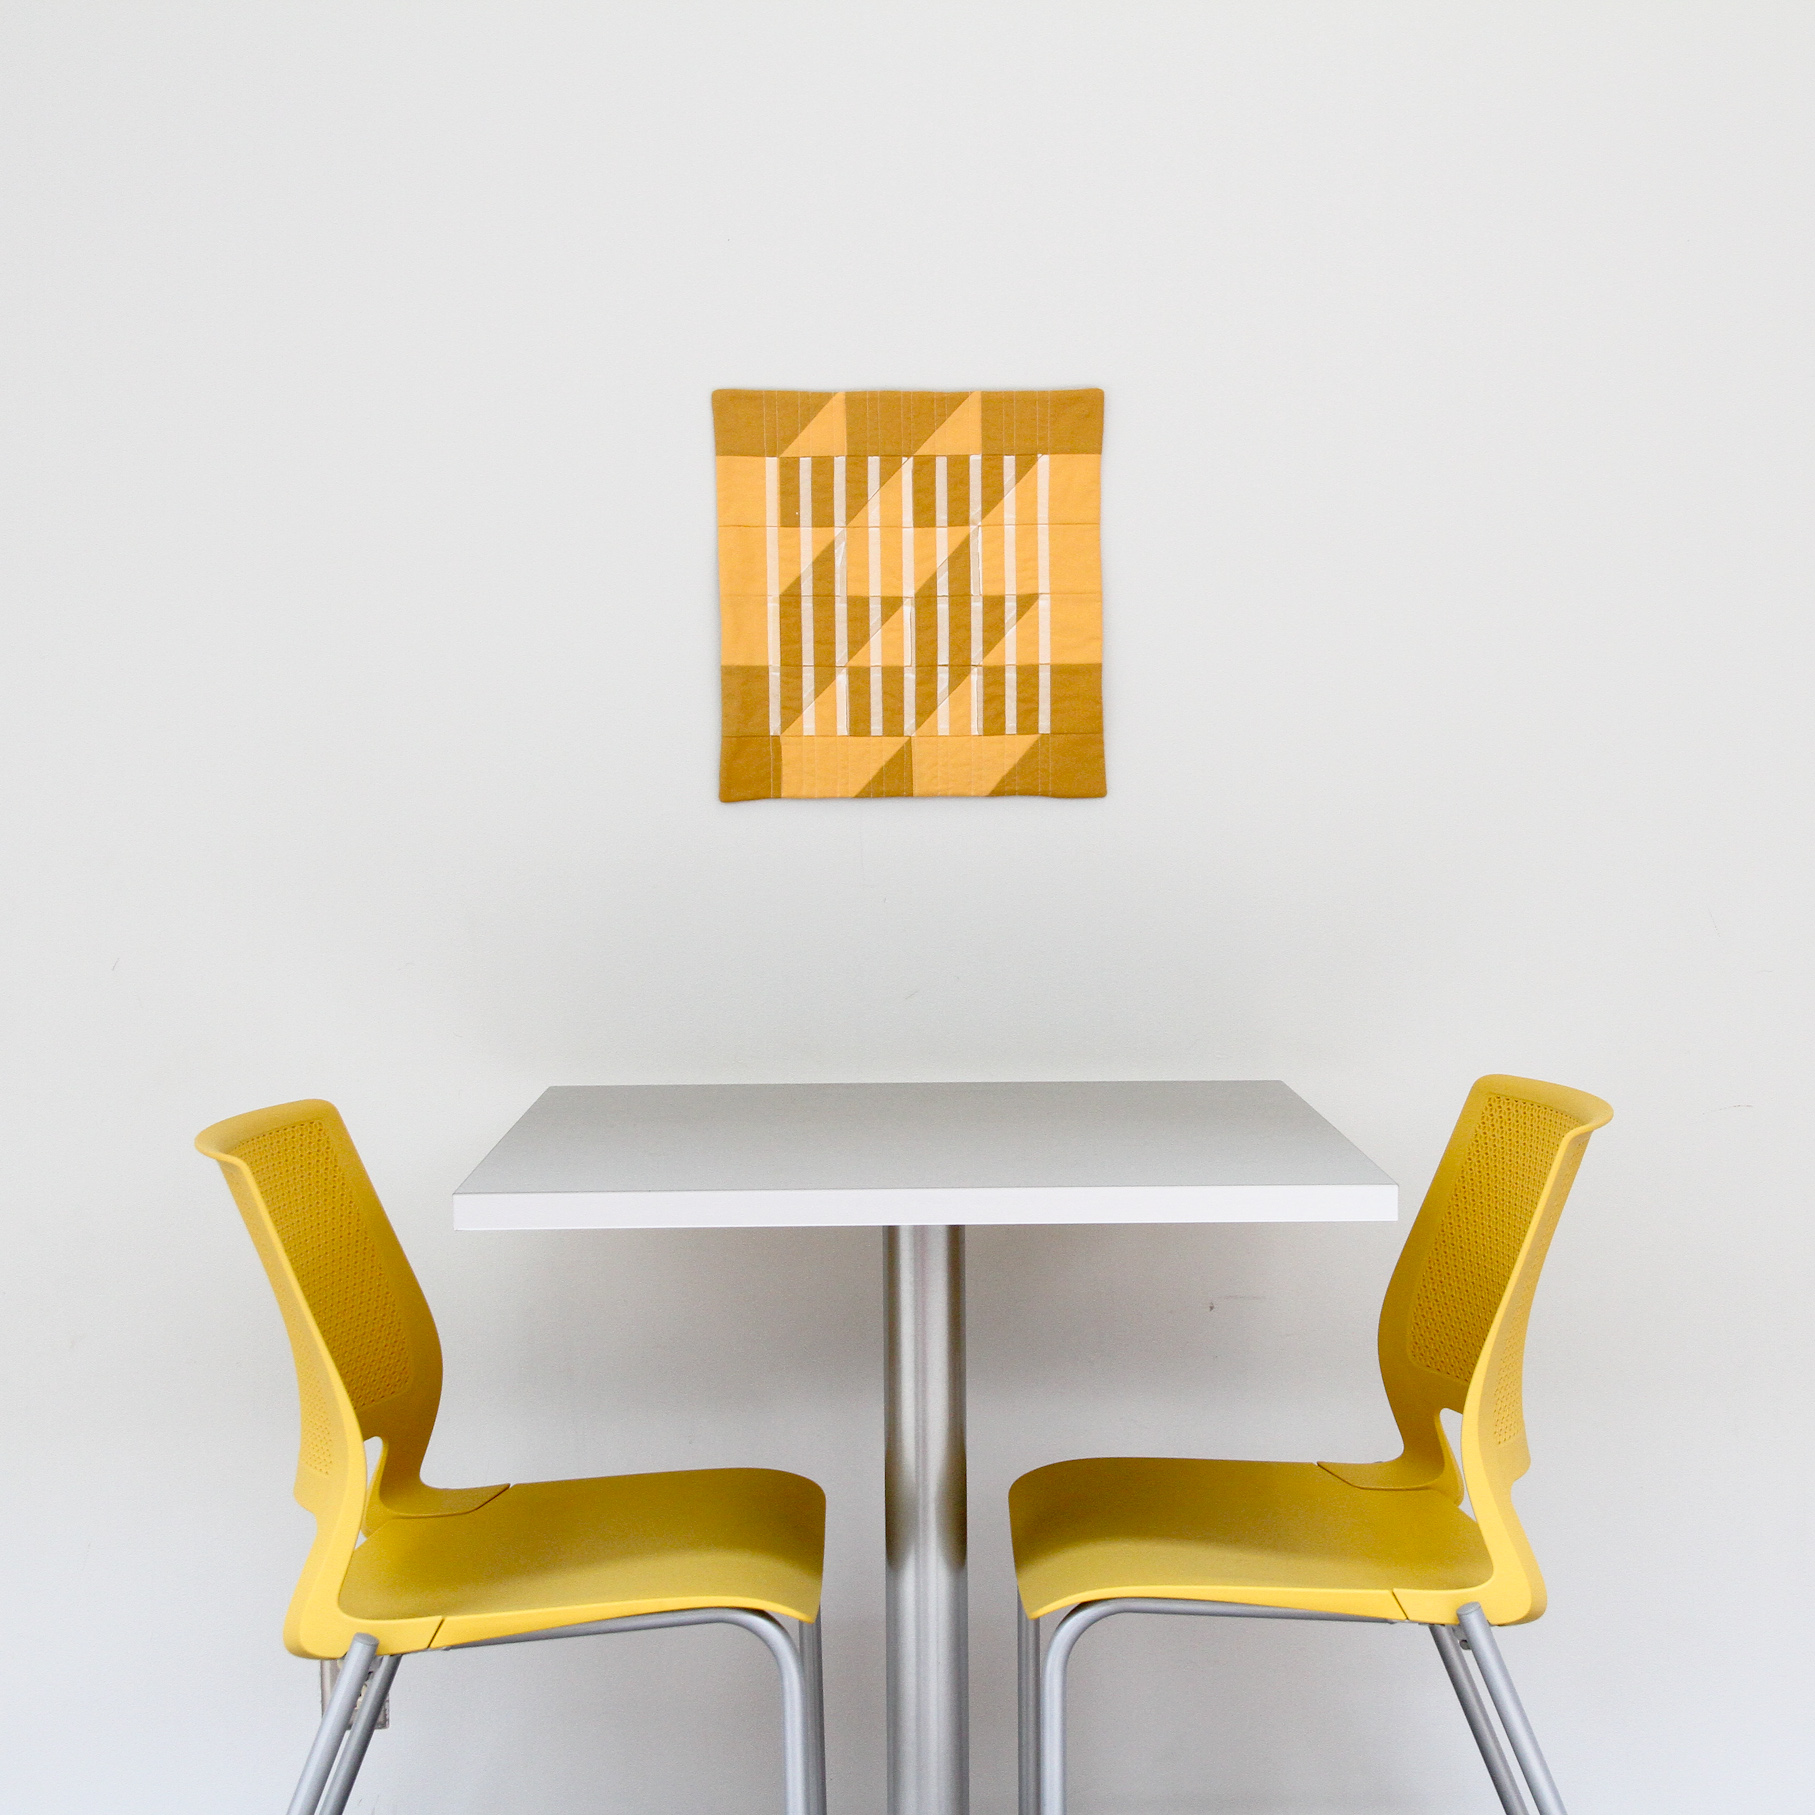
Experiment : Canvas-mounted Quilt

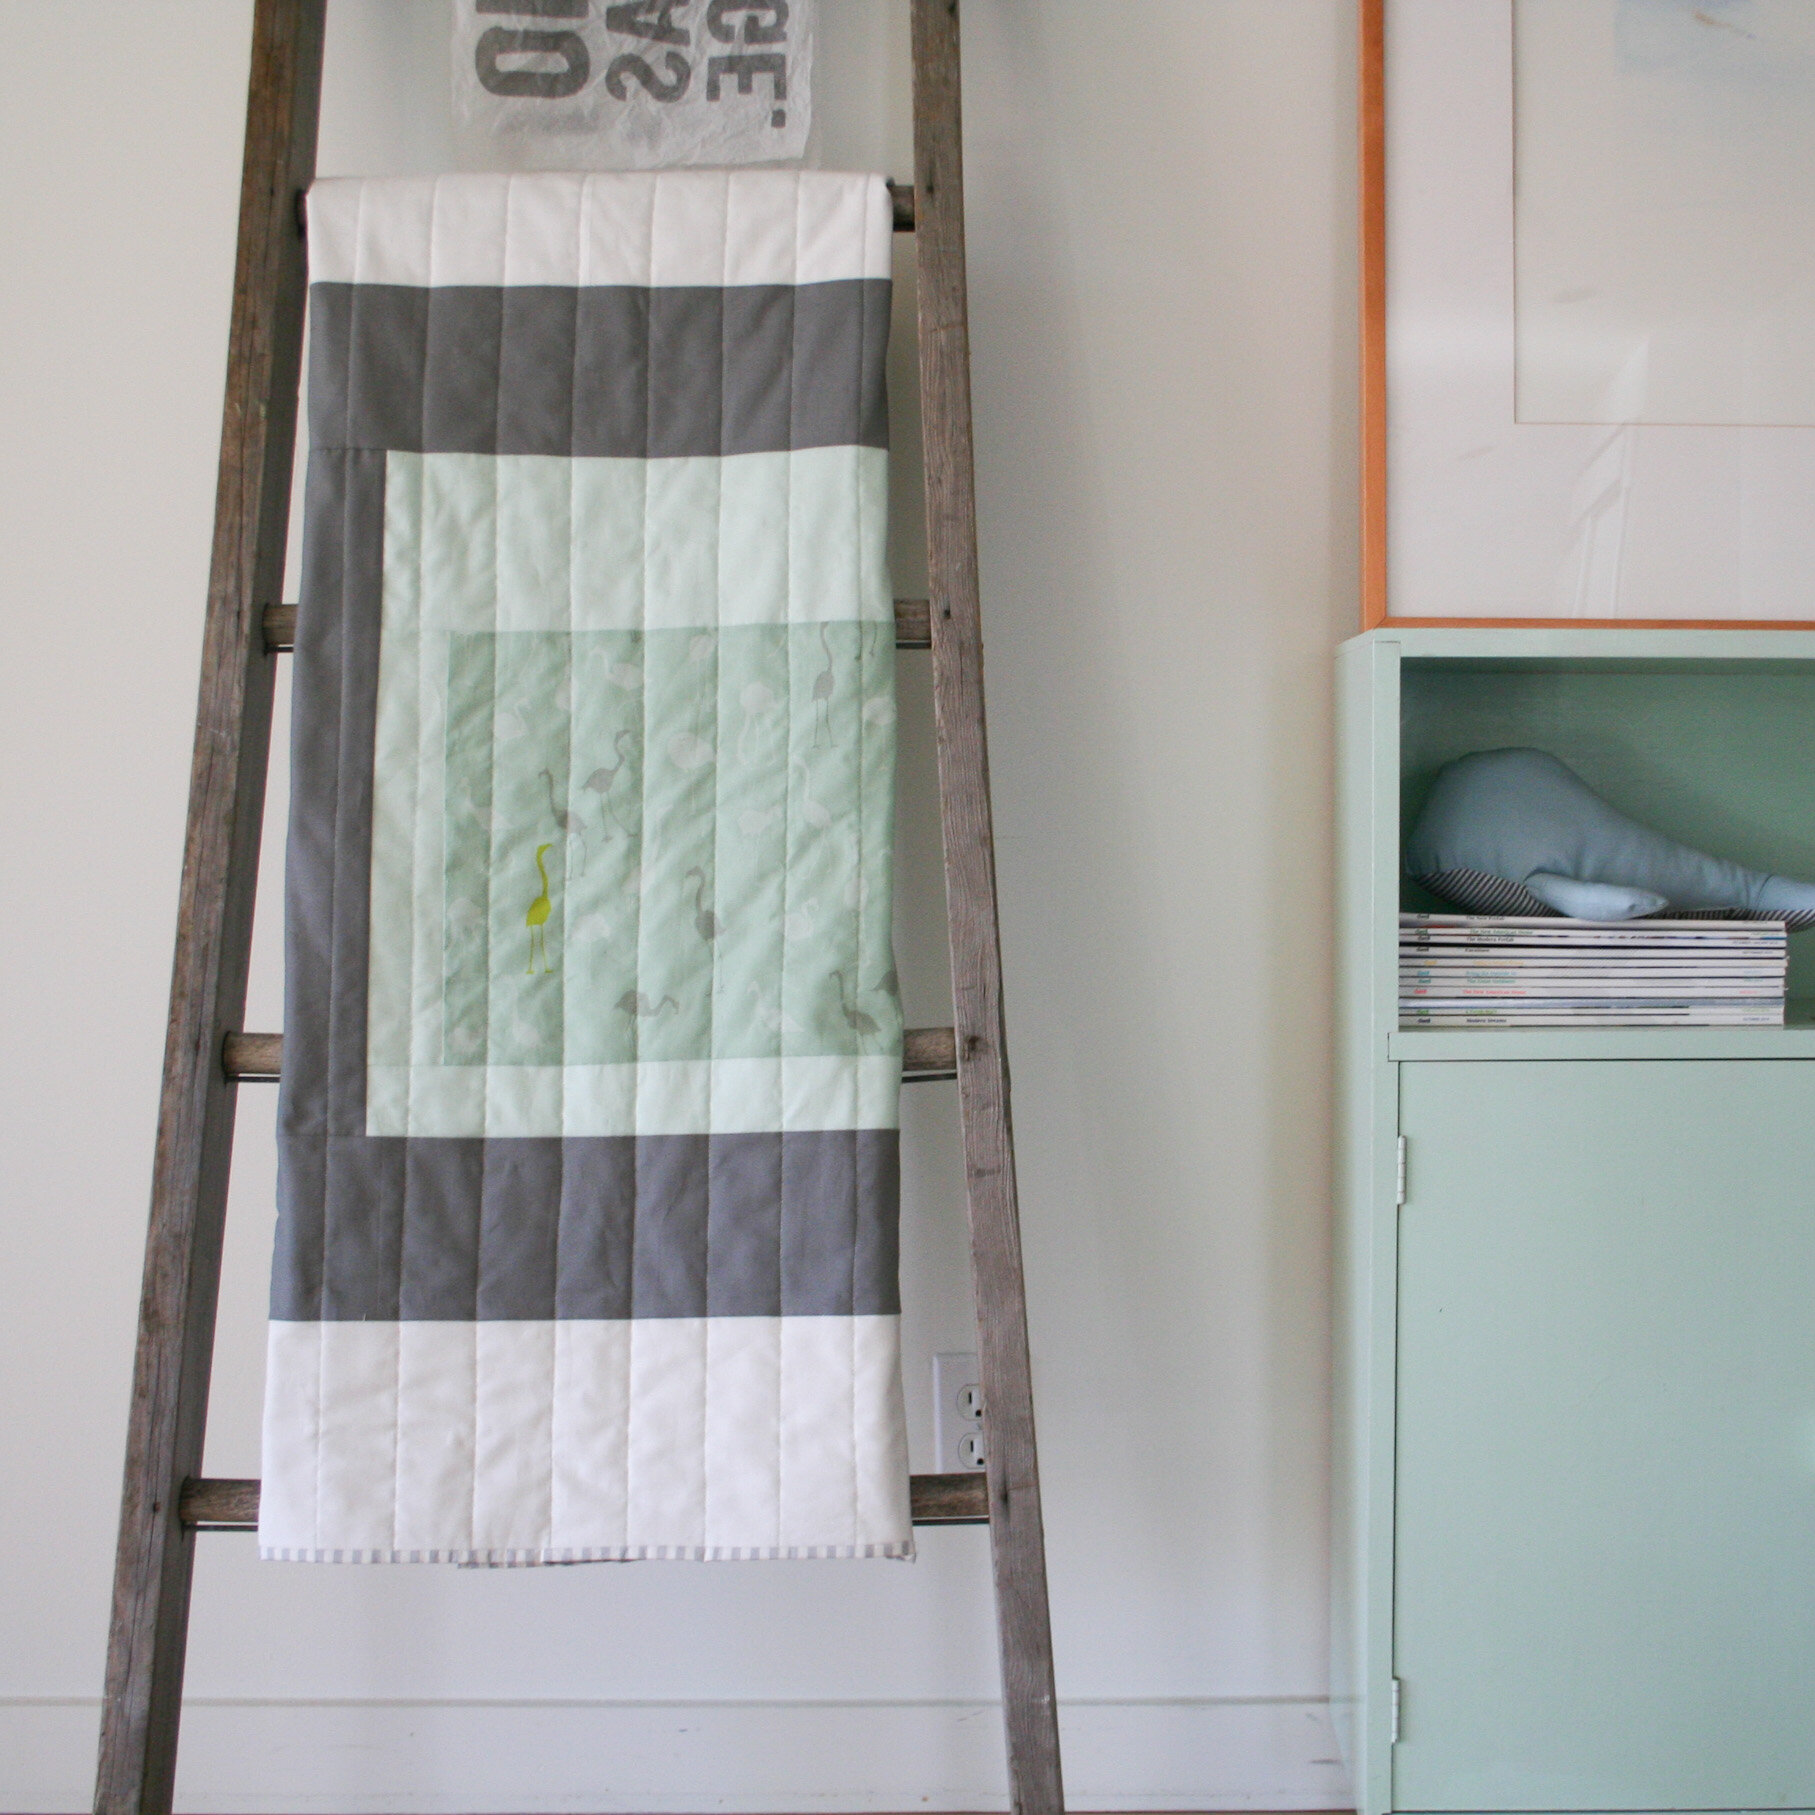
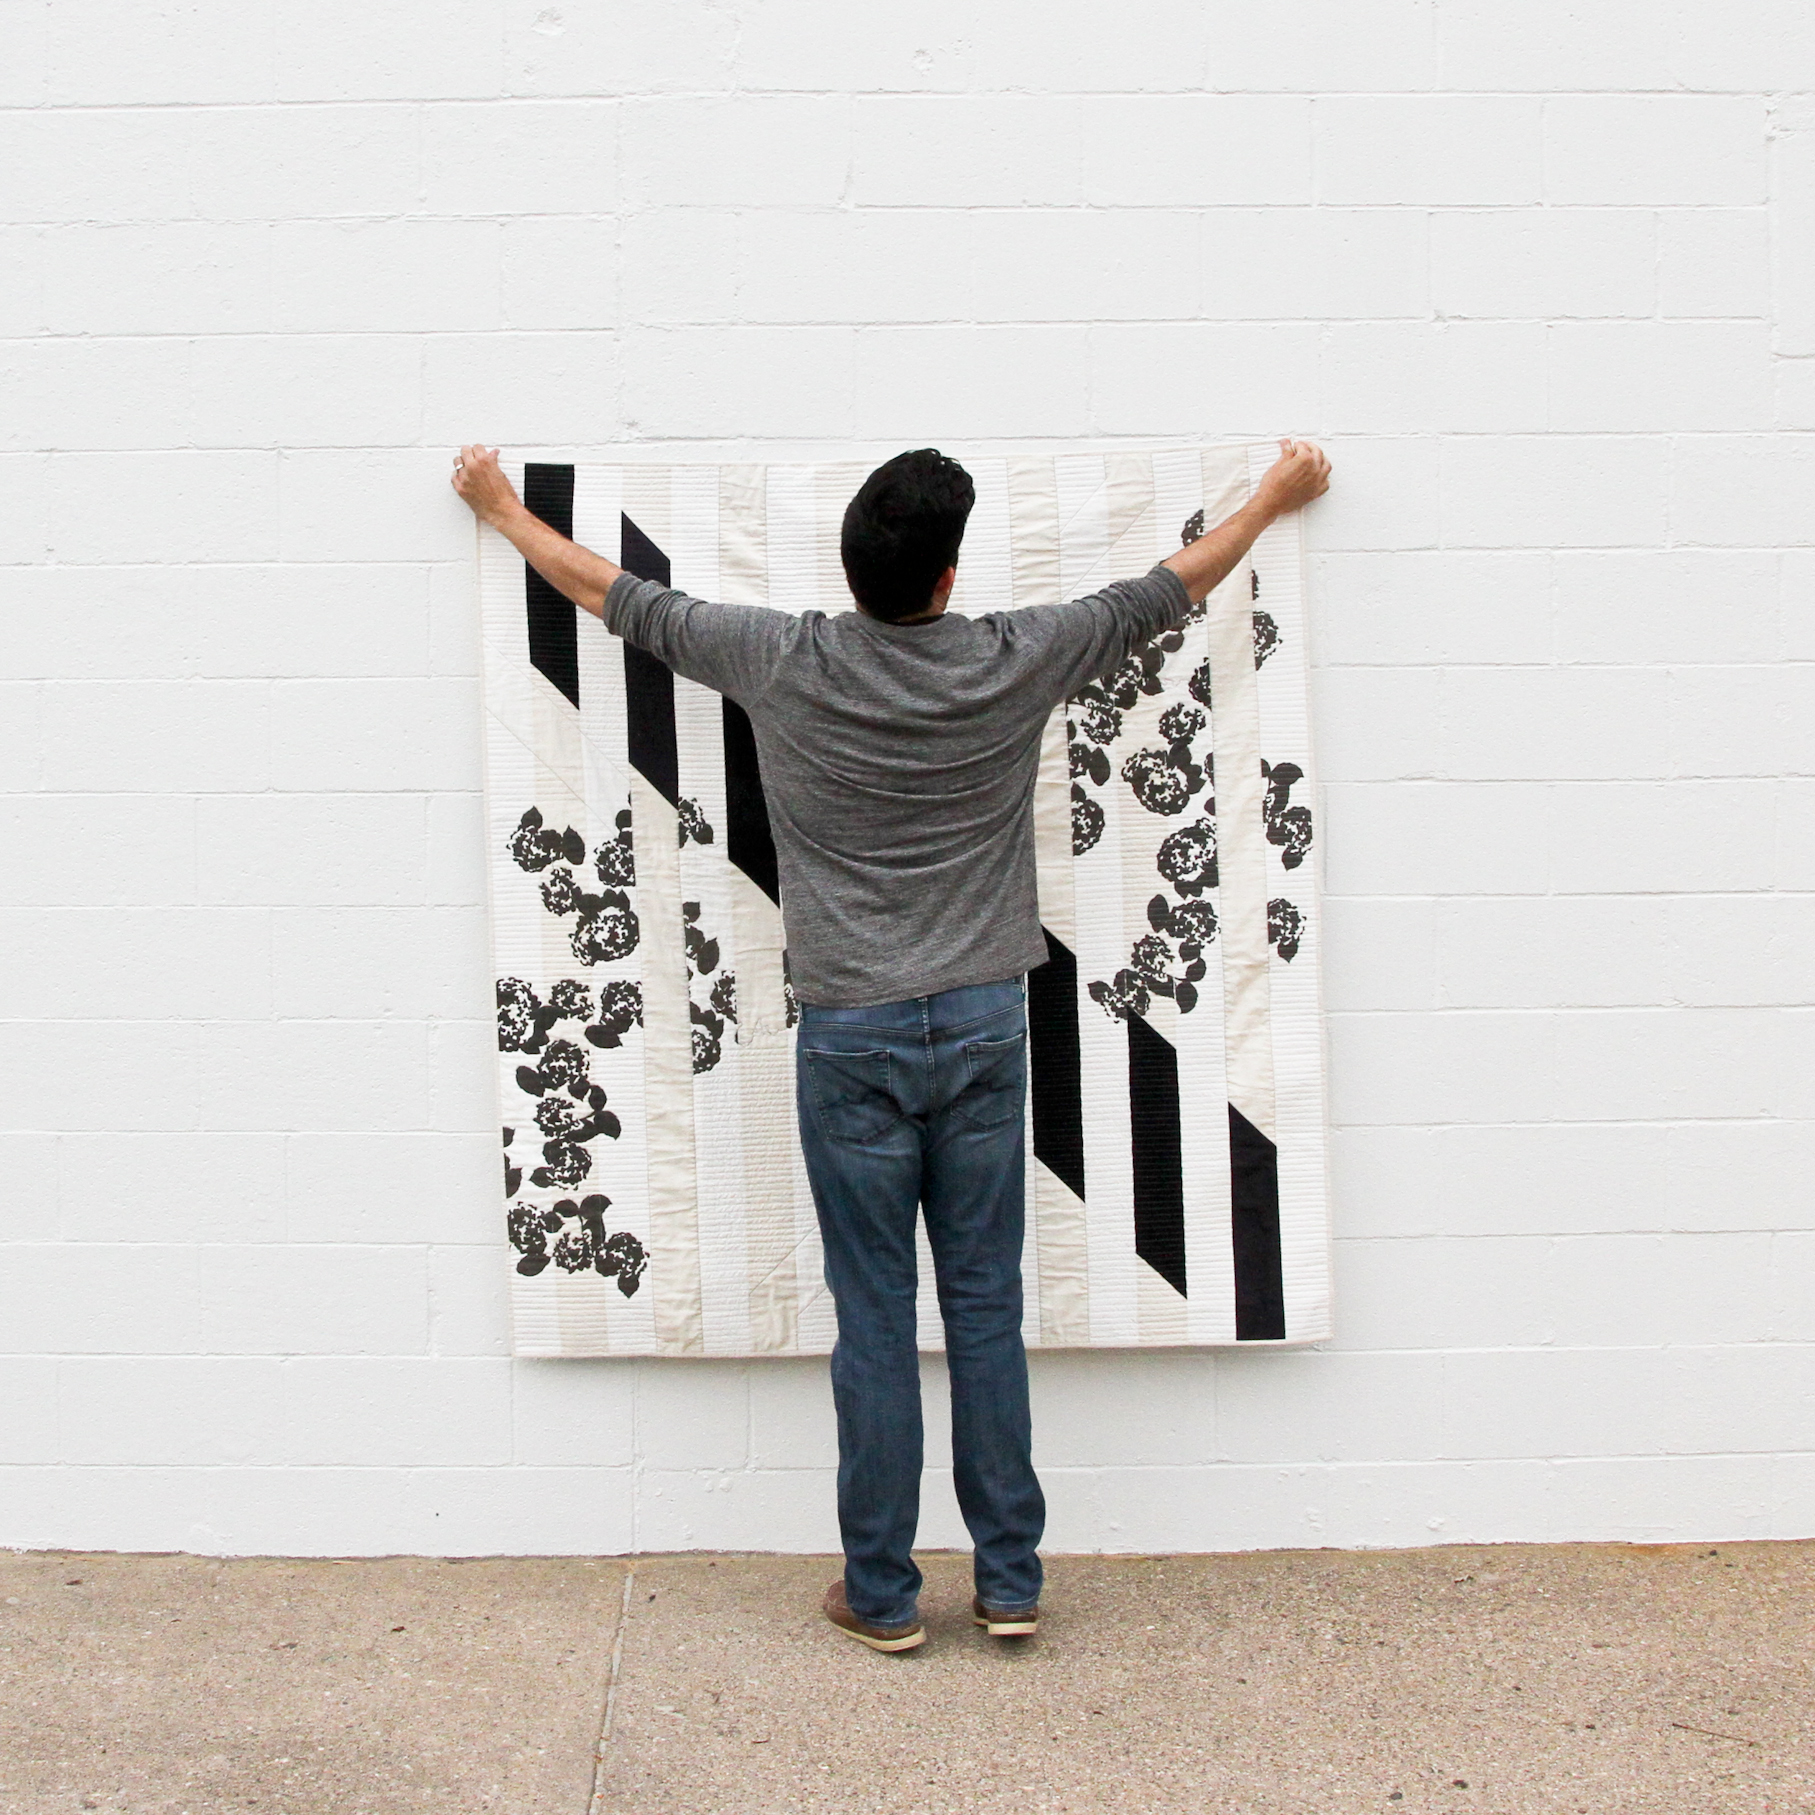
This is something I regularly wrestle with as I create wall quilts: how can an art quilt be easily and masterfully hung? There are several methods for finishing the edges of a quilt other than traditional binding, and I hope to work on a tutorial series covering some of these methods. However, no matter how you finish the edges of the art quilt, you are still left deciding how to hang it on the wall. I have used velcro. I have used dowels. I have hand-sewed individual quilt squares to a piece of mat board. None of these methods have satisfied my desire for a method that elevates the quilt to the crisp finish of modern art without requiring painstaking care and copious amounts of fiddly hand-sewing.

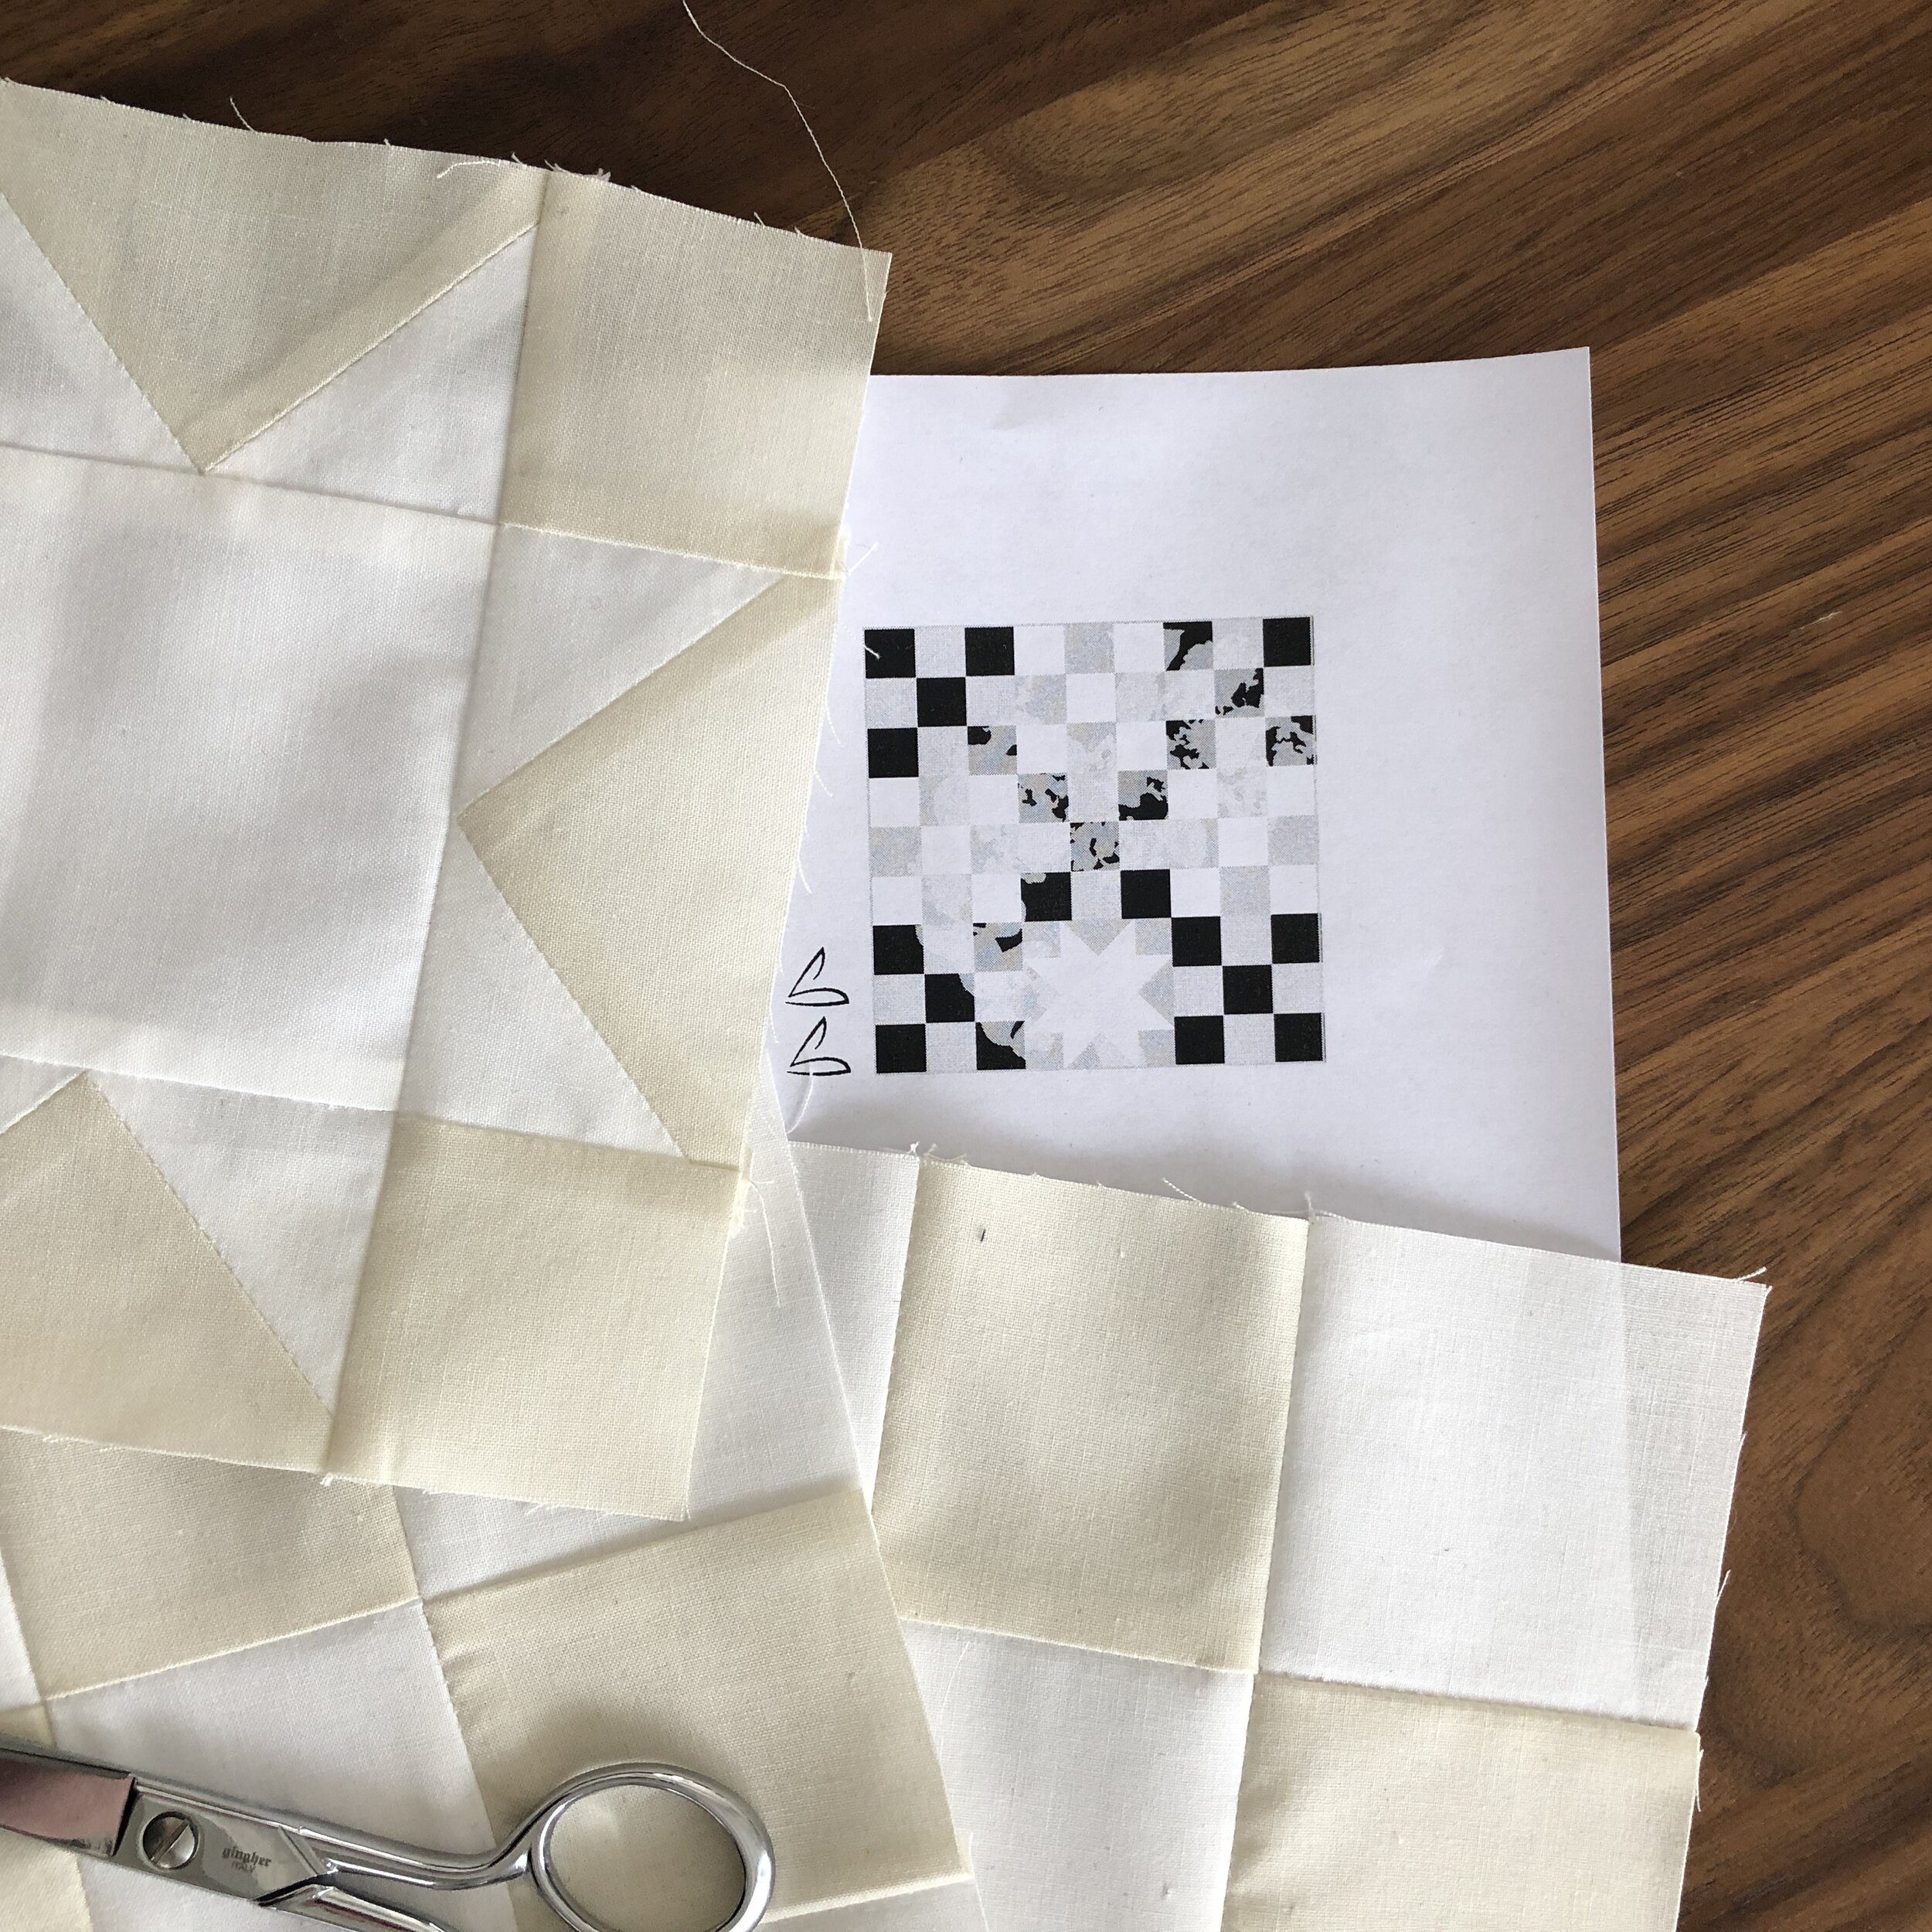
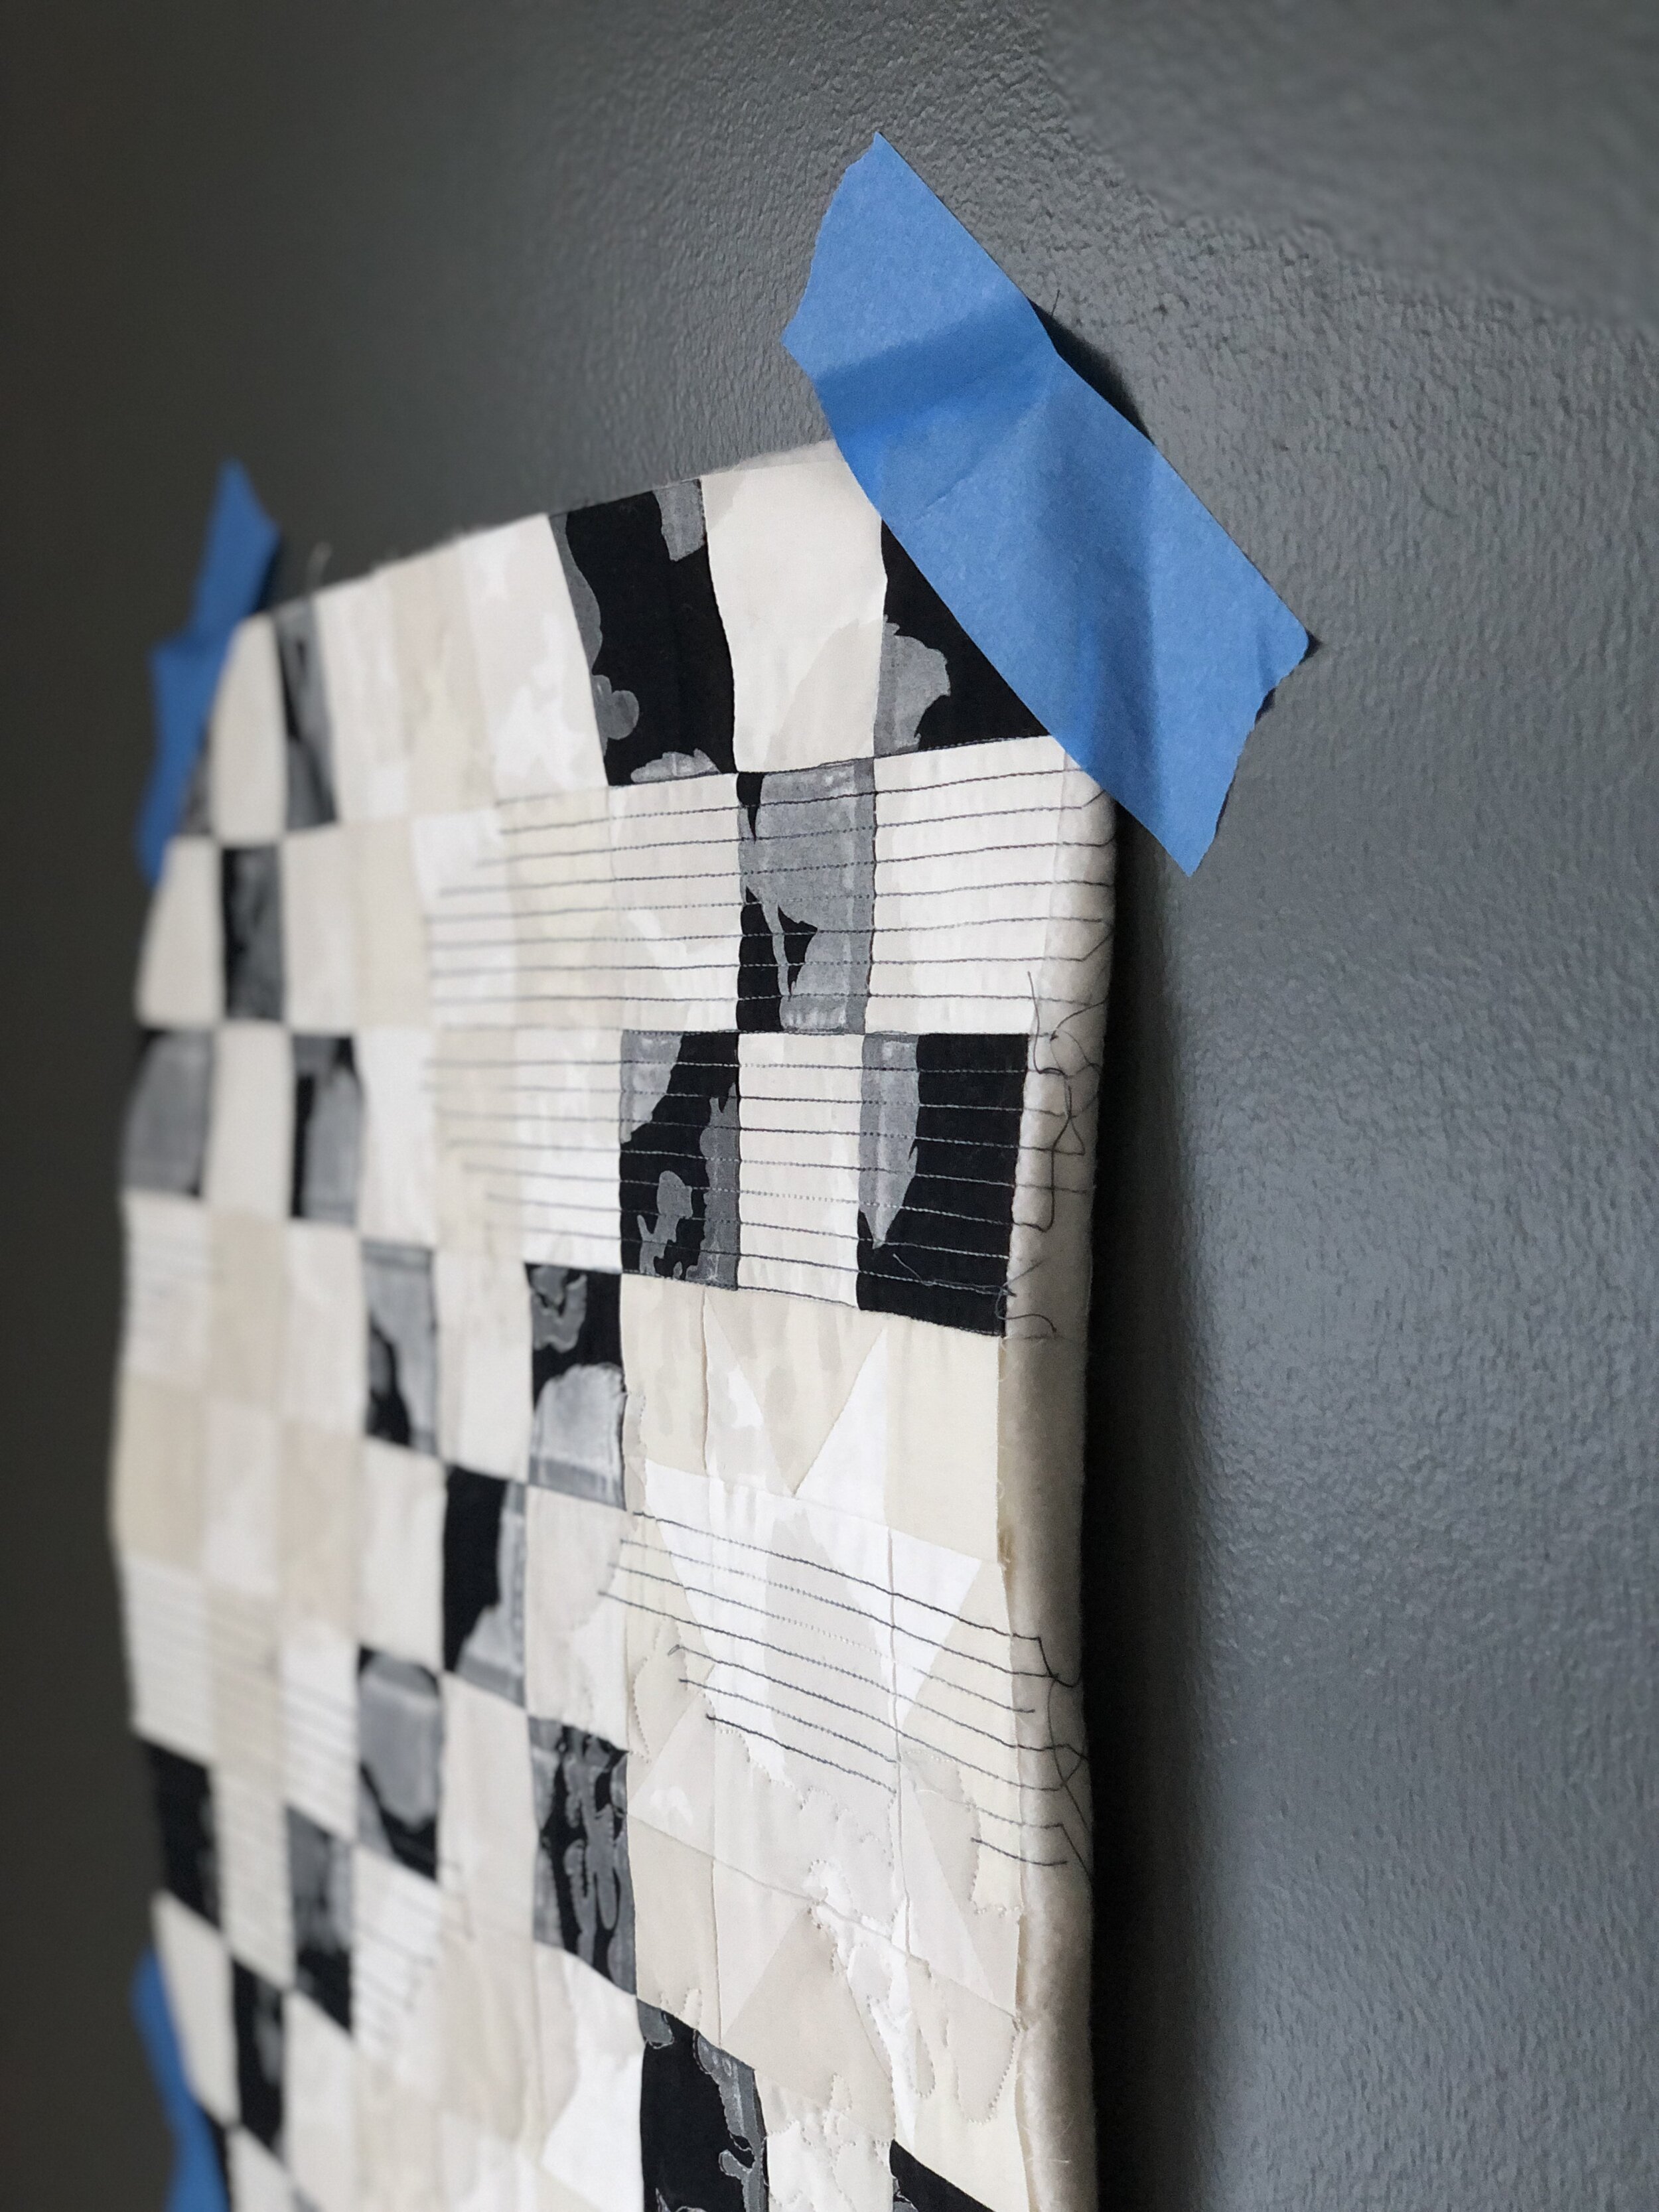
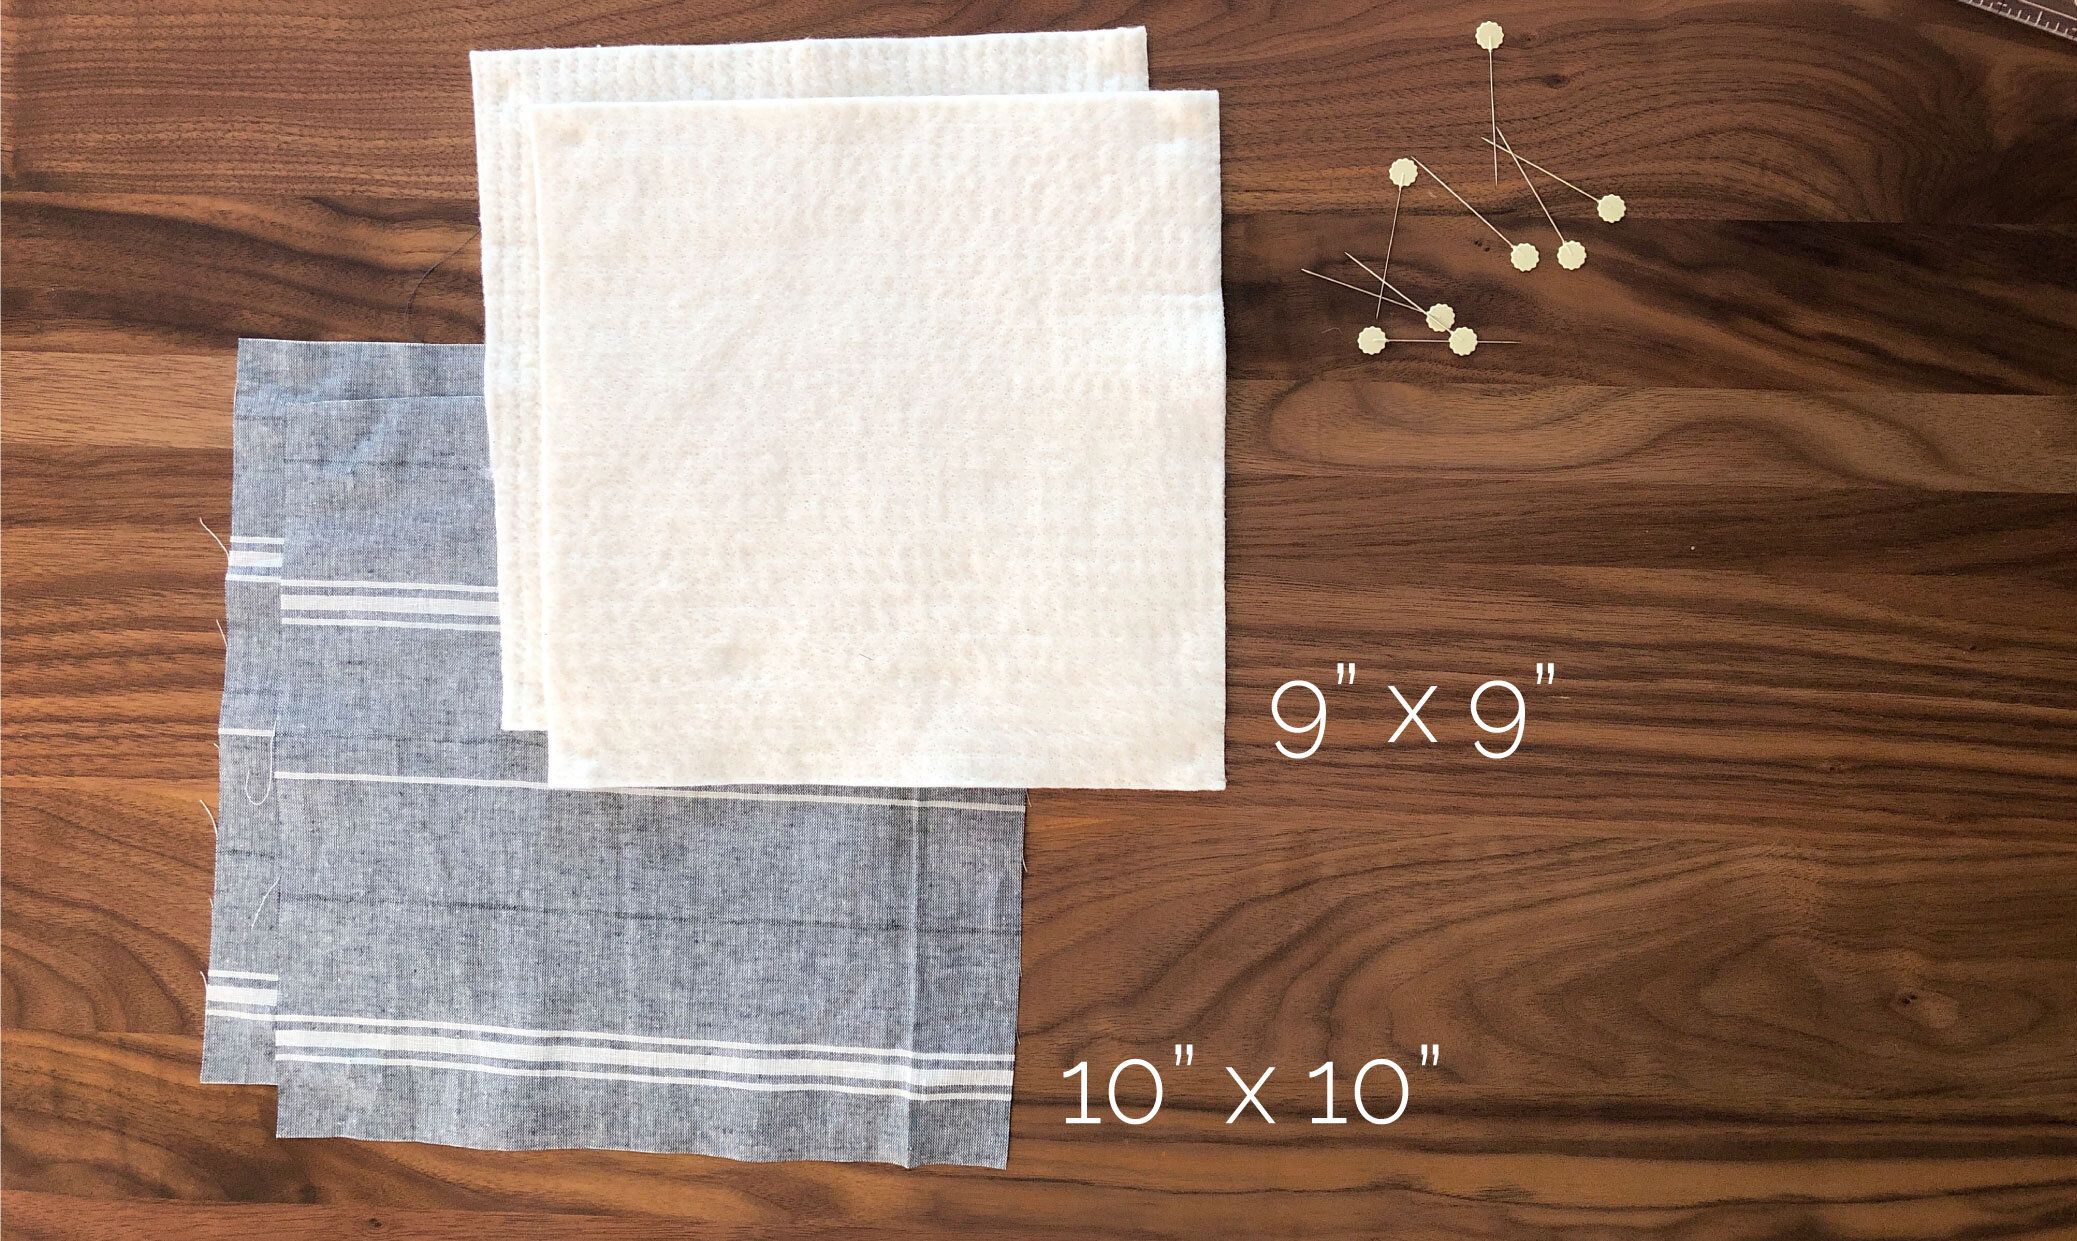
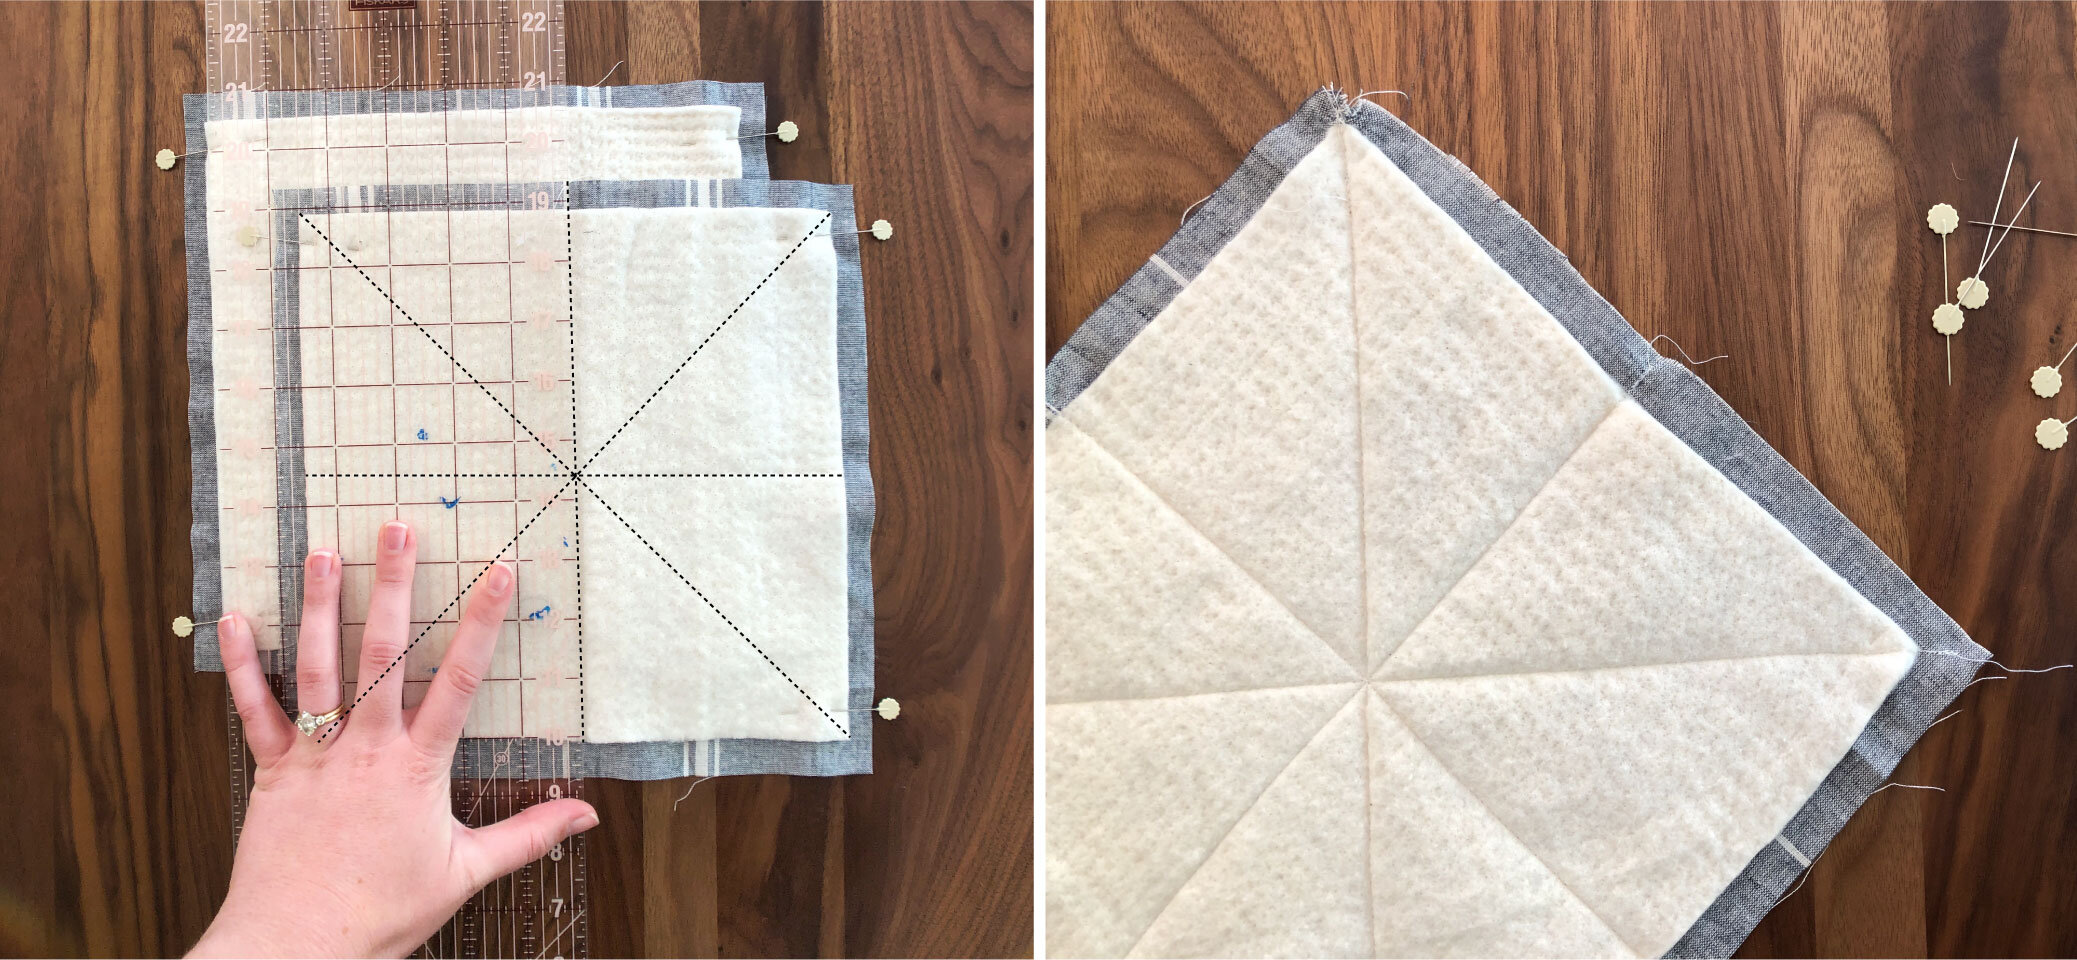
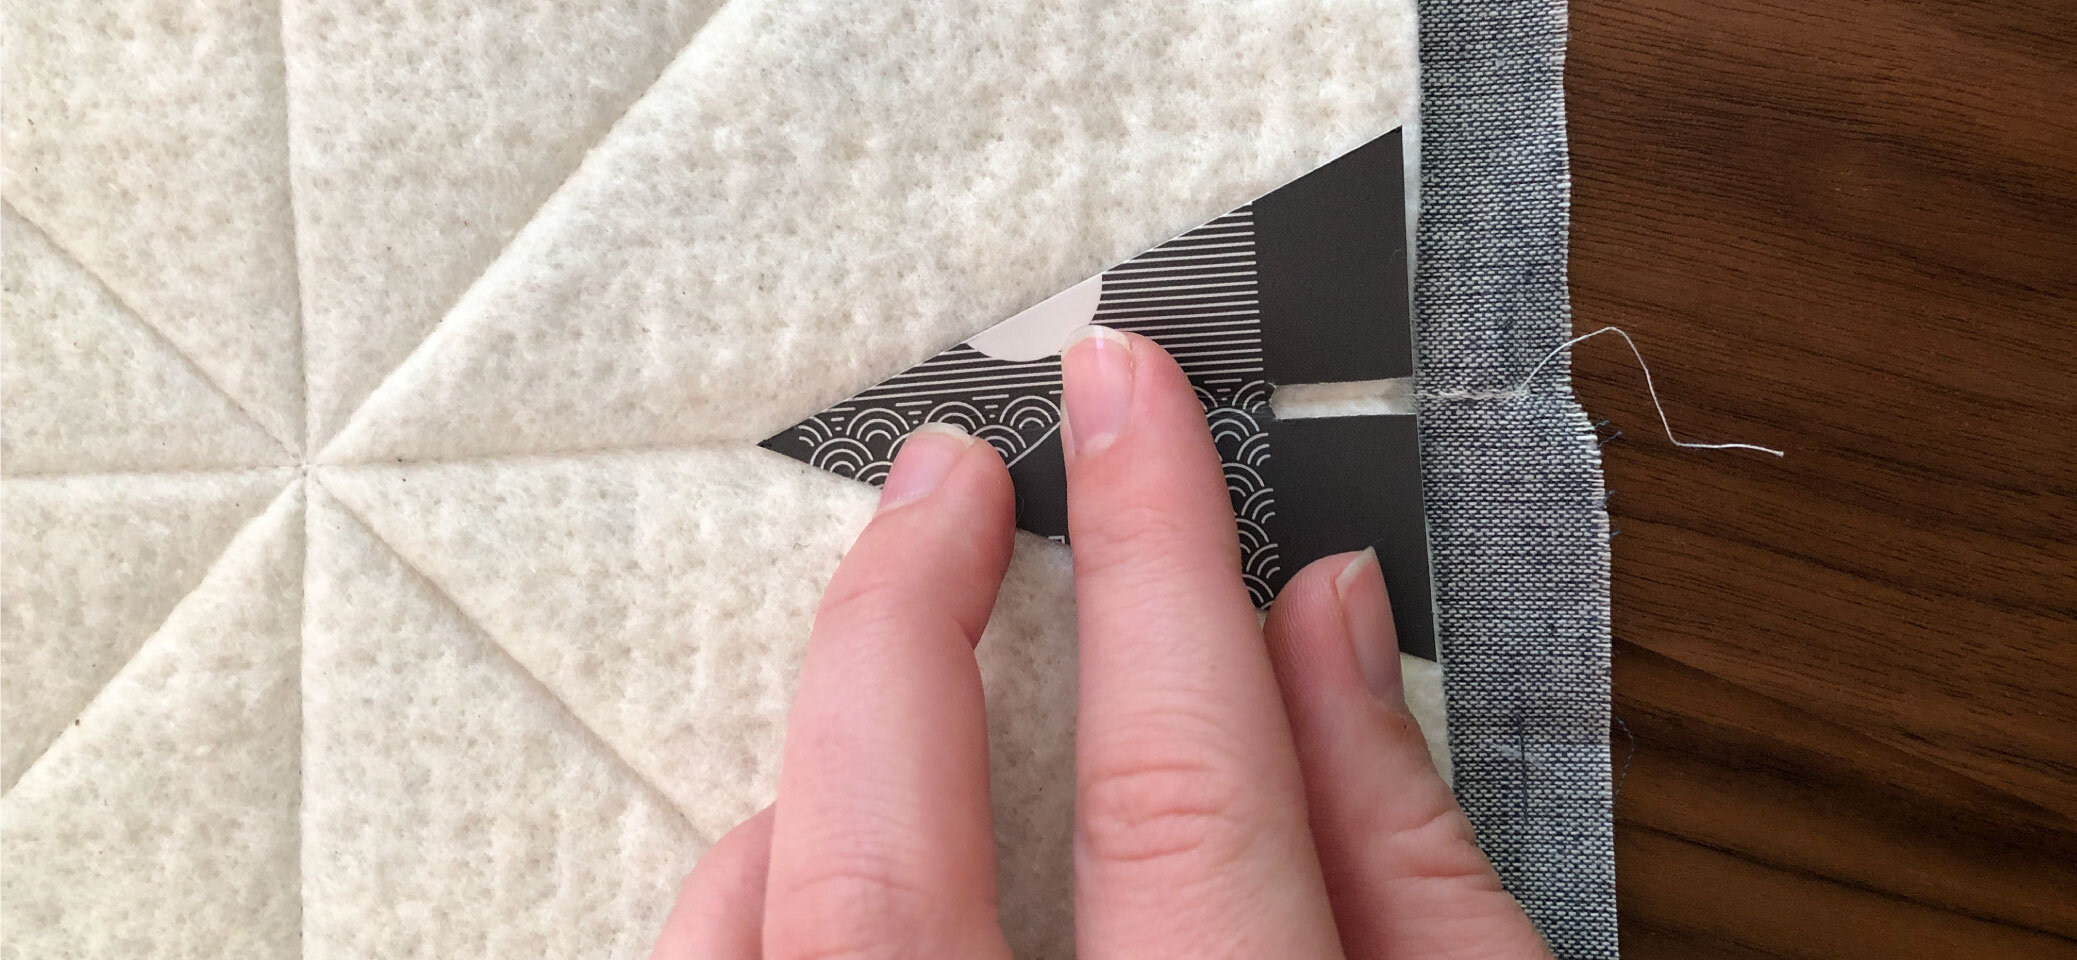
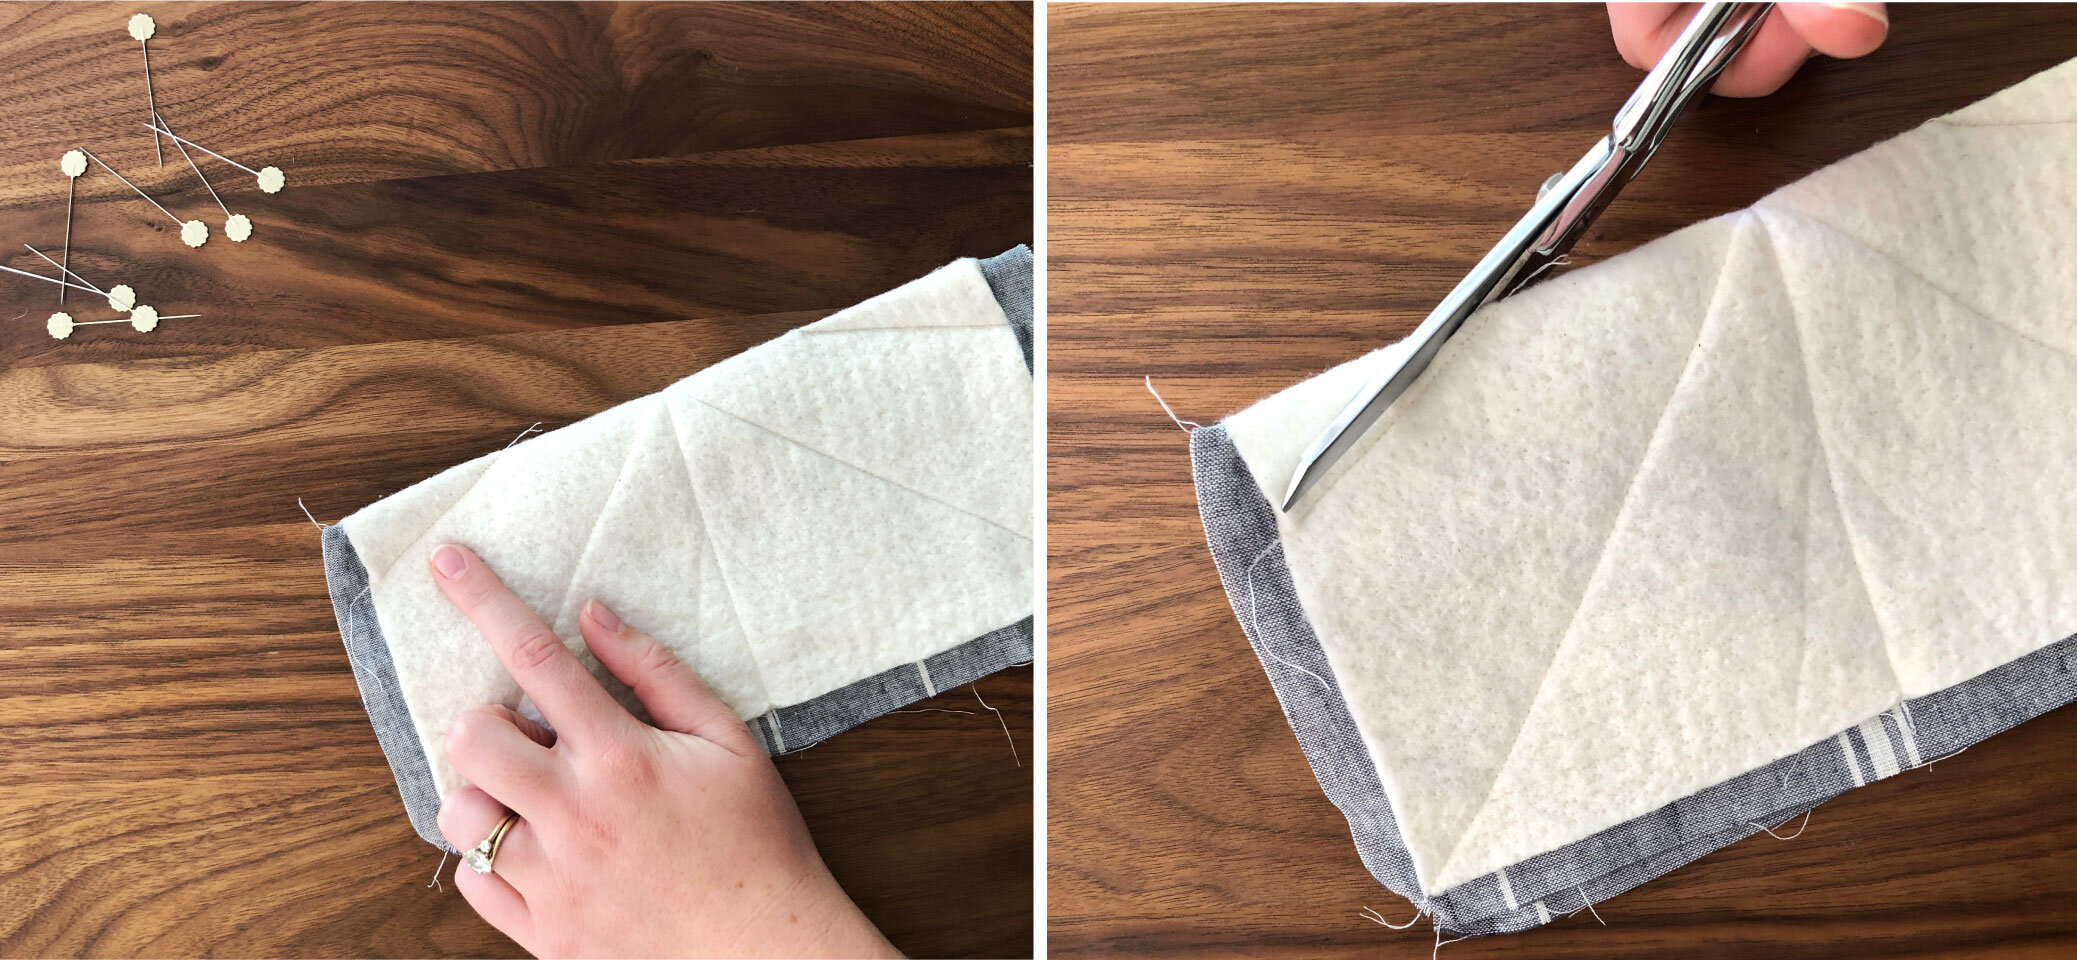
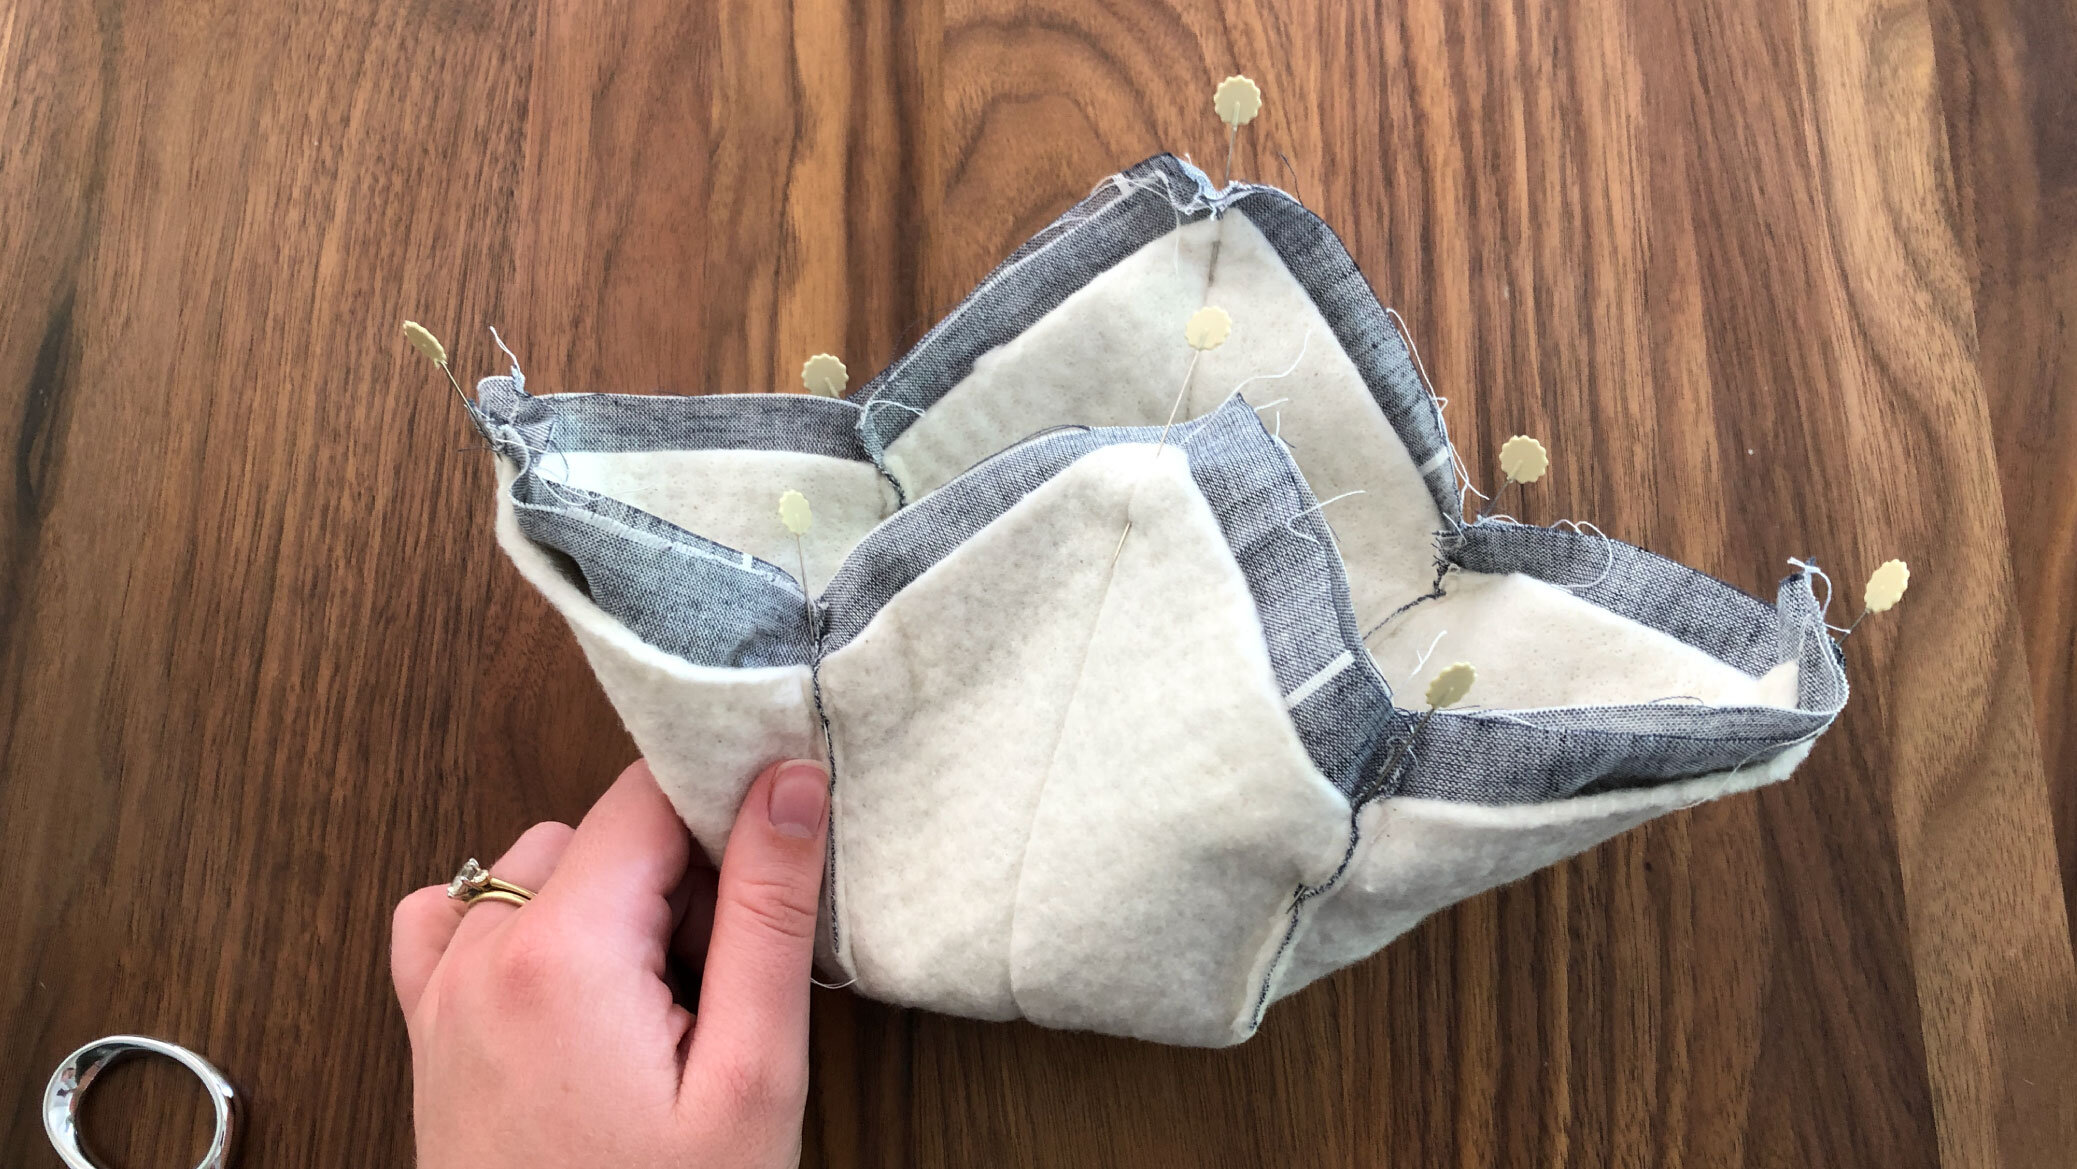
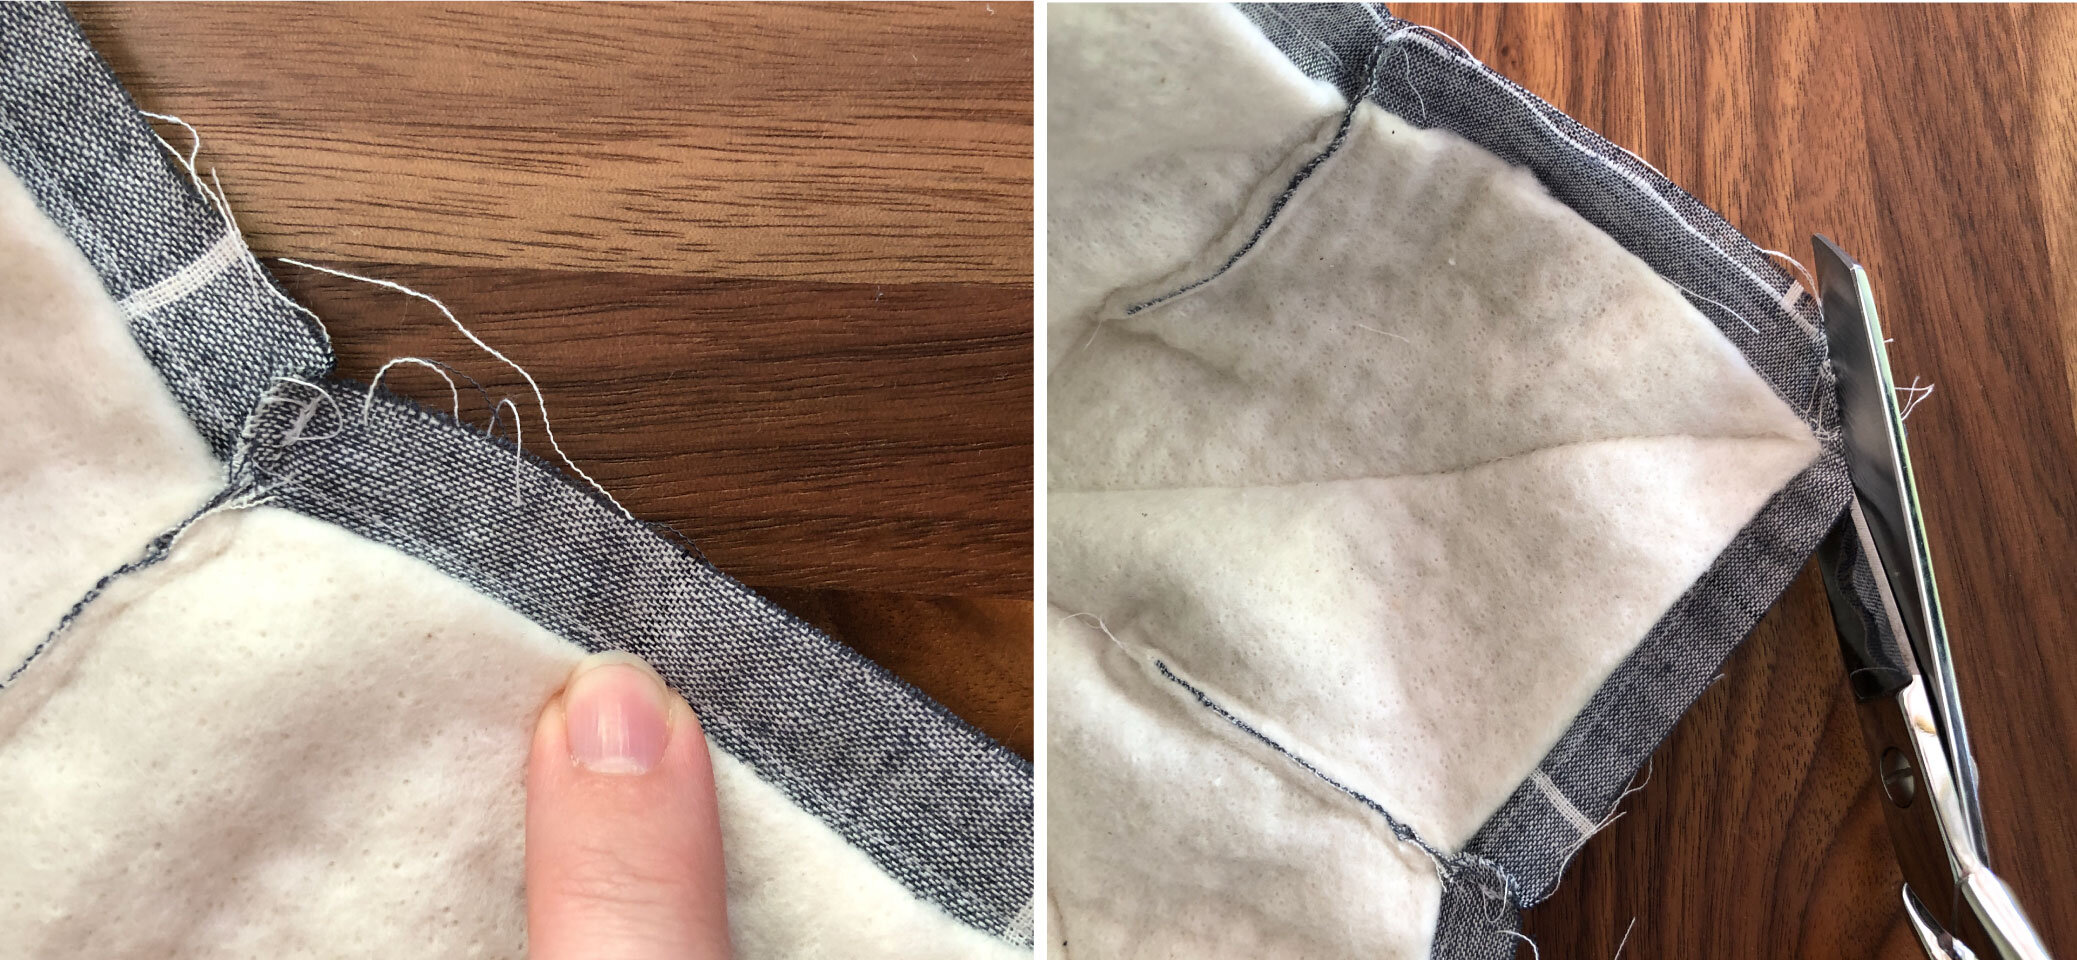
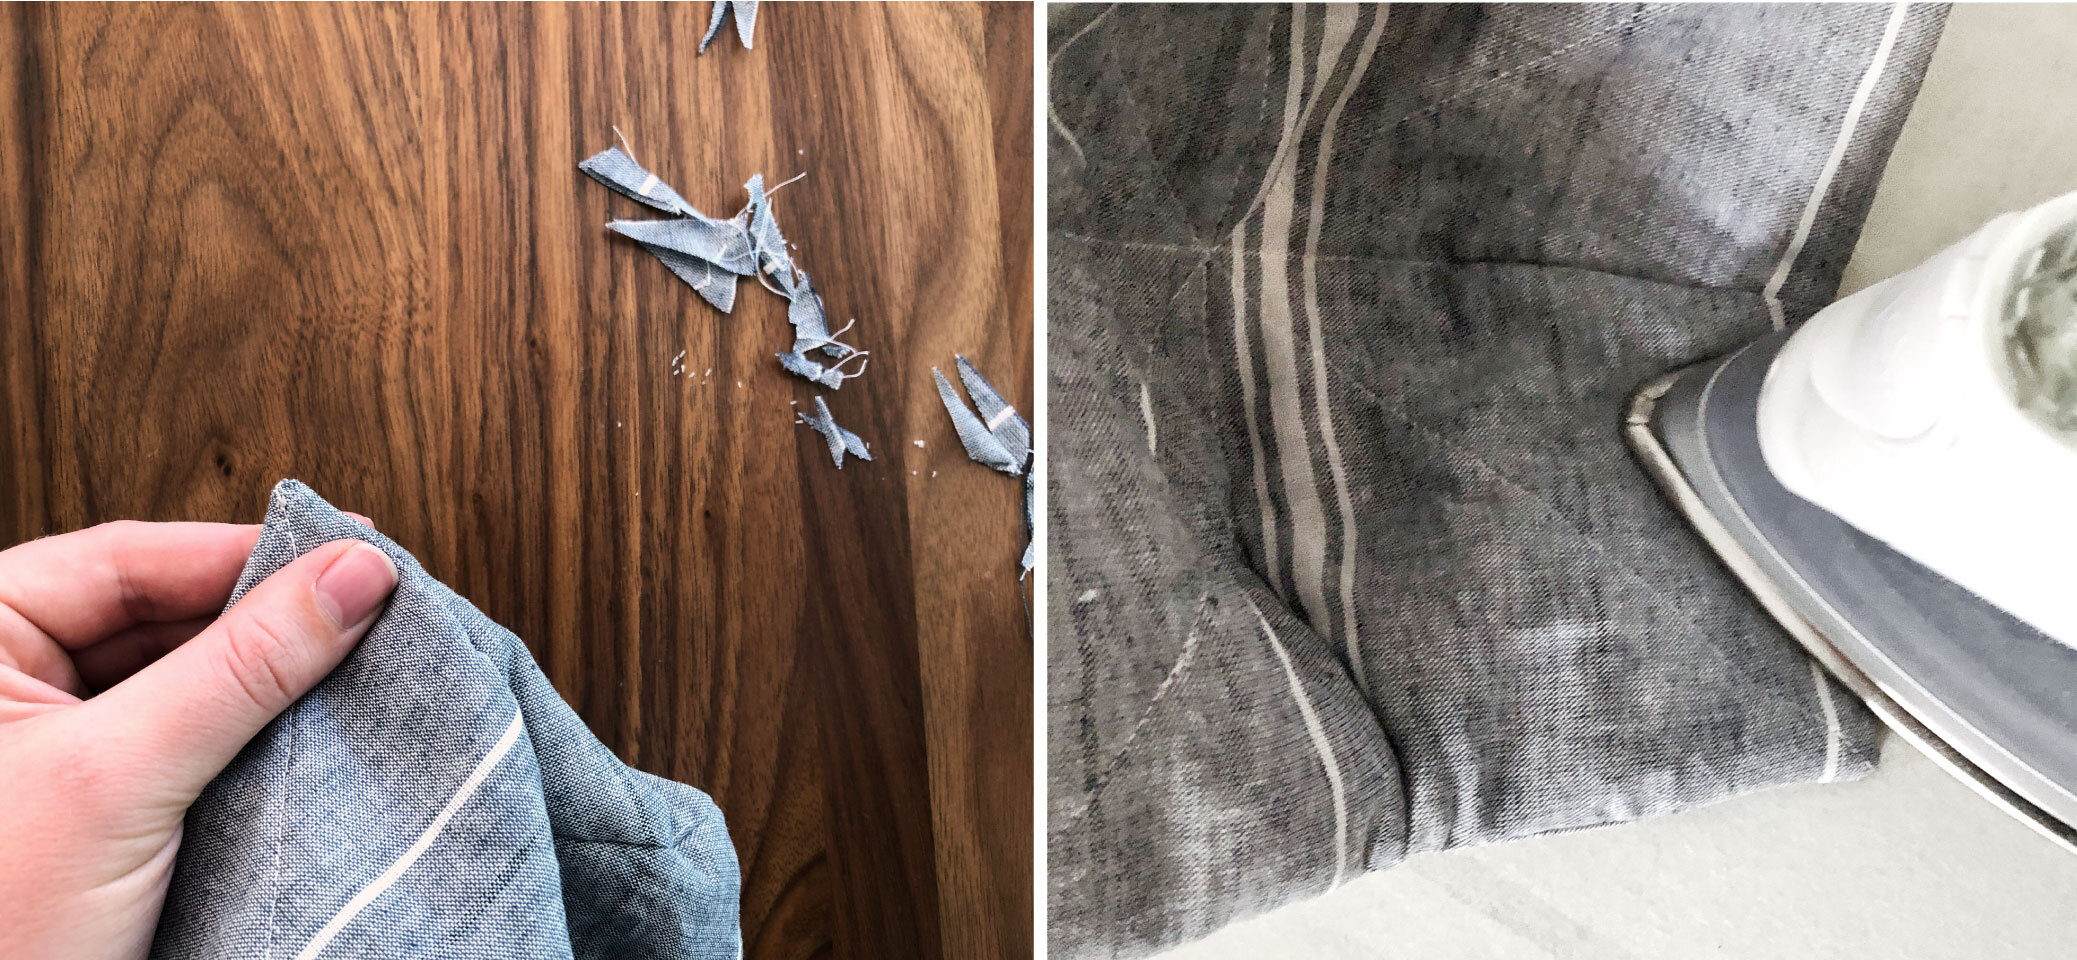
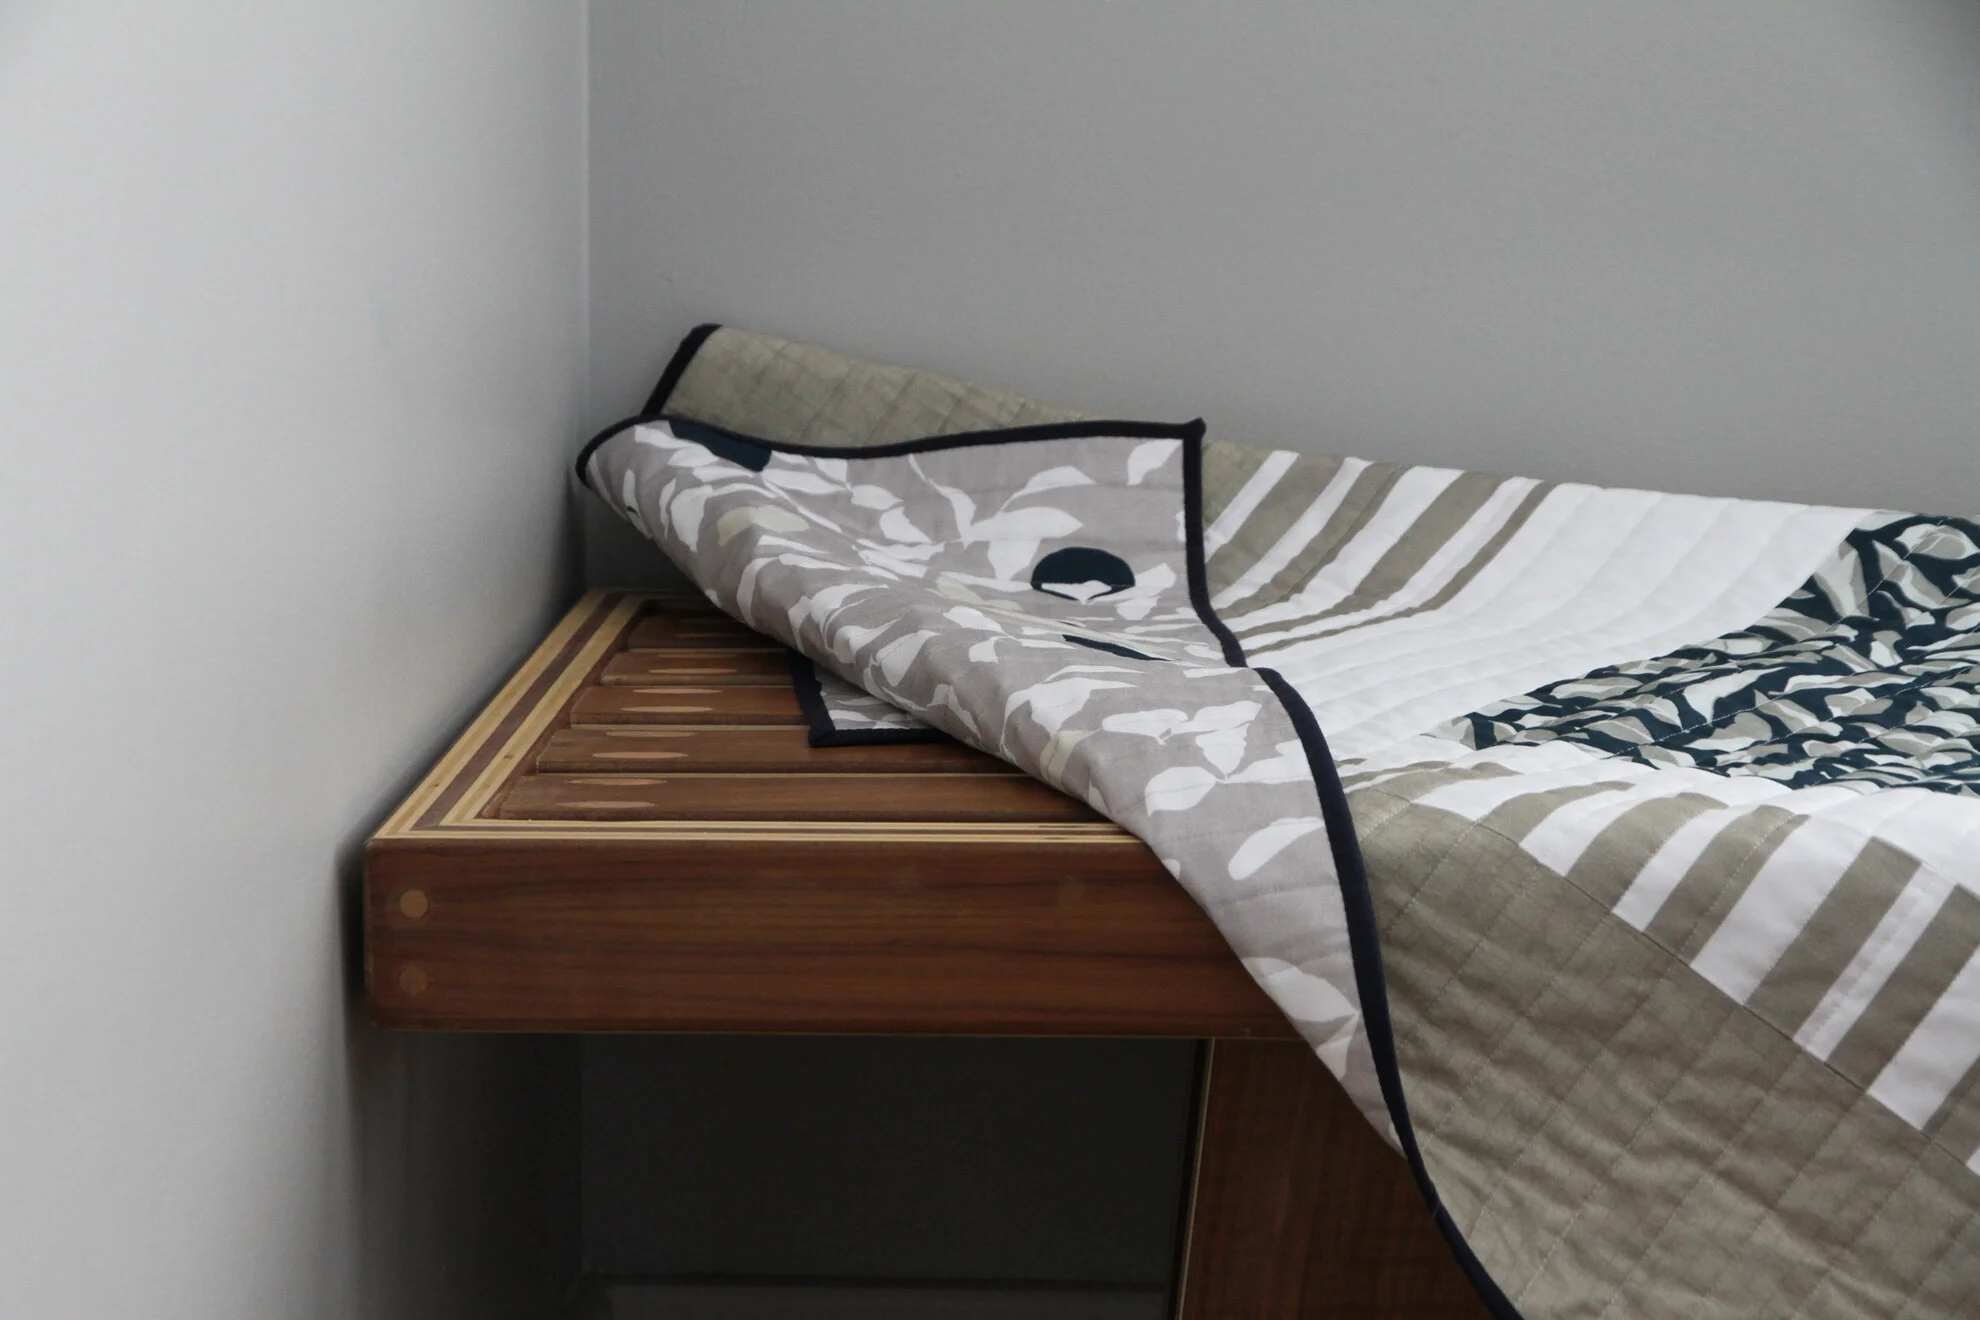
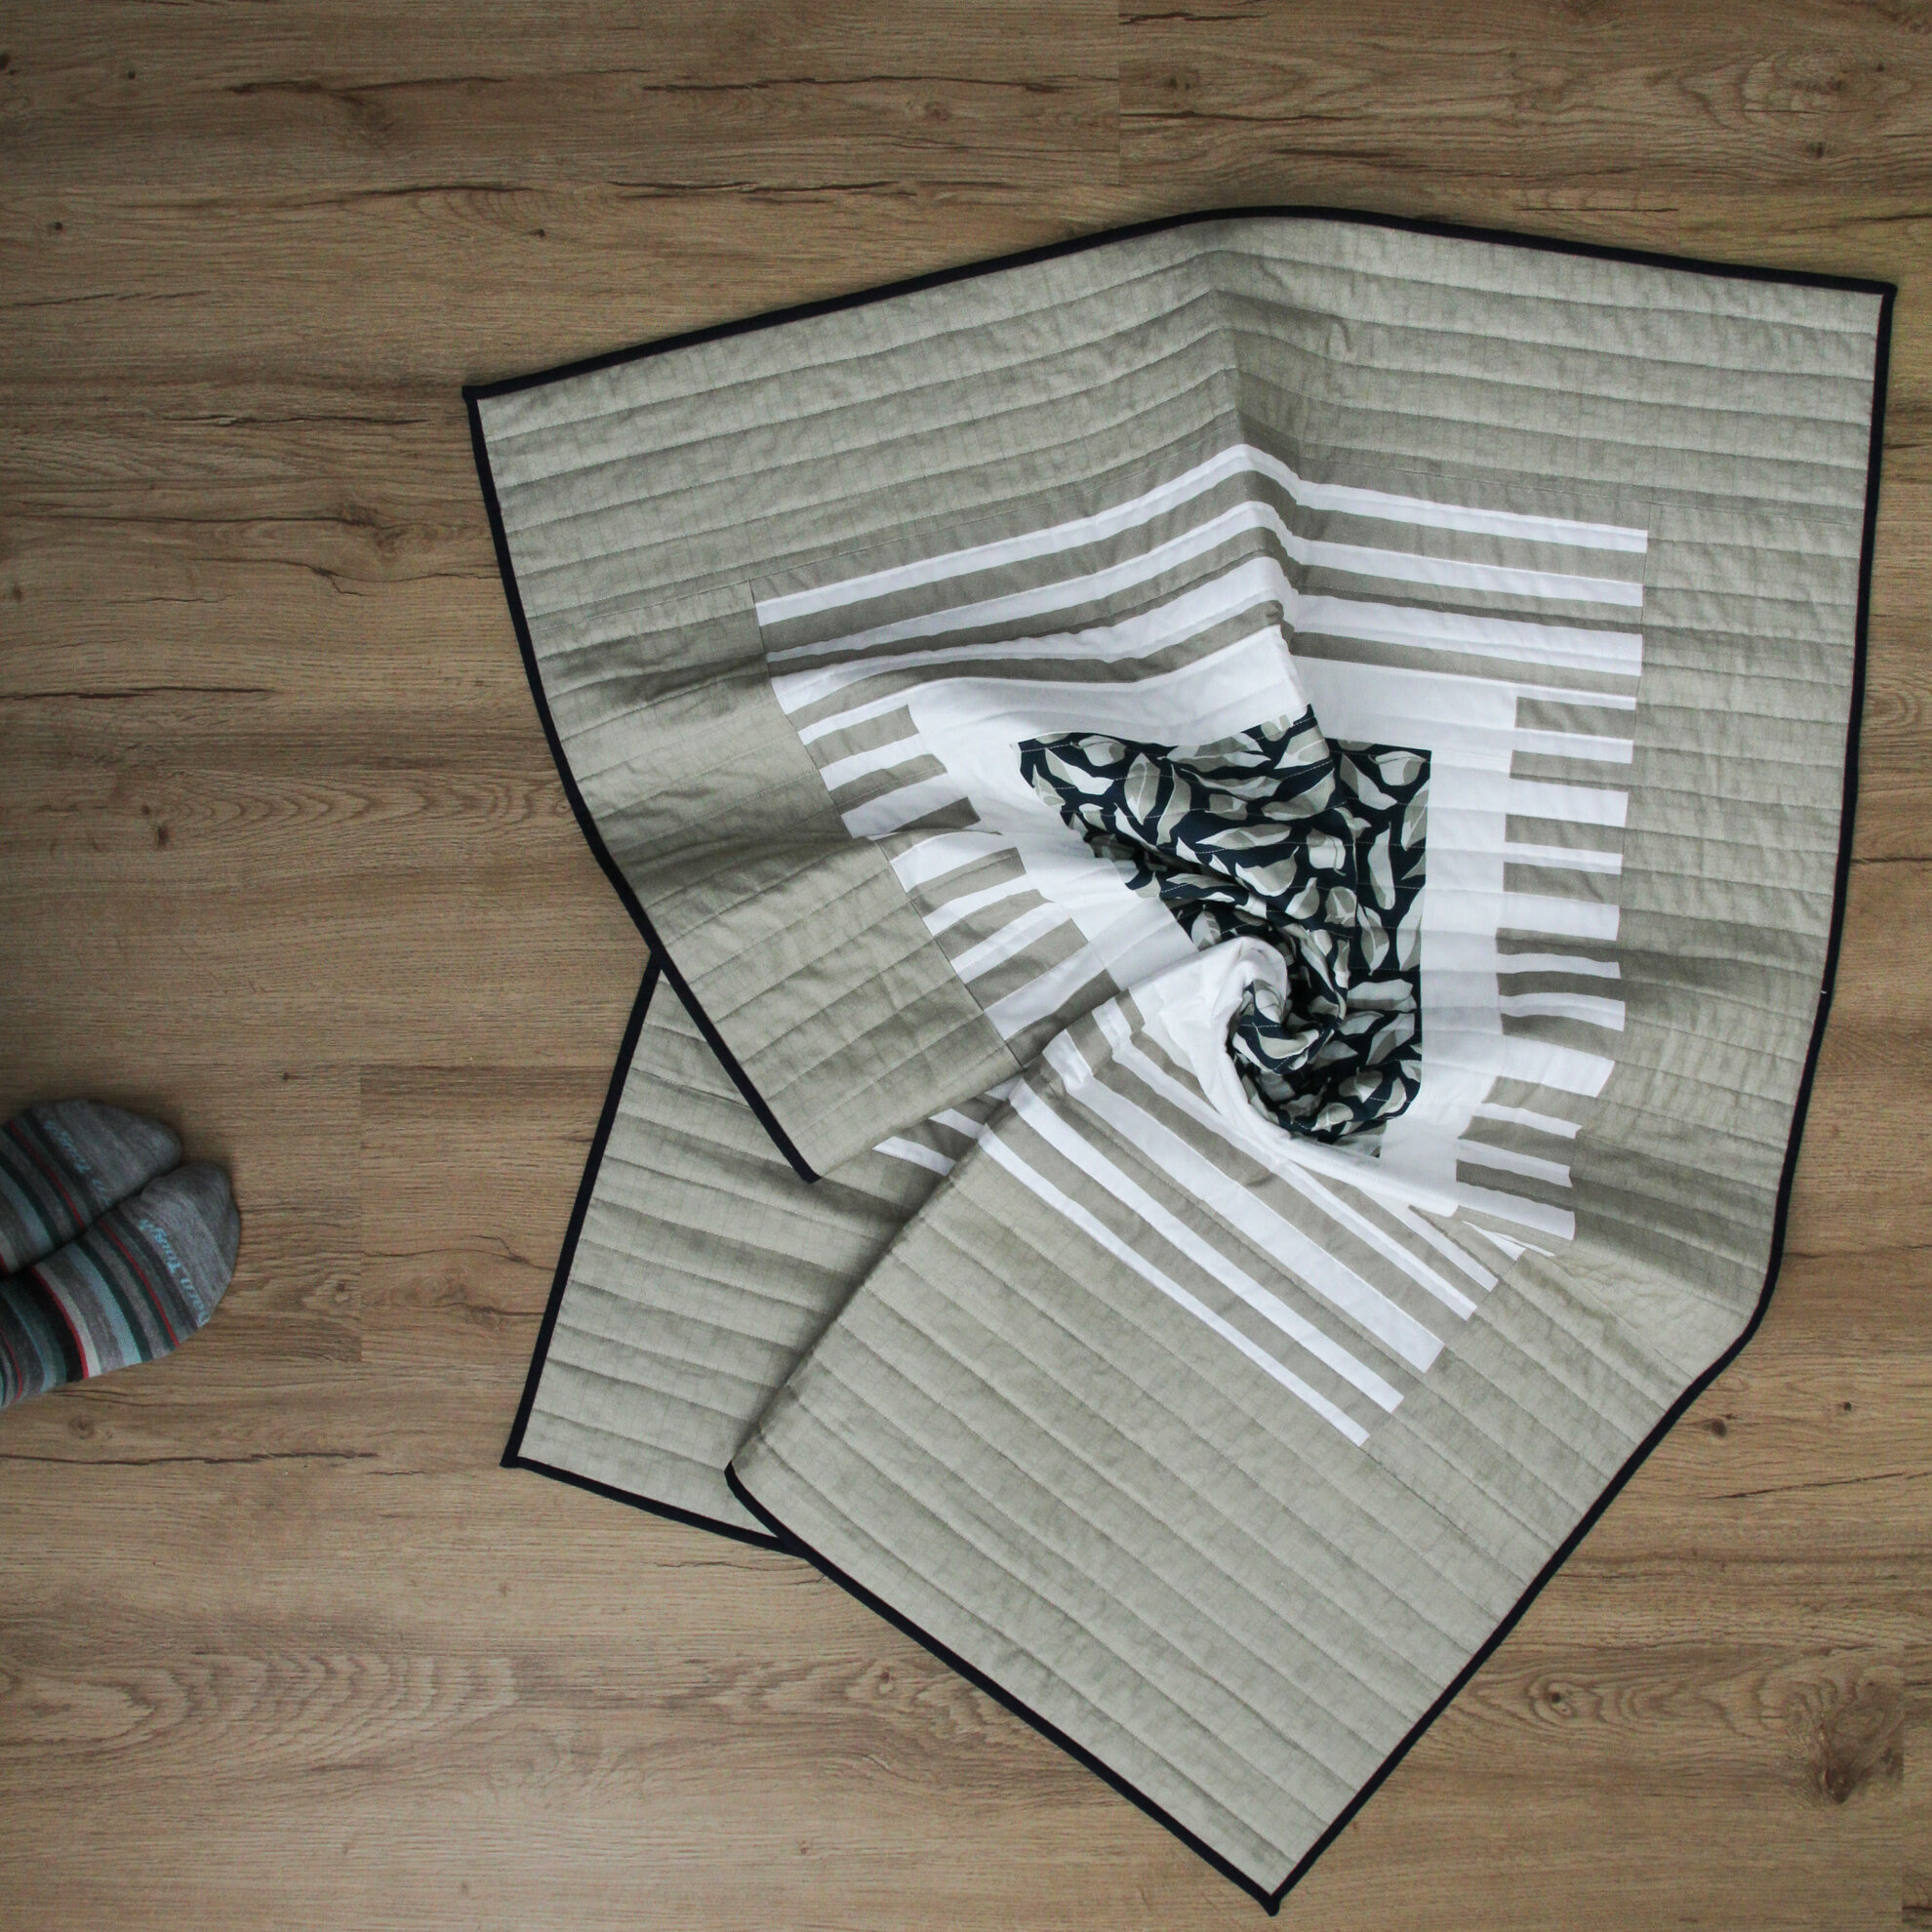
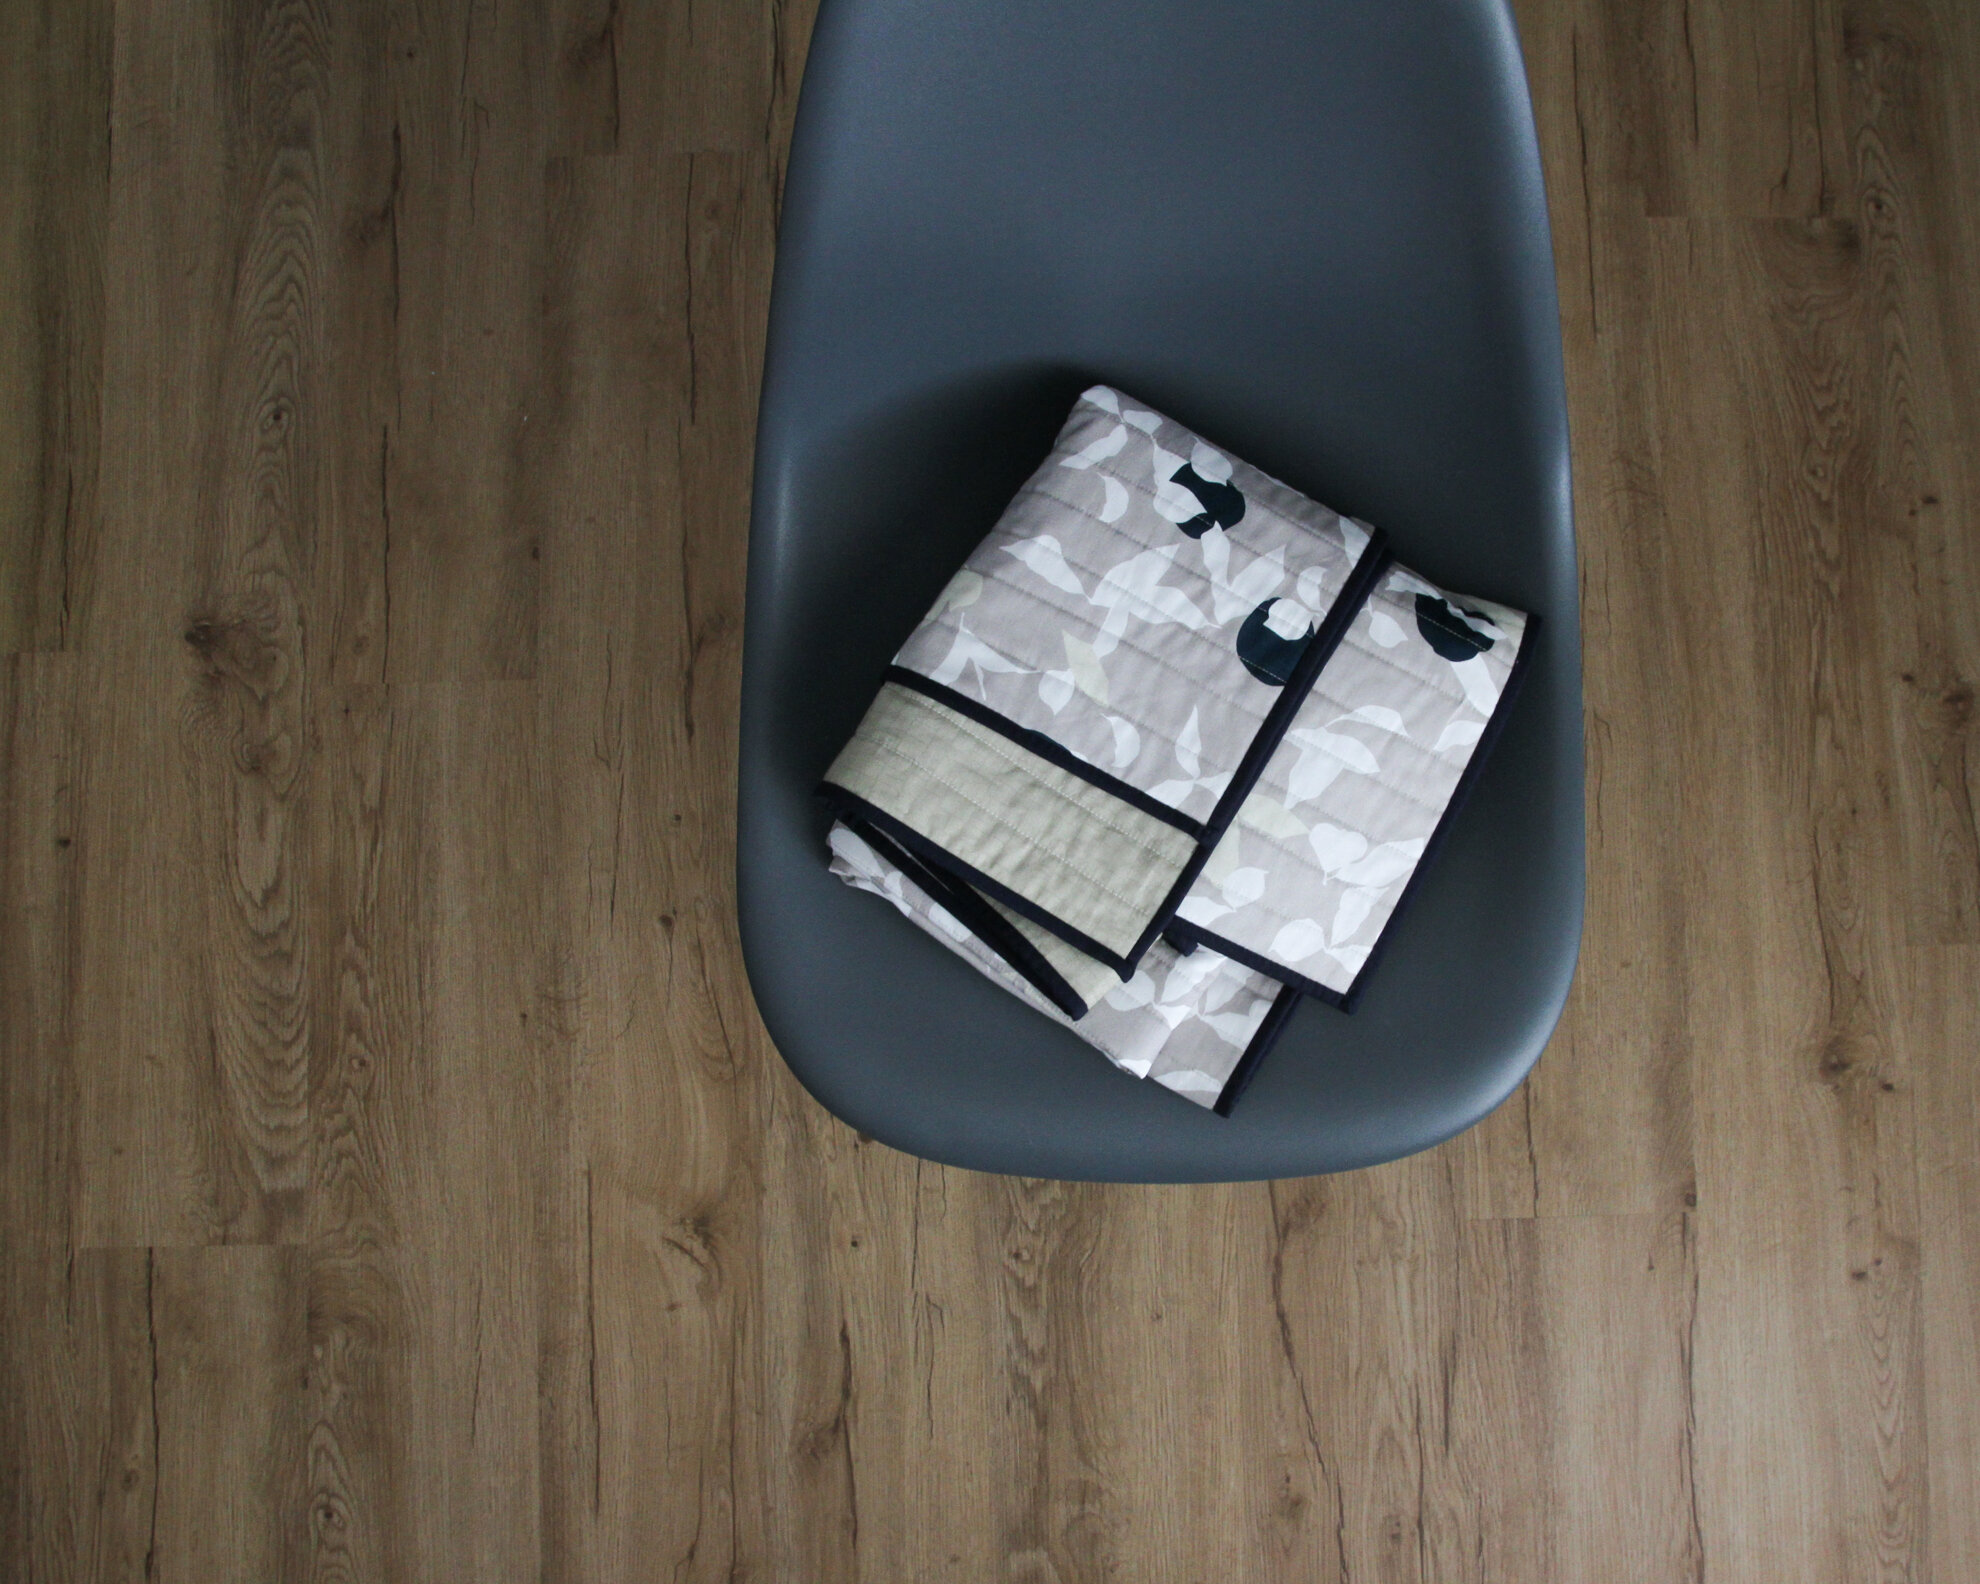
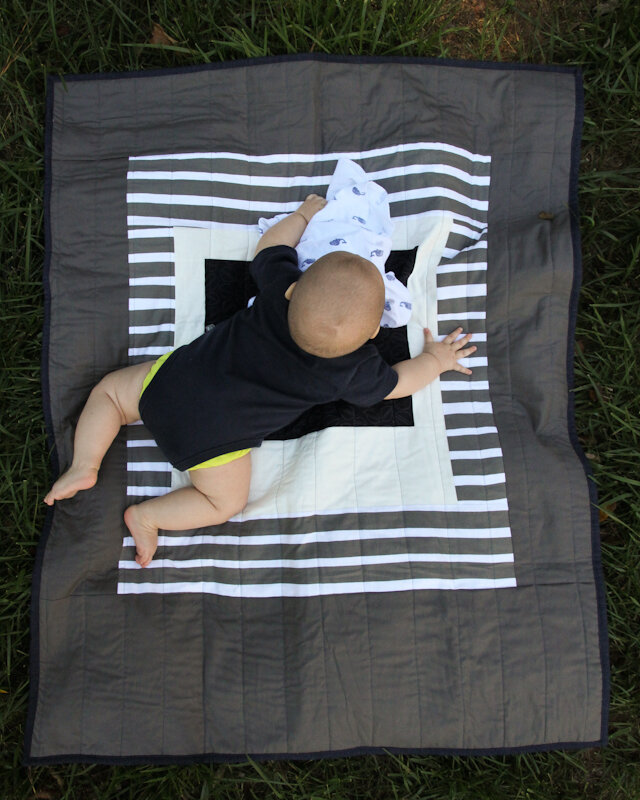
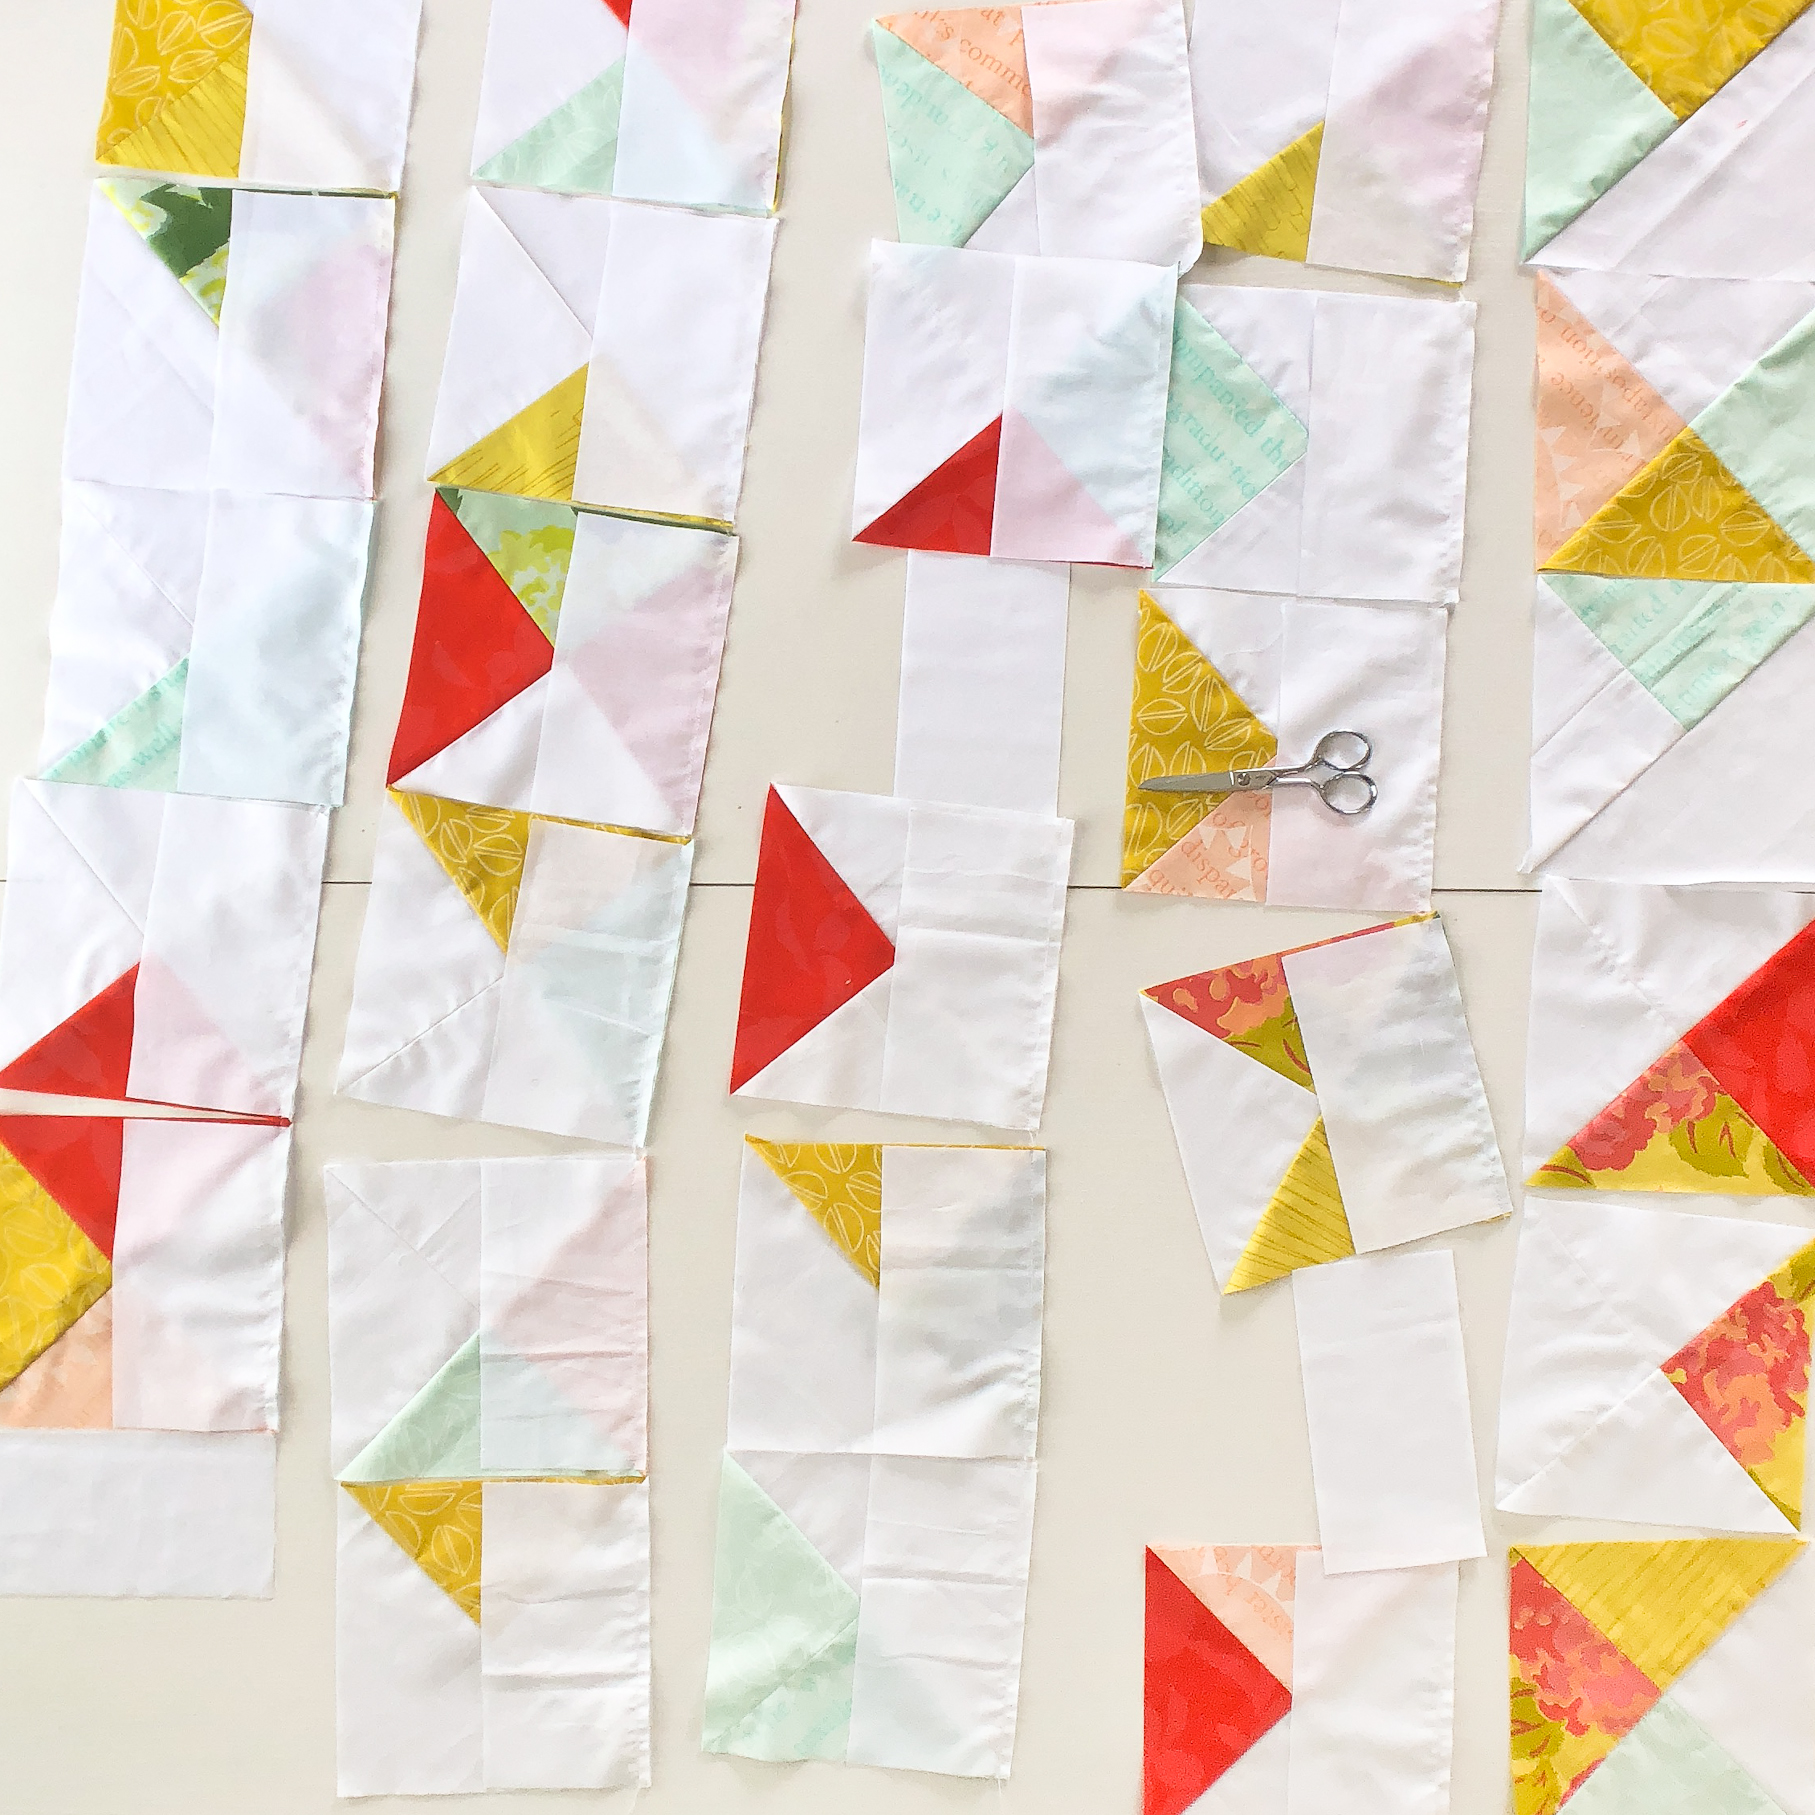
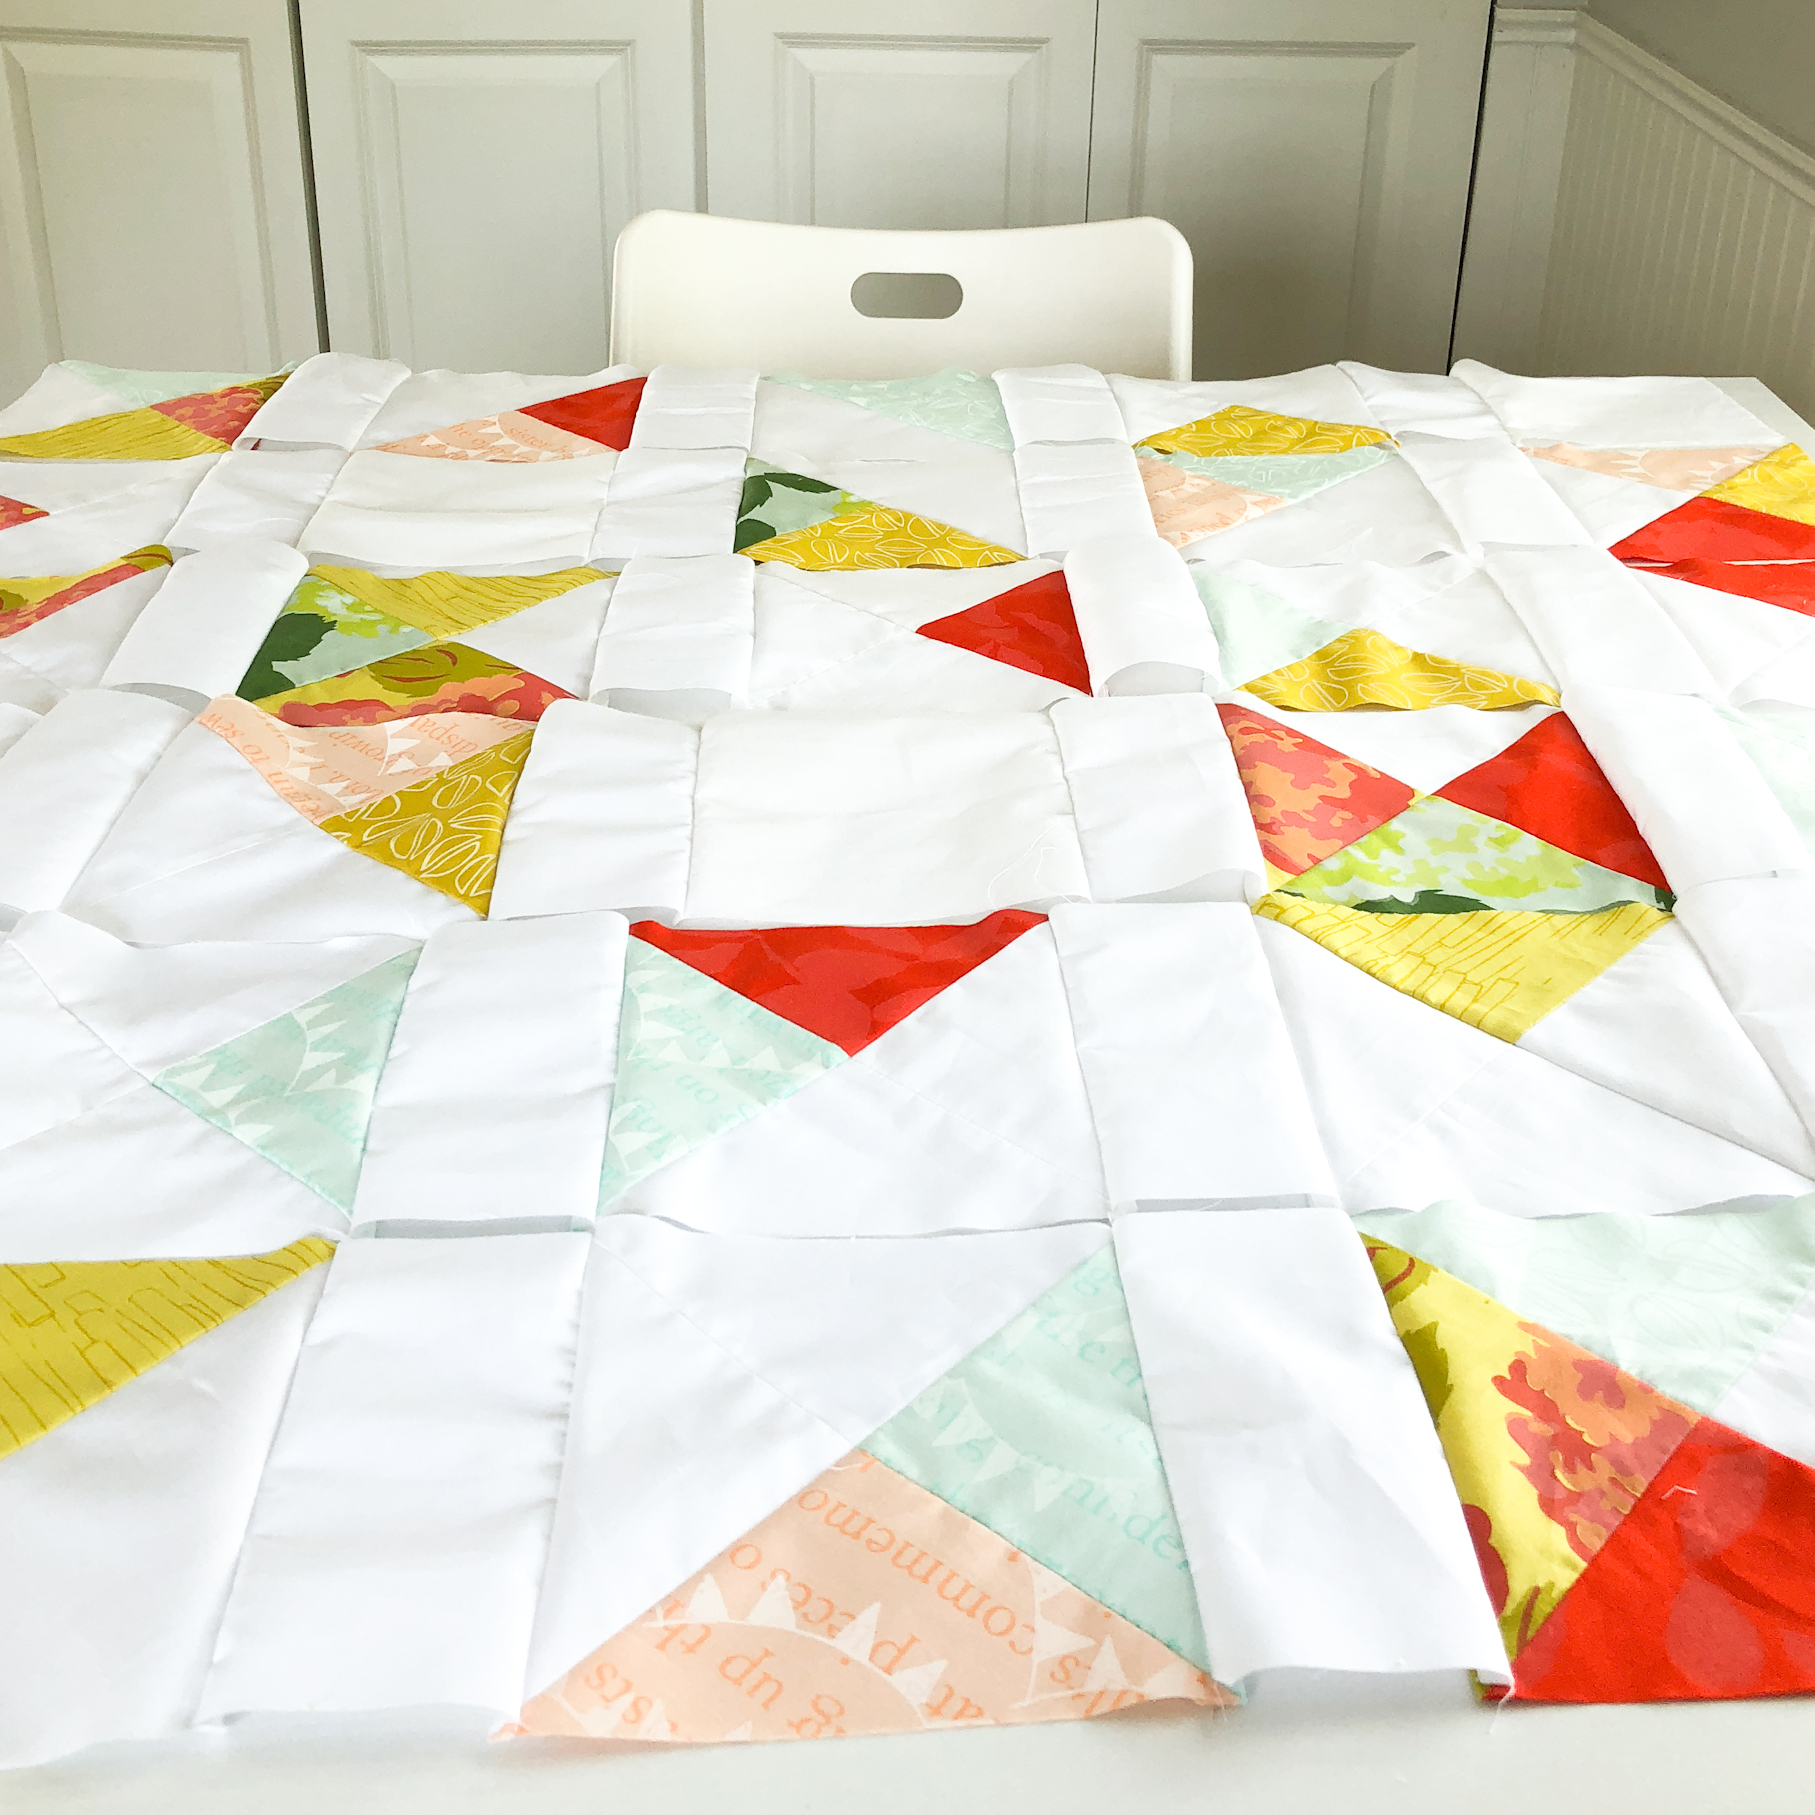
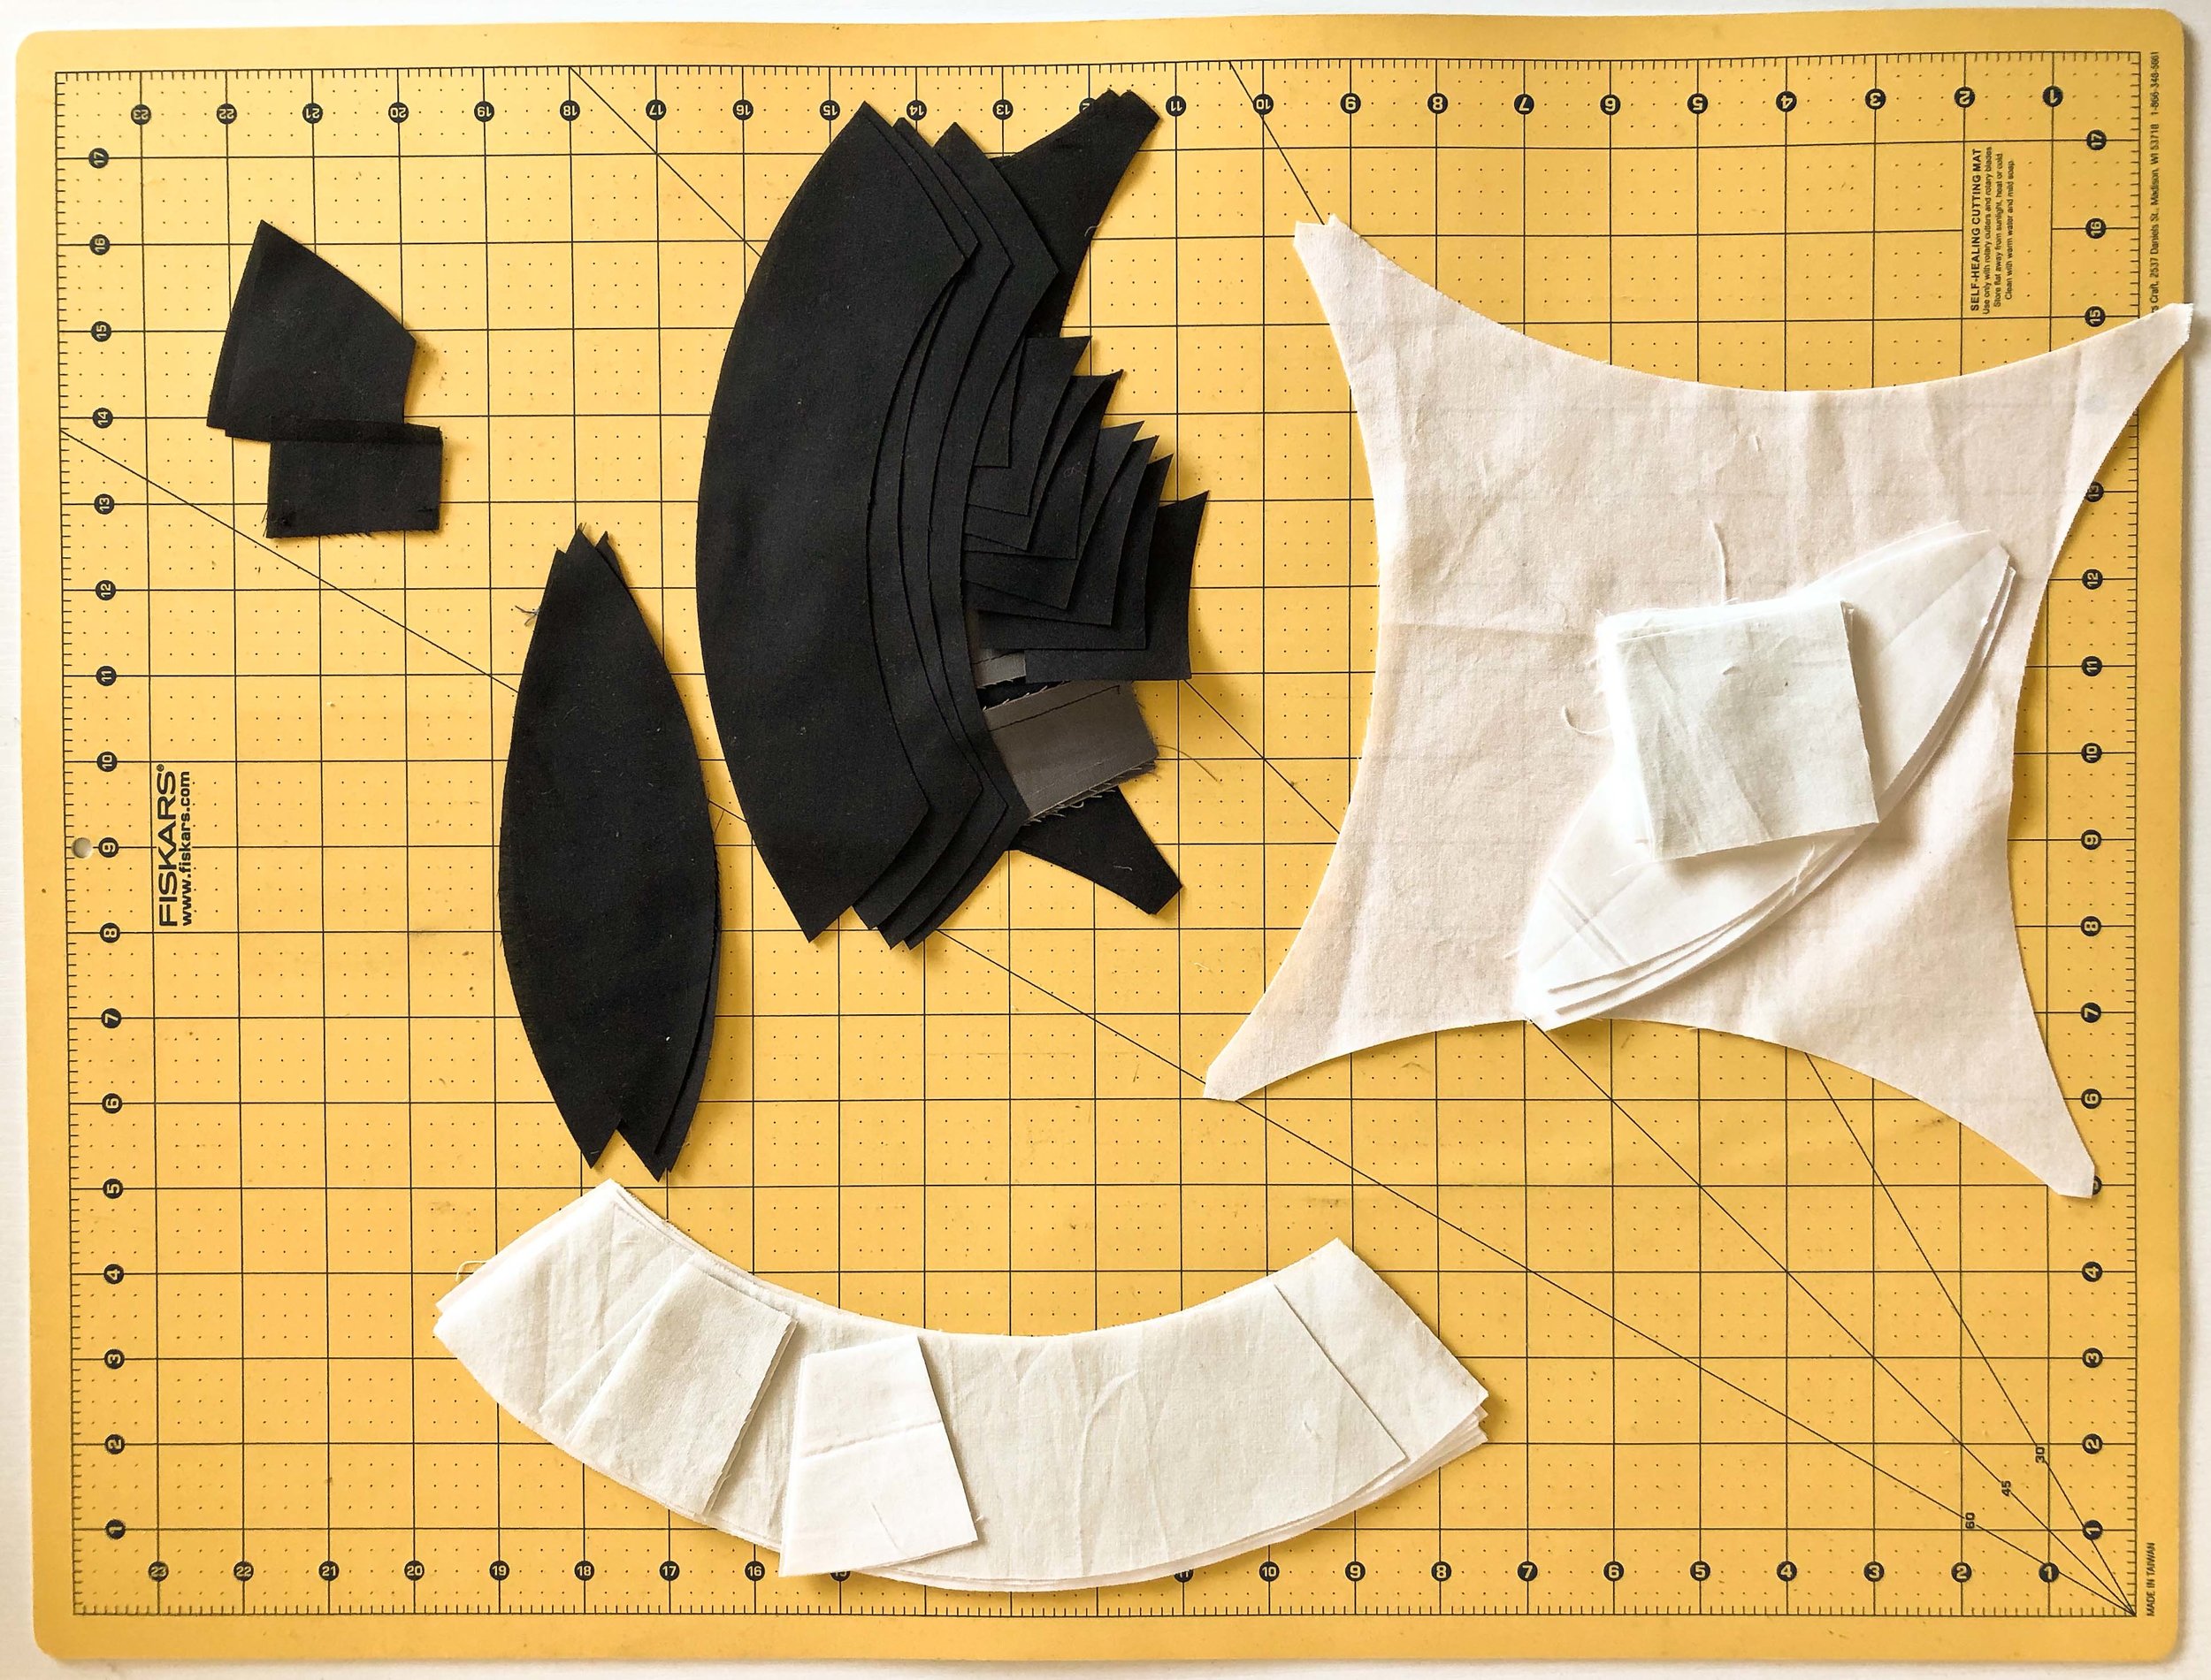
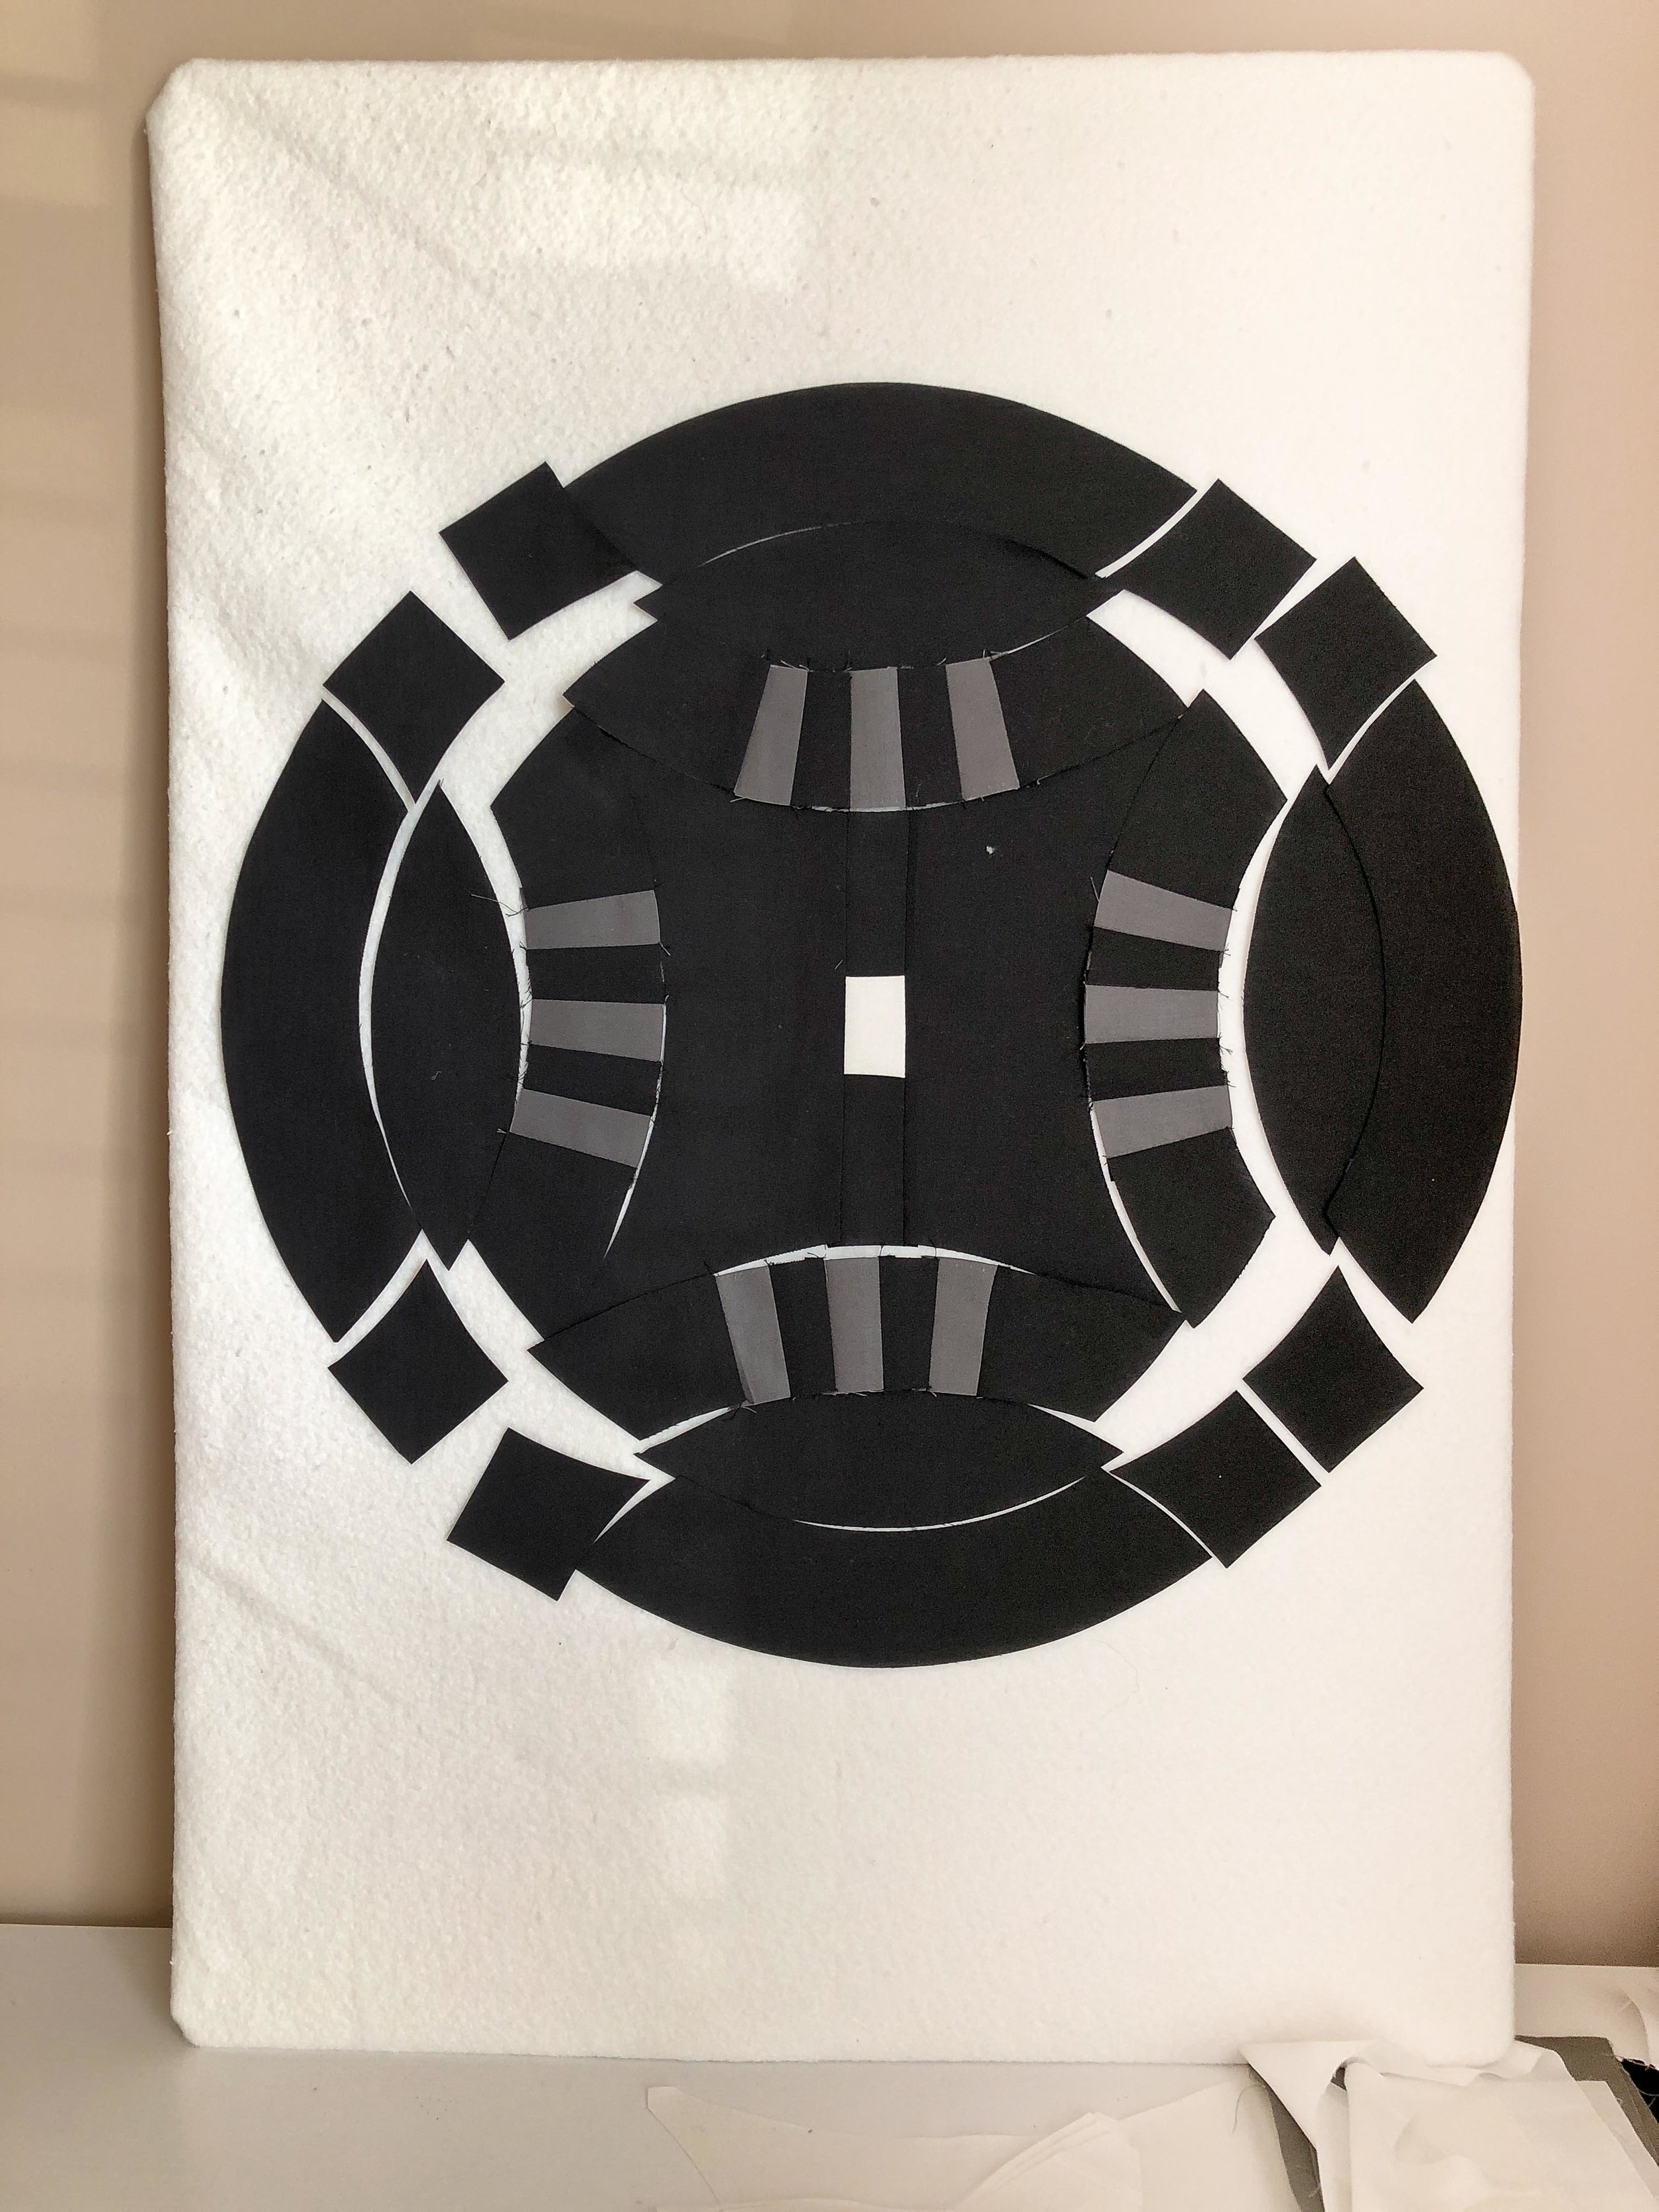
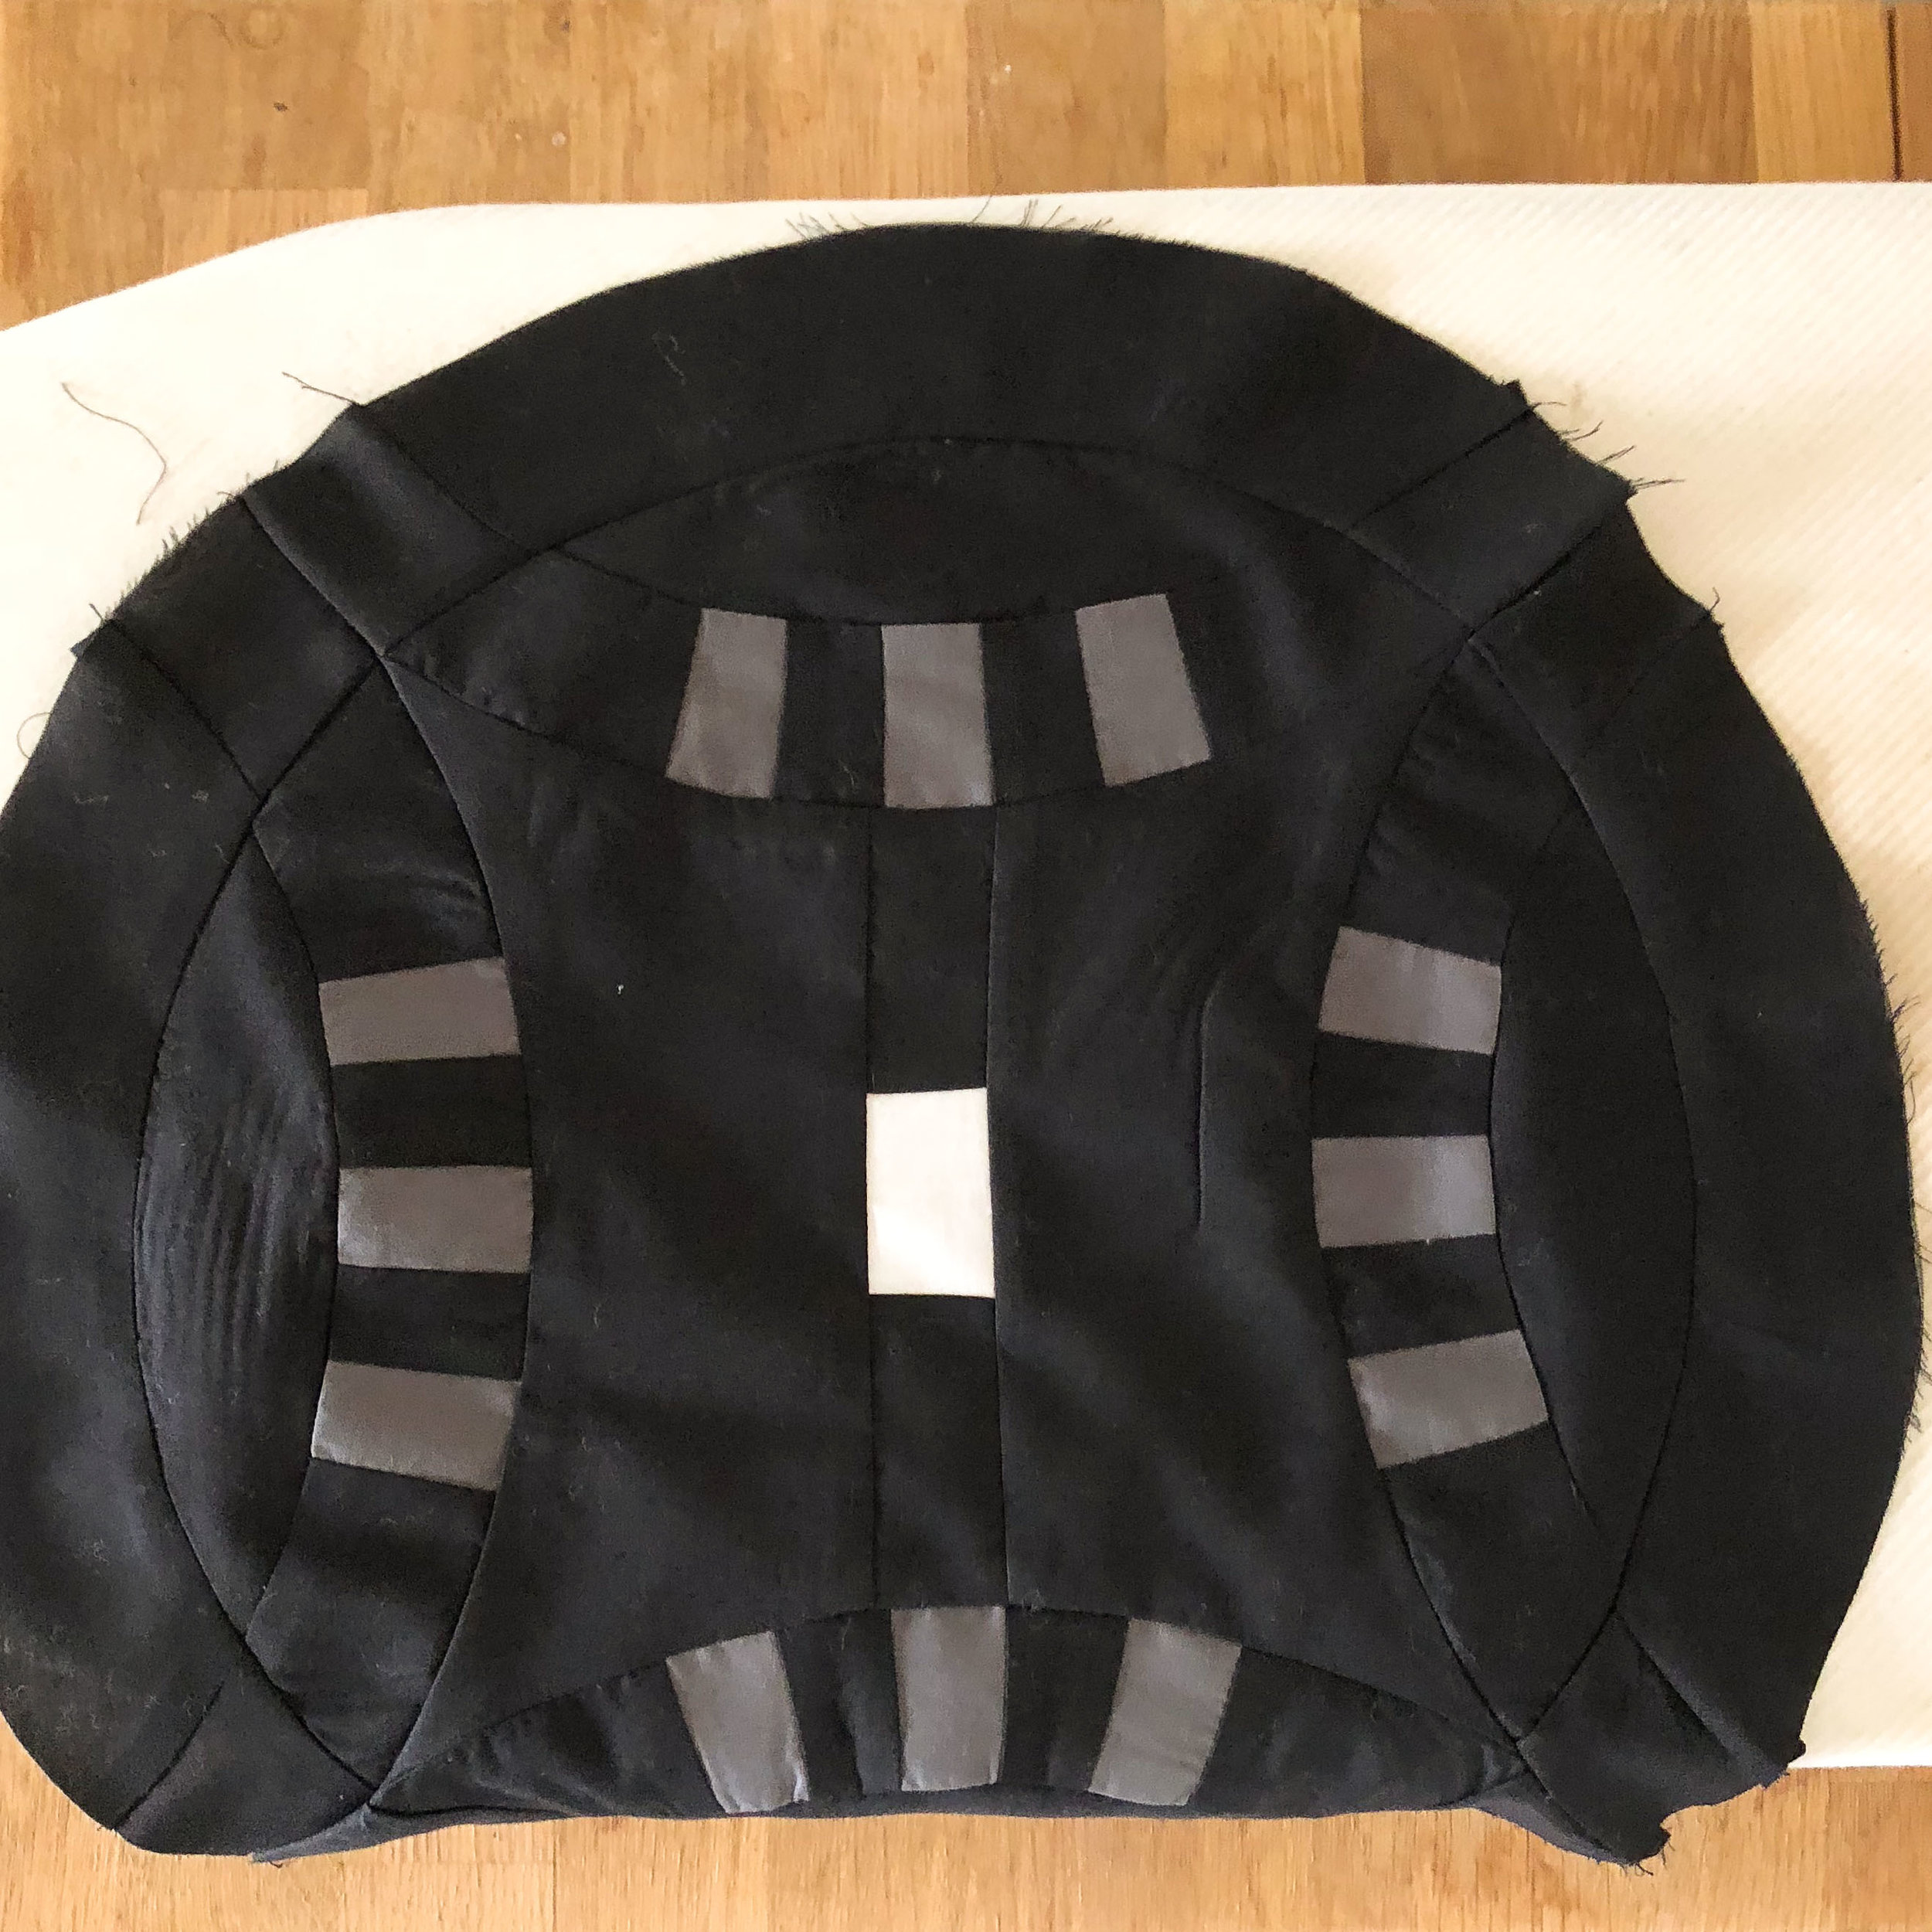
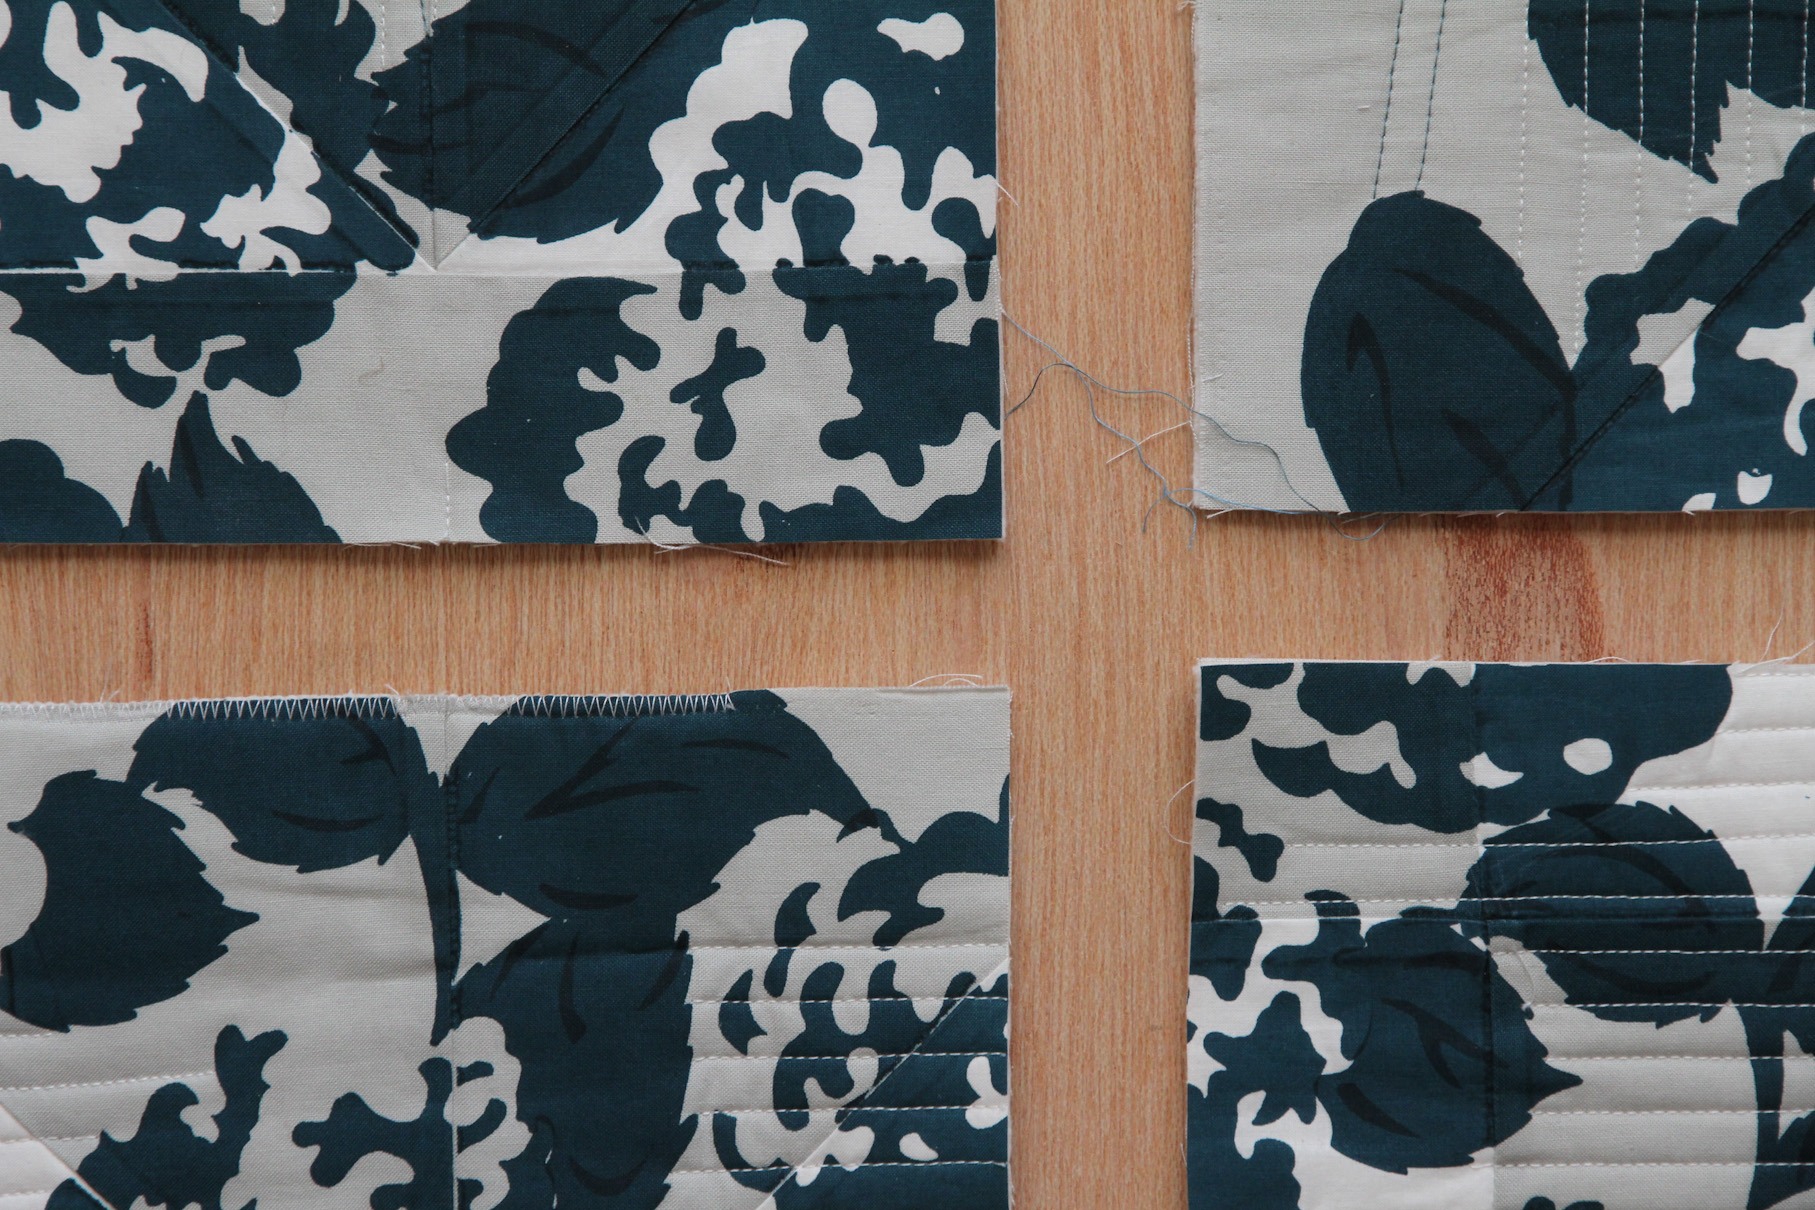
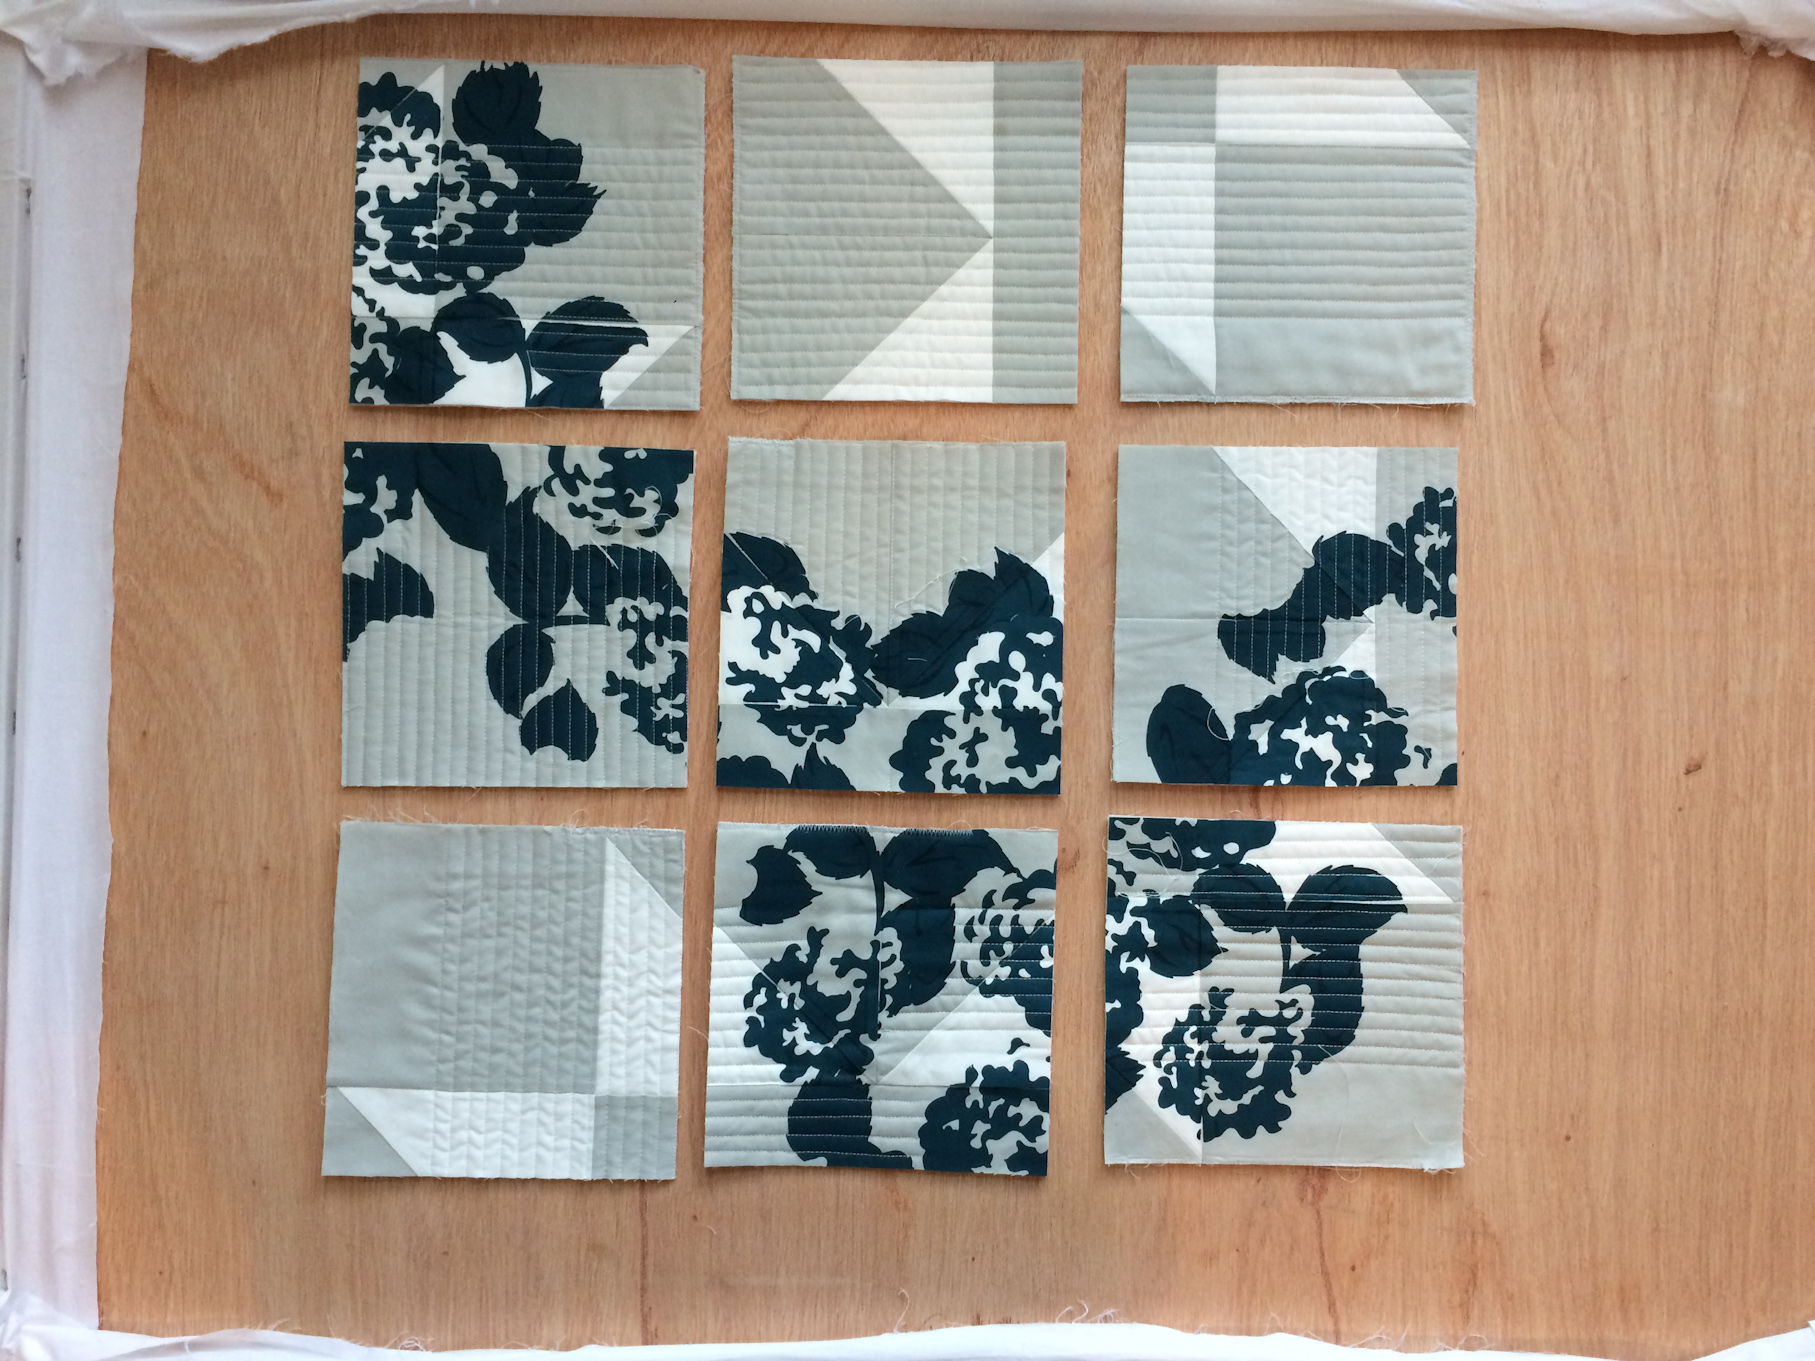
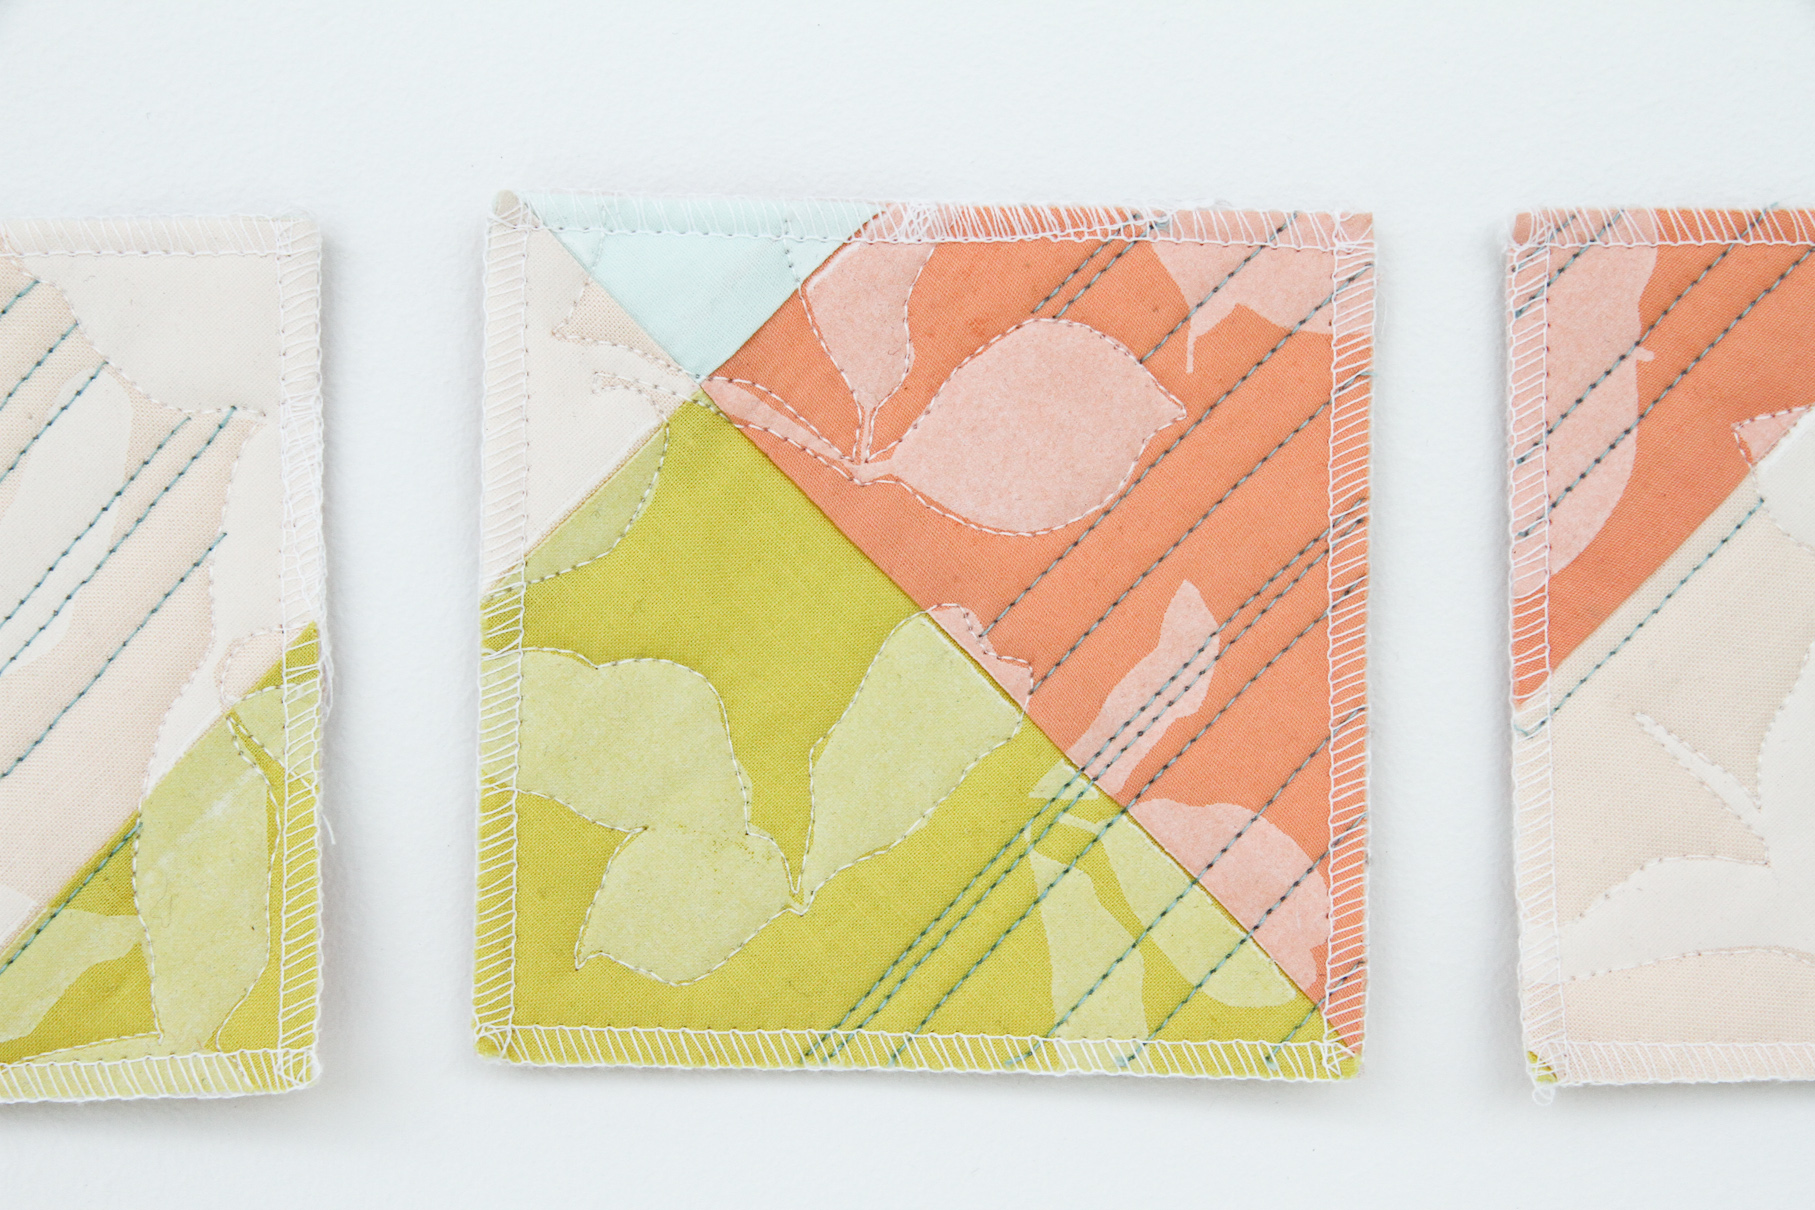
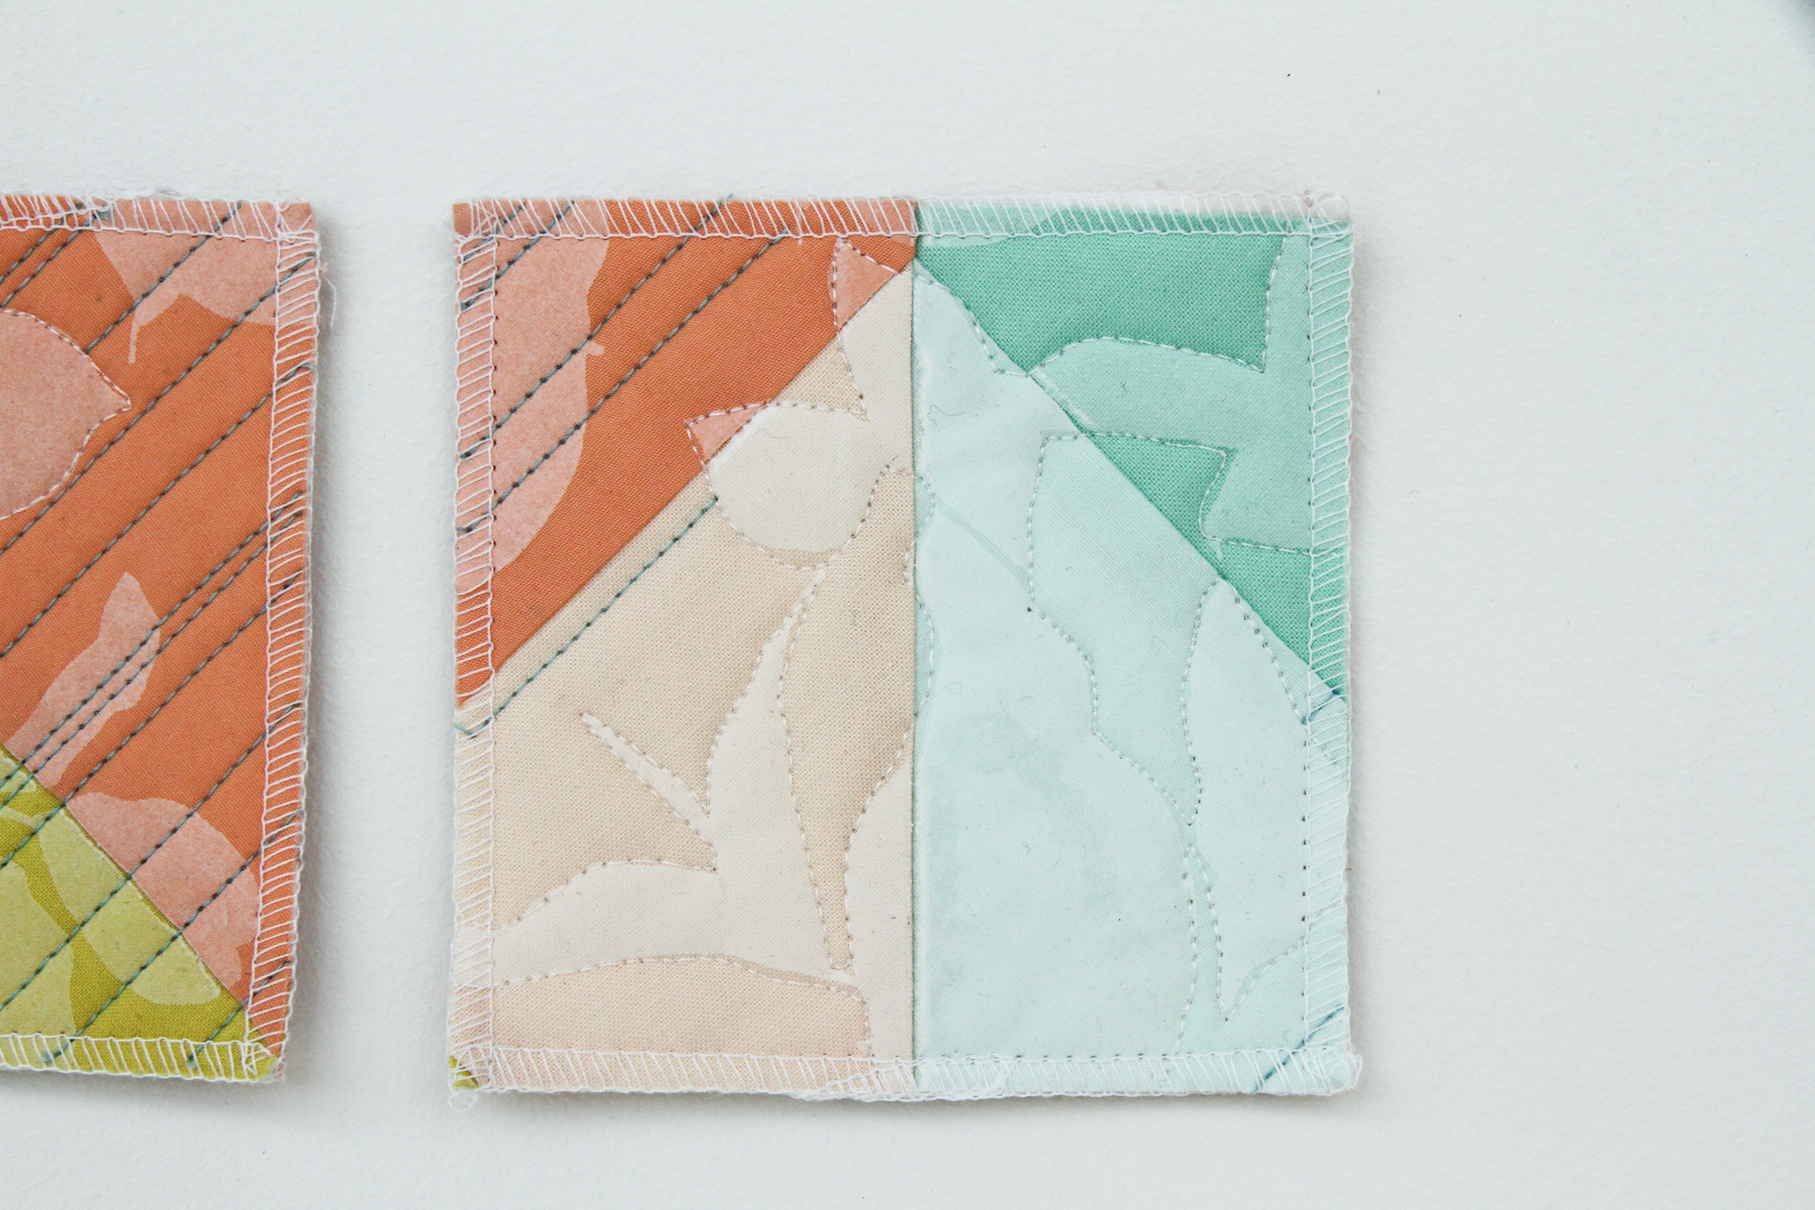
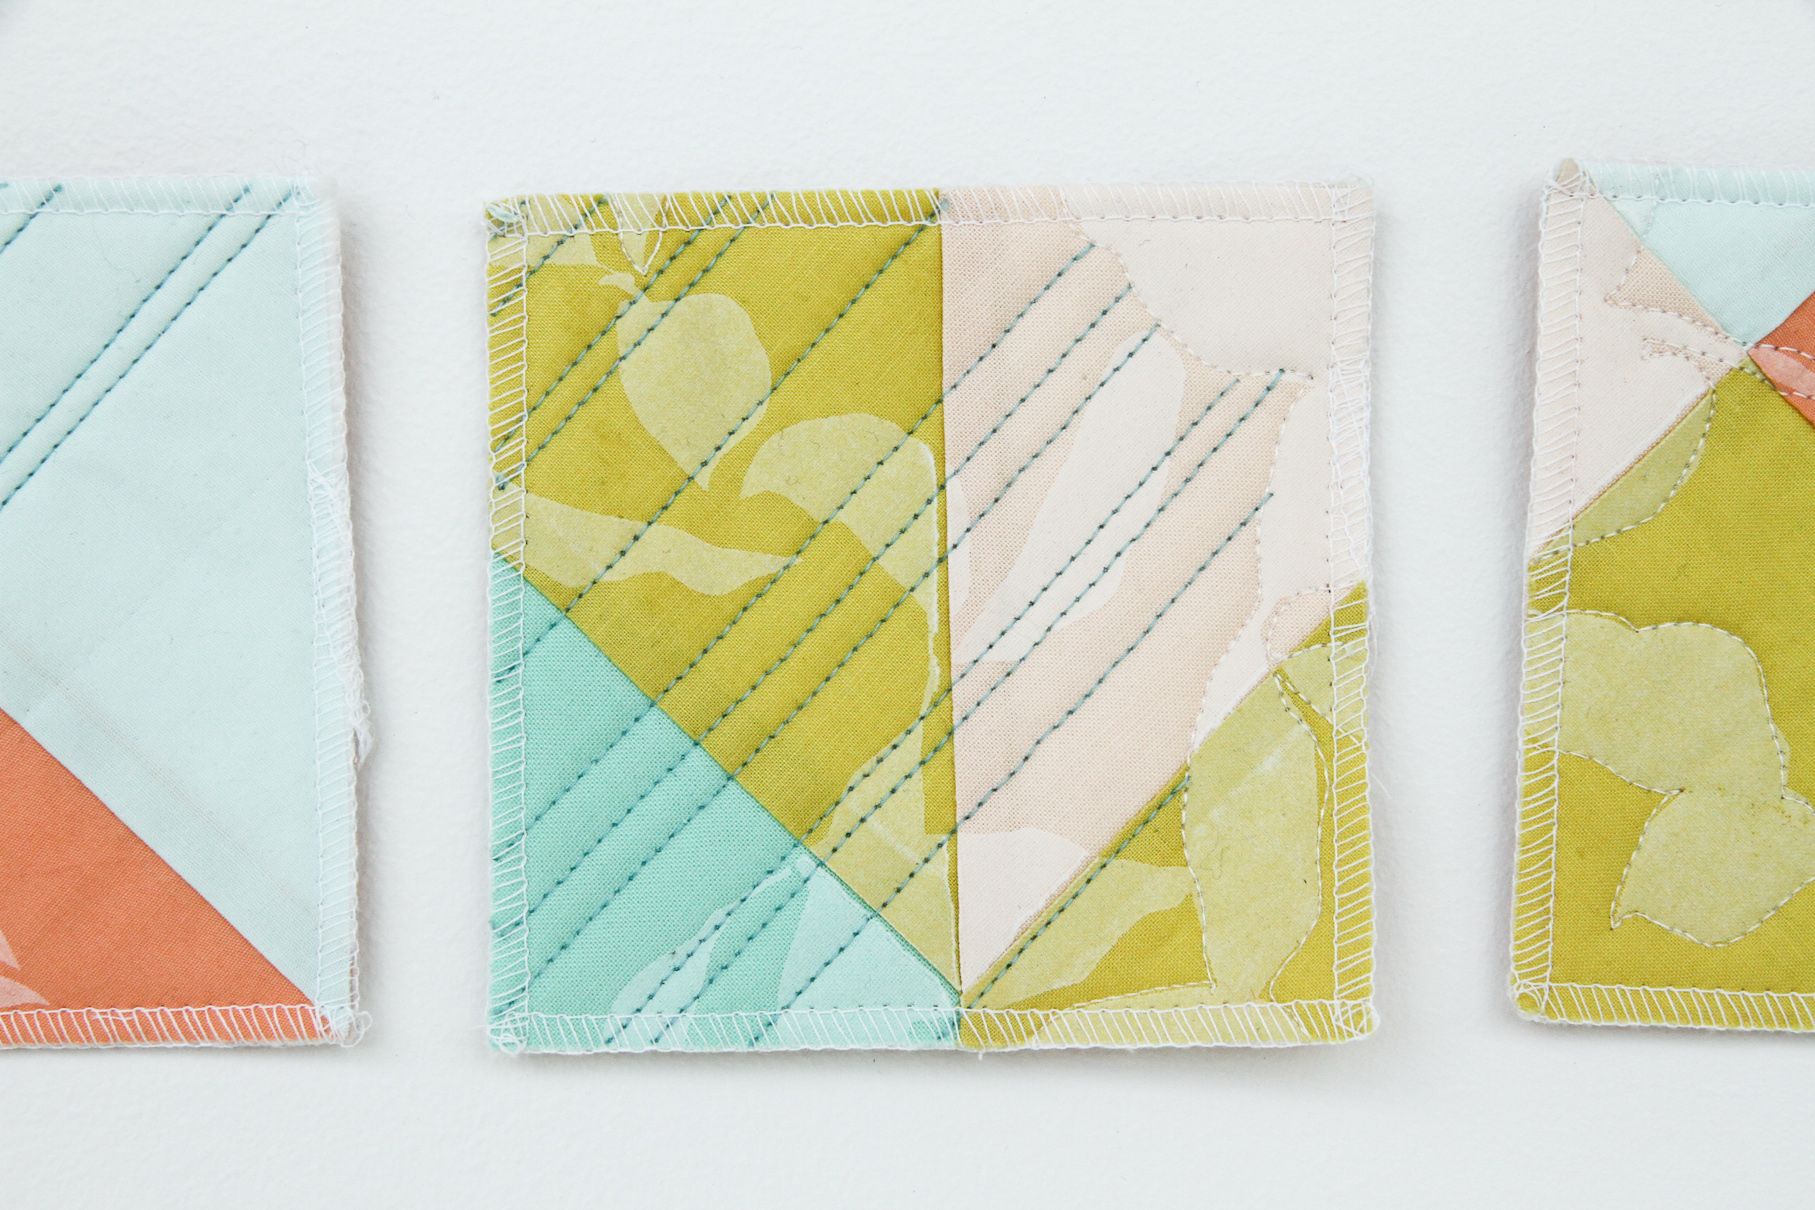
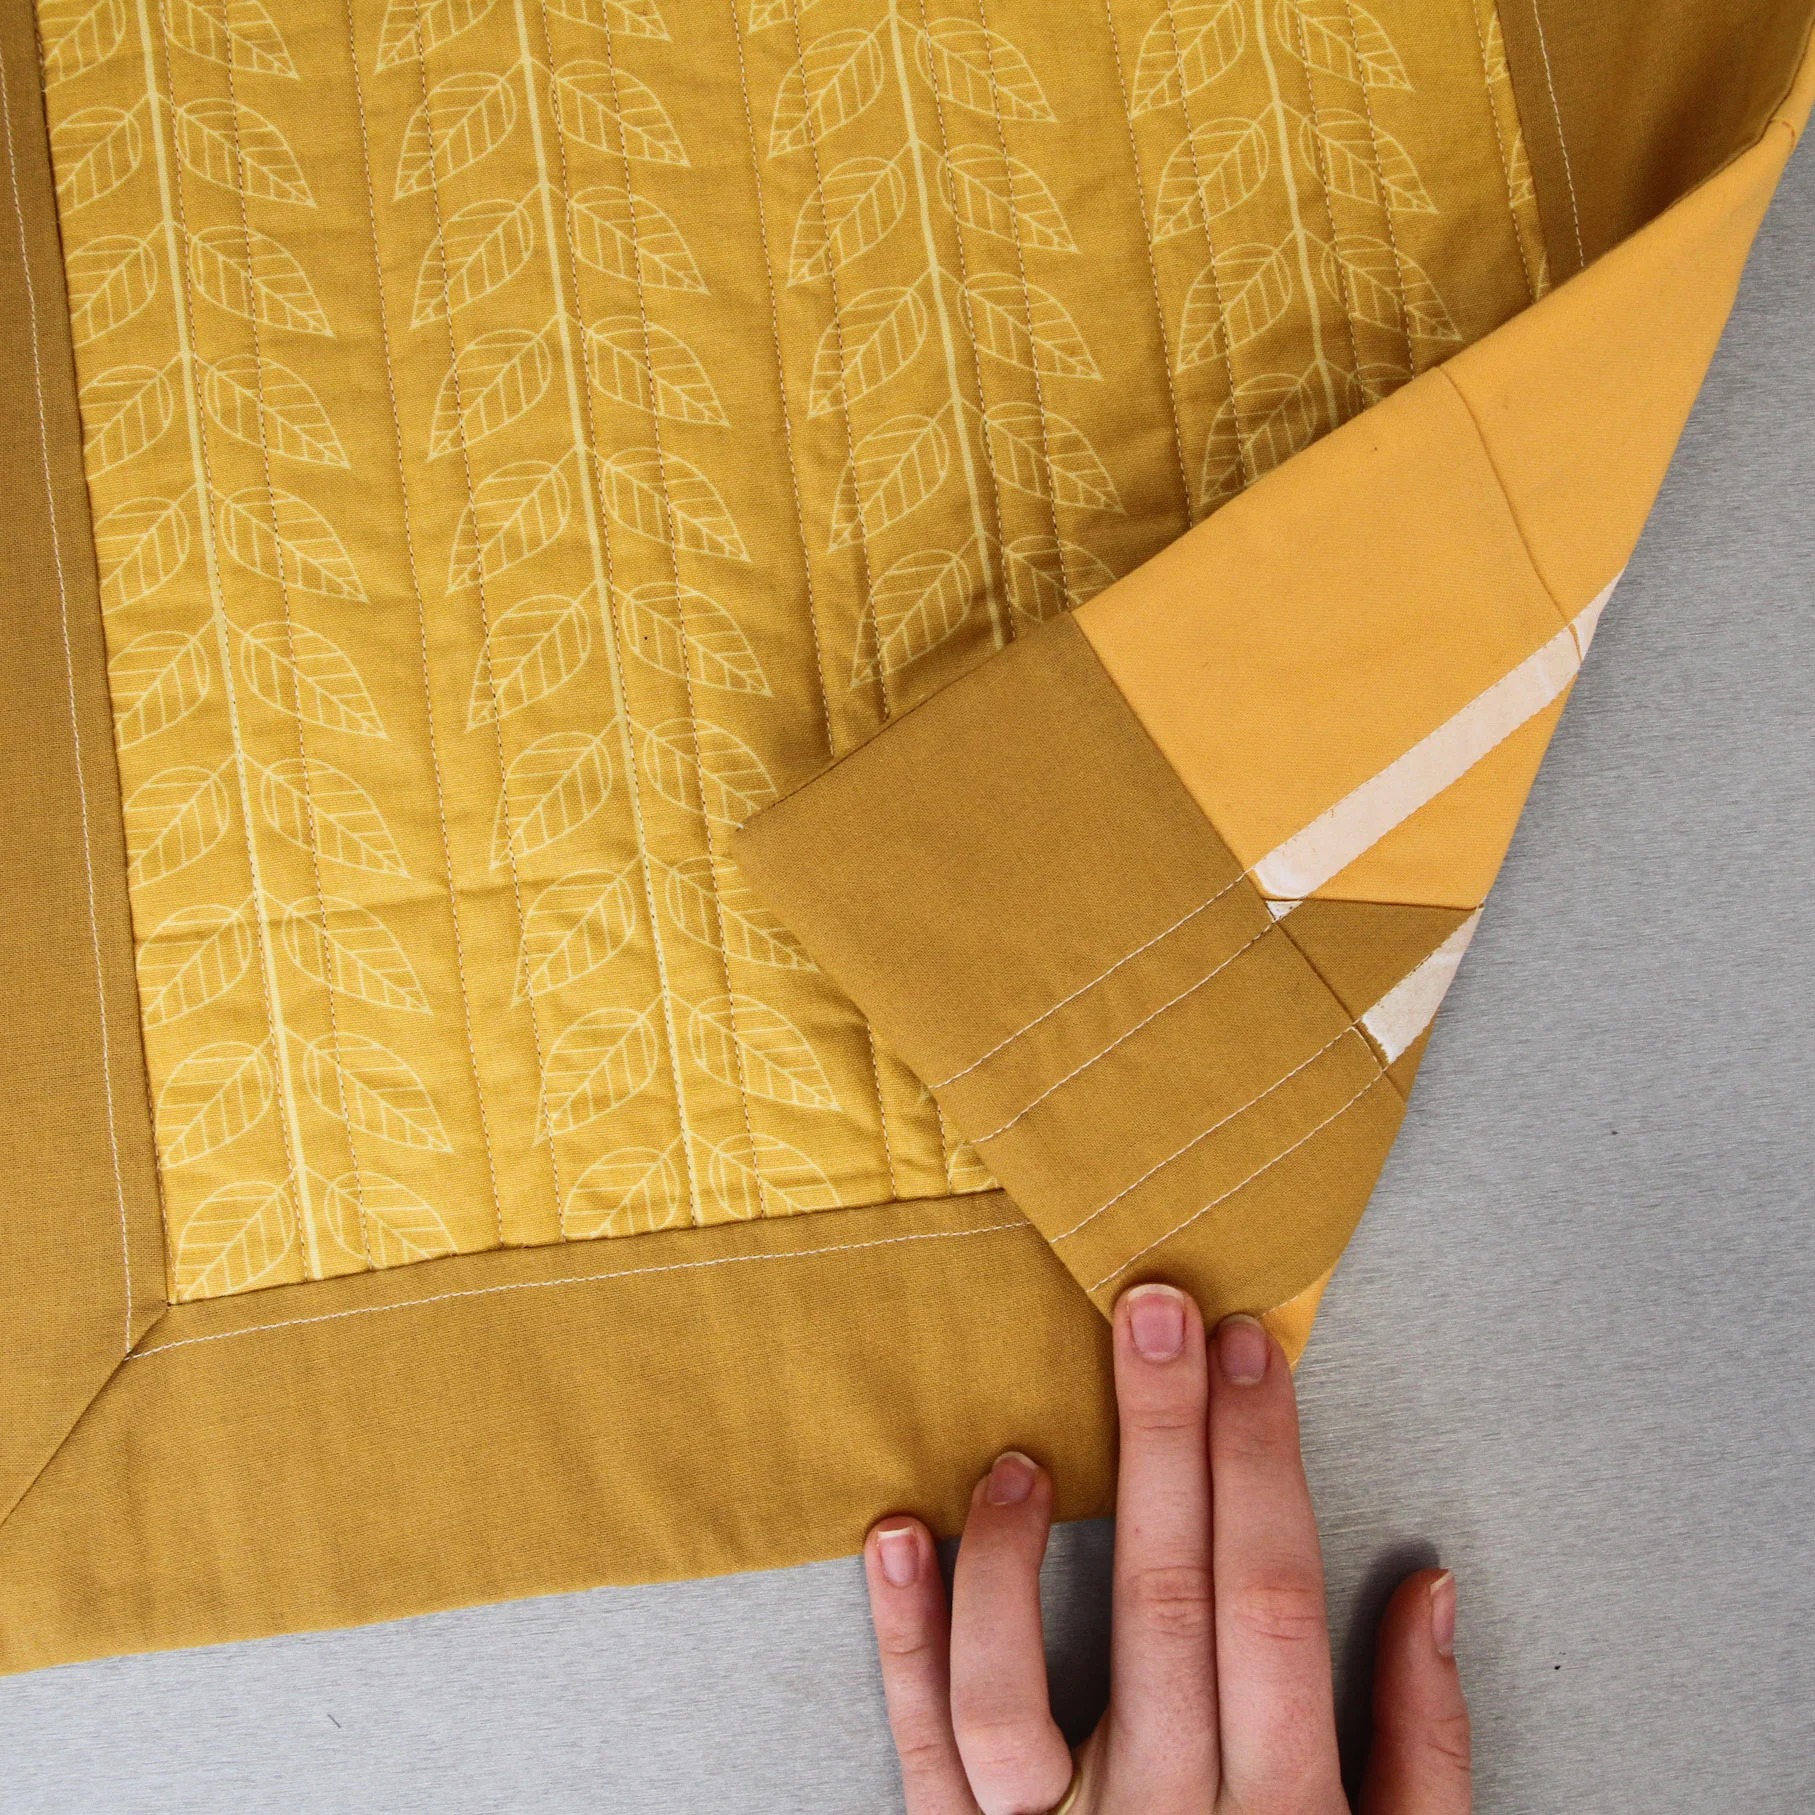
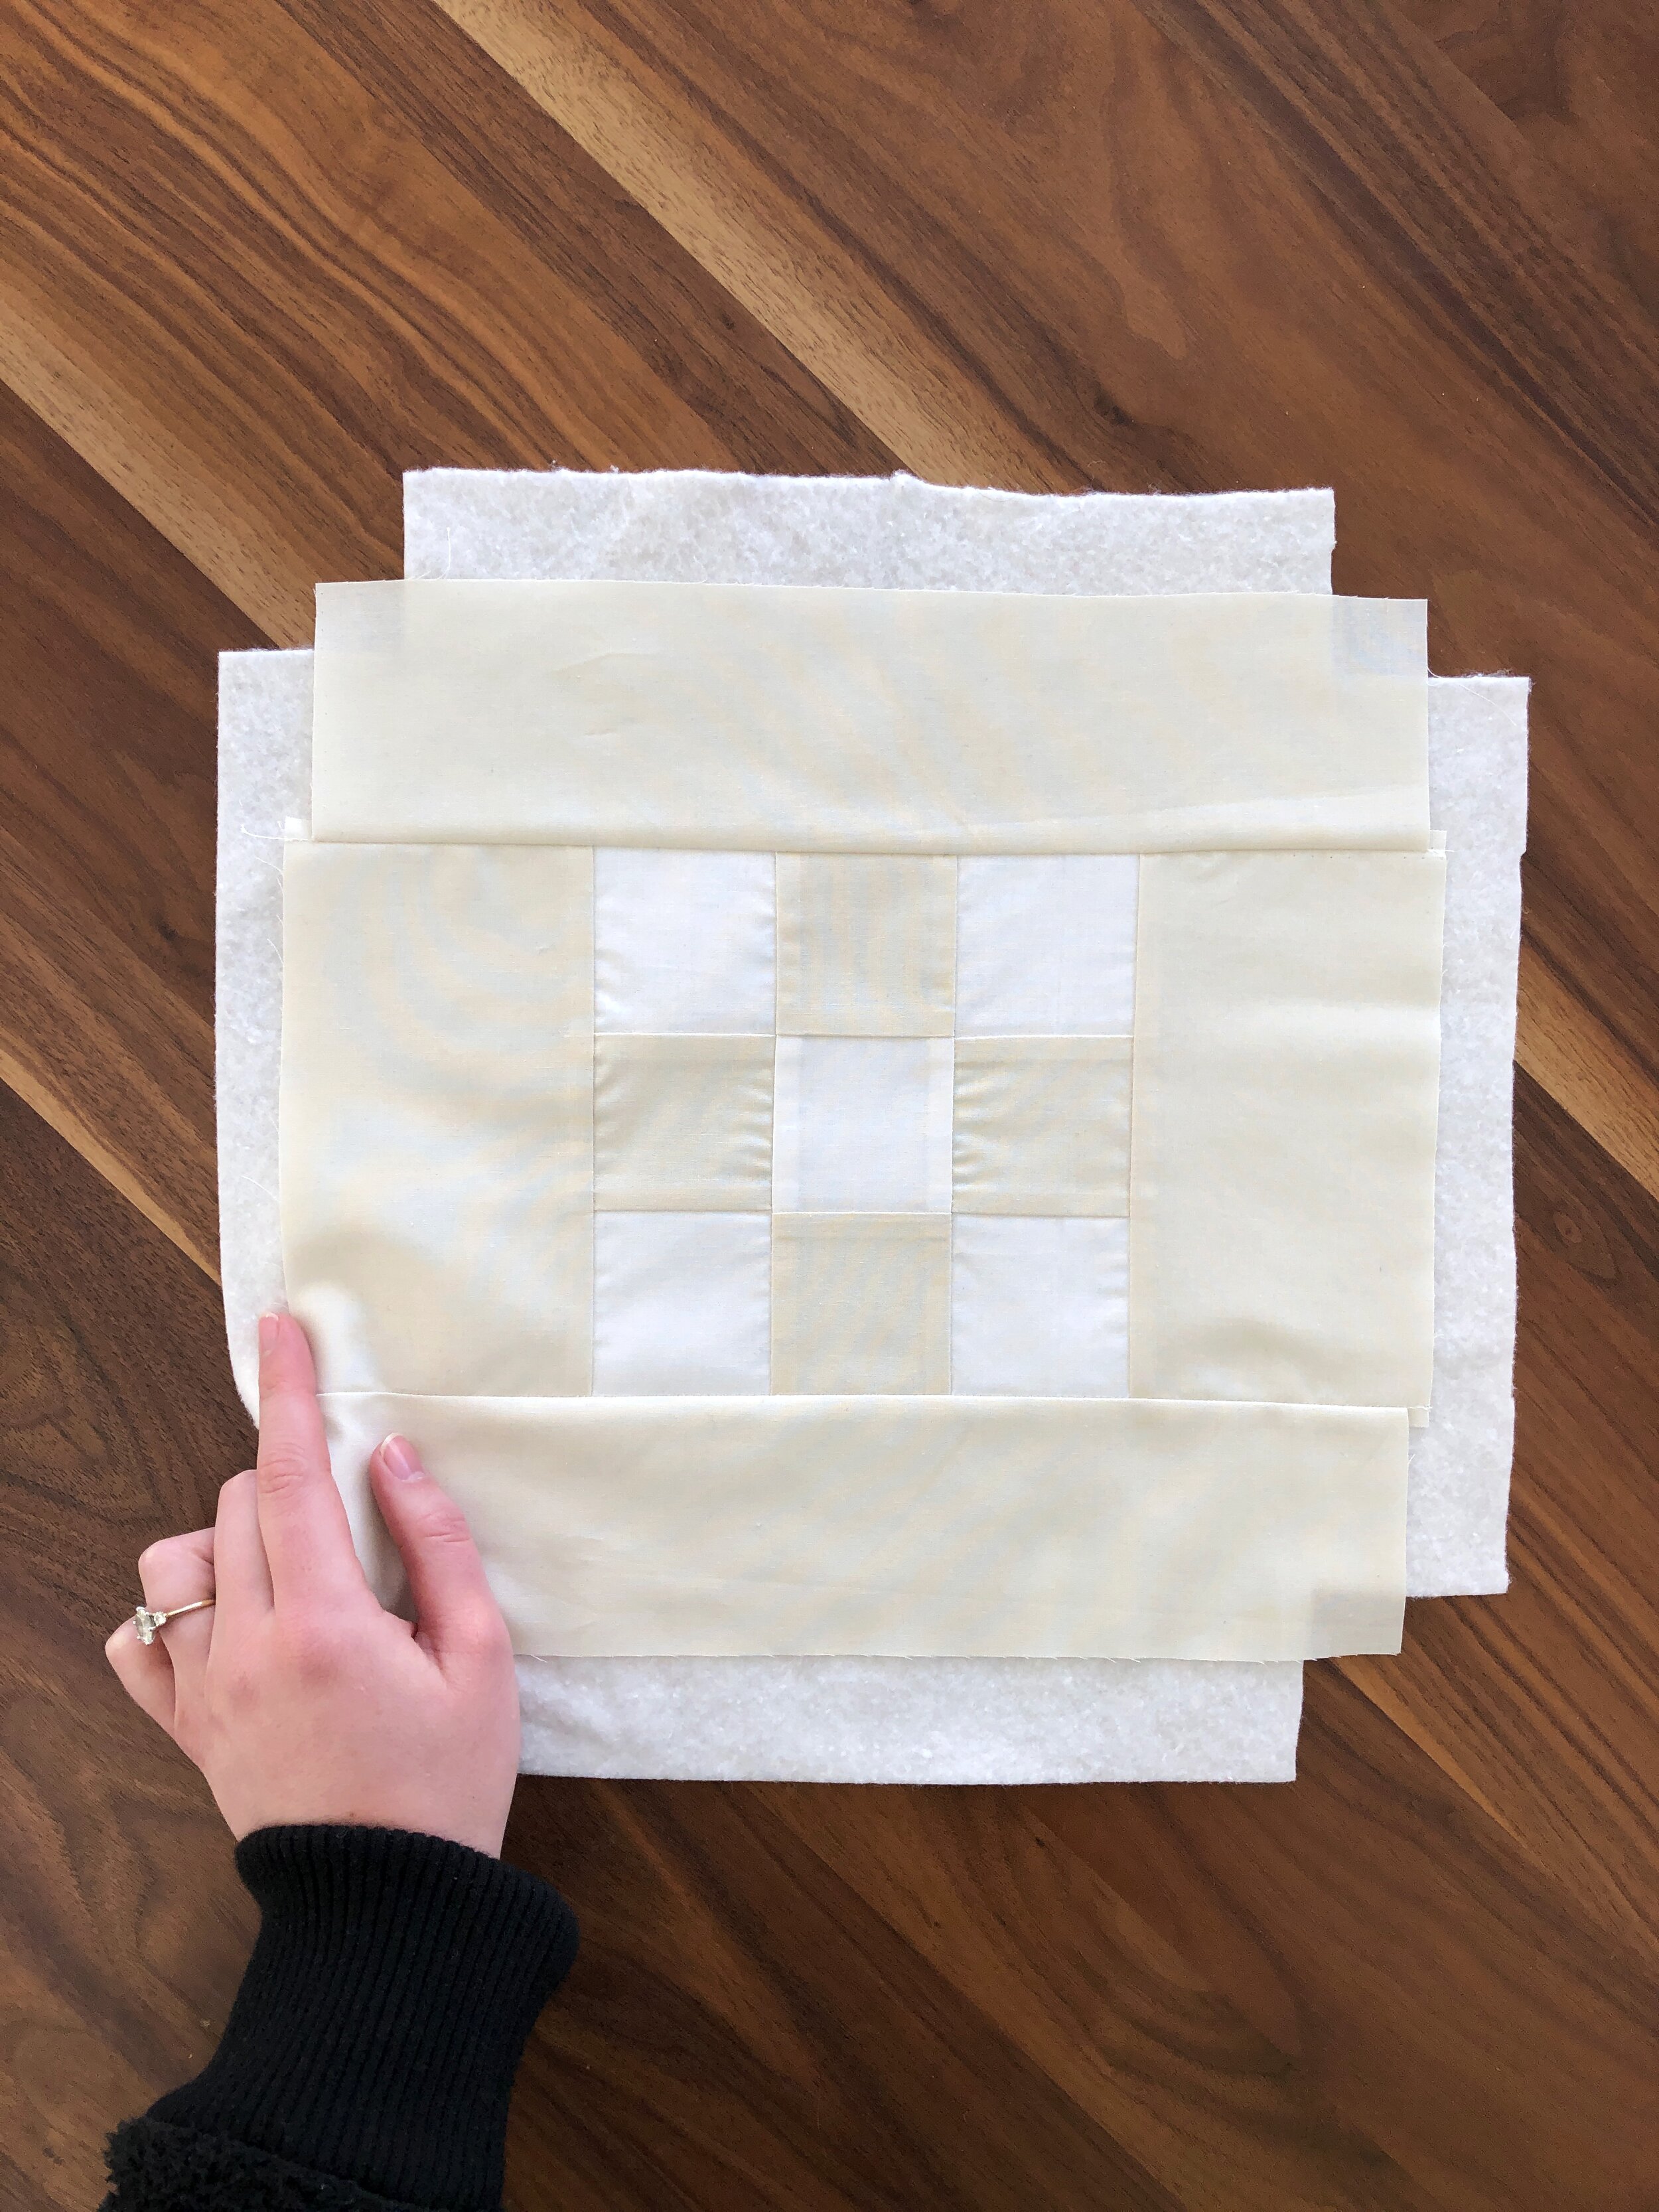
This week, I planned to try wrapping my finished quilt around a pre-made canvas (experiment #3). I added a border to the original composition in order to provide extra fabric for wrapping. Then, after printing on the quilt, I realized I had calculated the margin wrong and added more. I also cut my batting in a cross shape so that there would be no bulky batting to fold around the corners of the canvas.

IMG_8115.JPG

Results : trying French cleats next

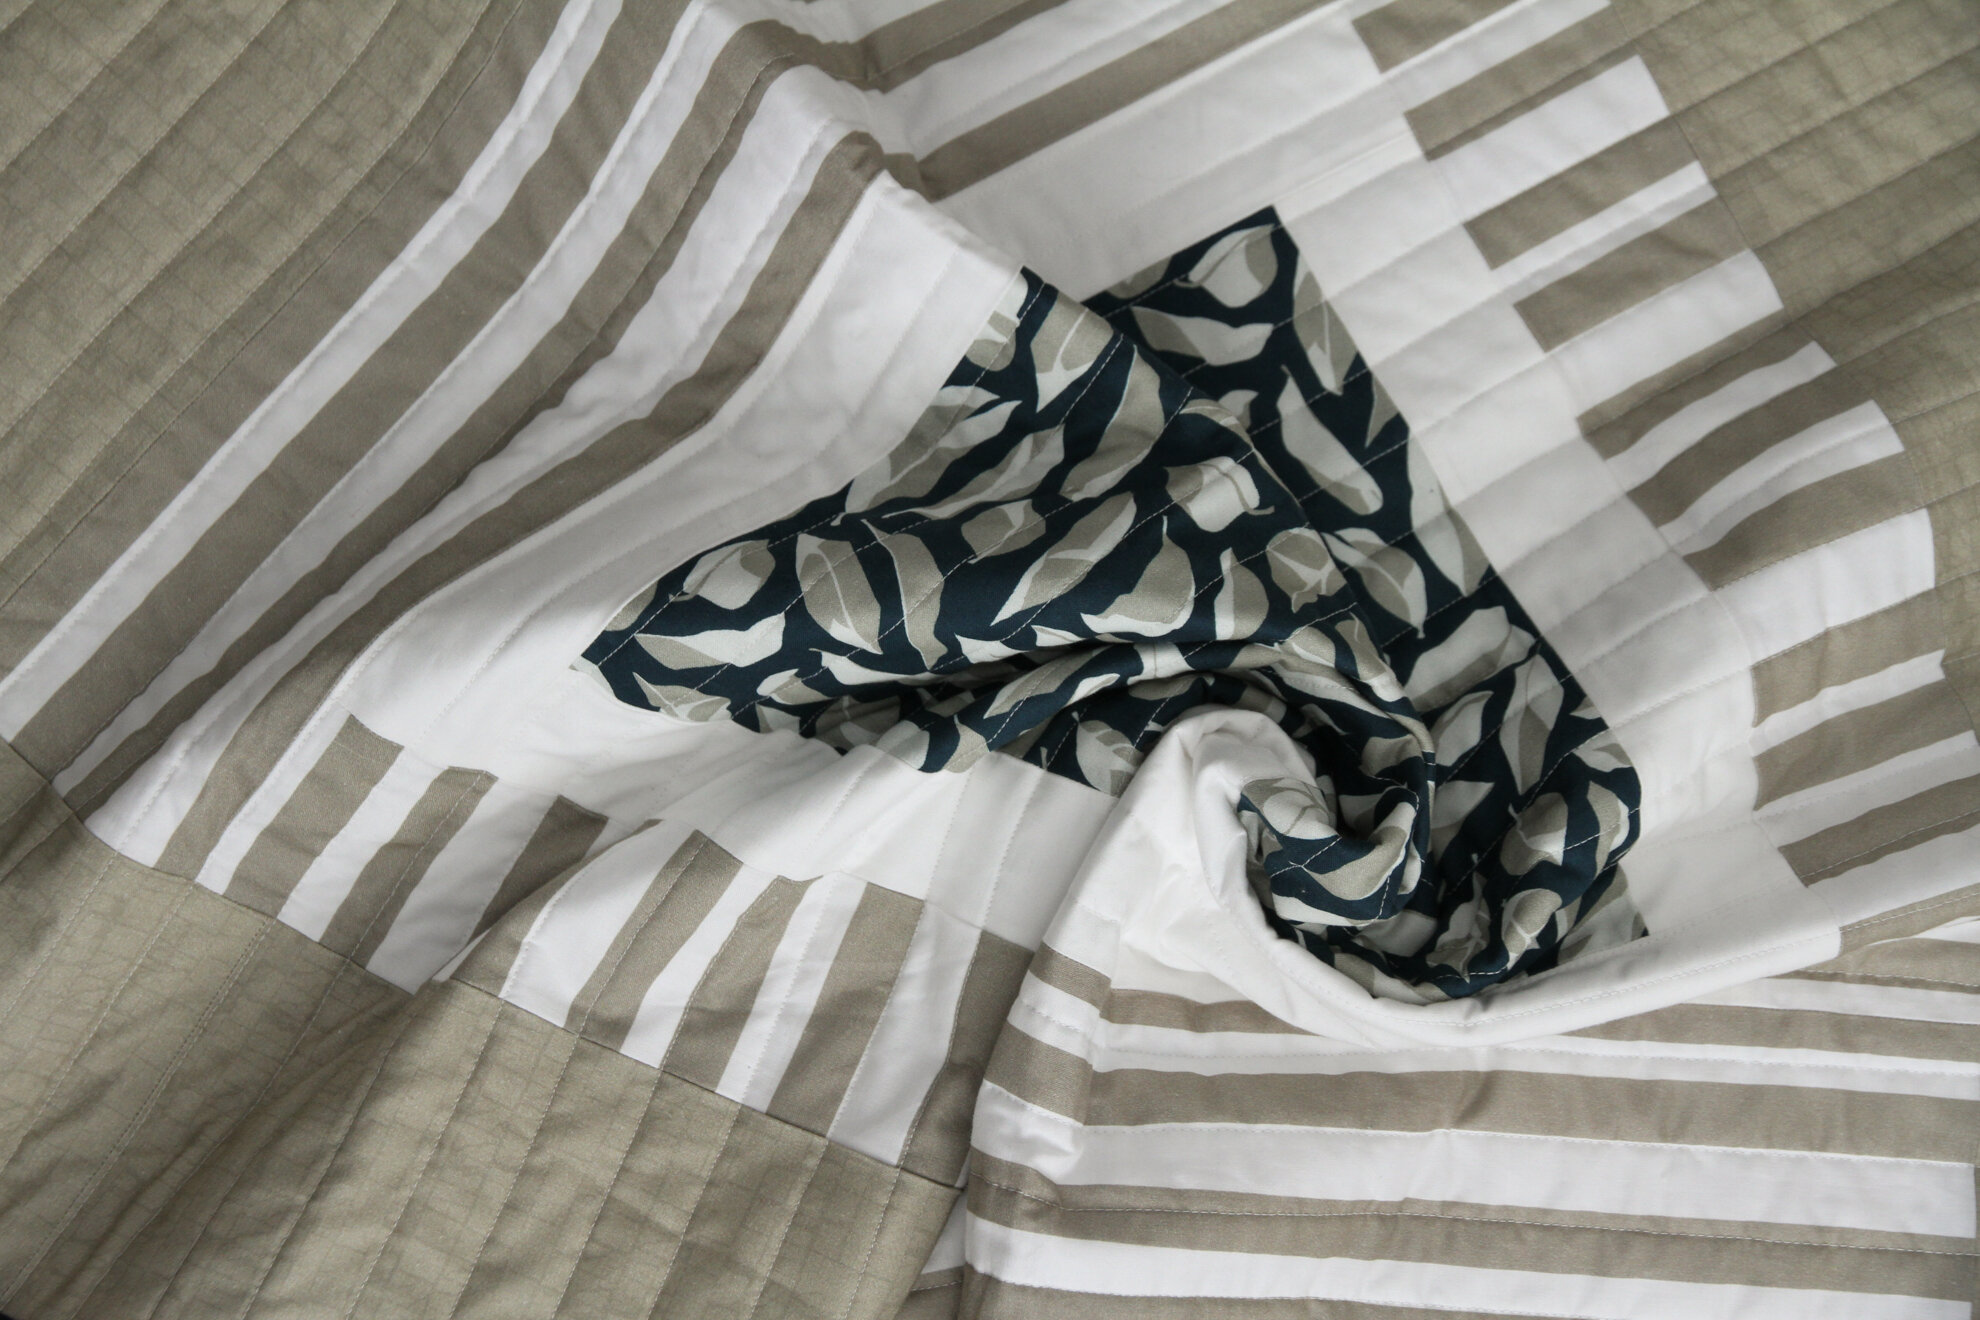
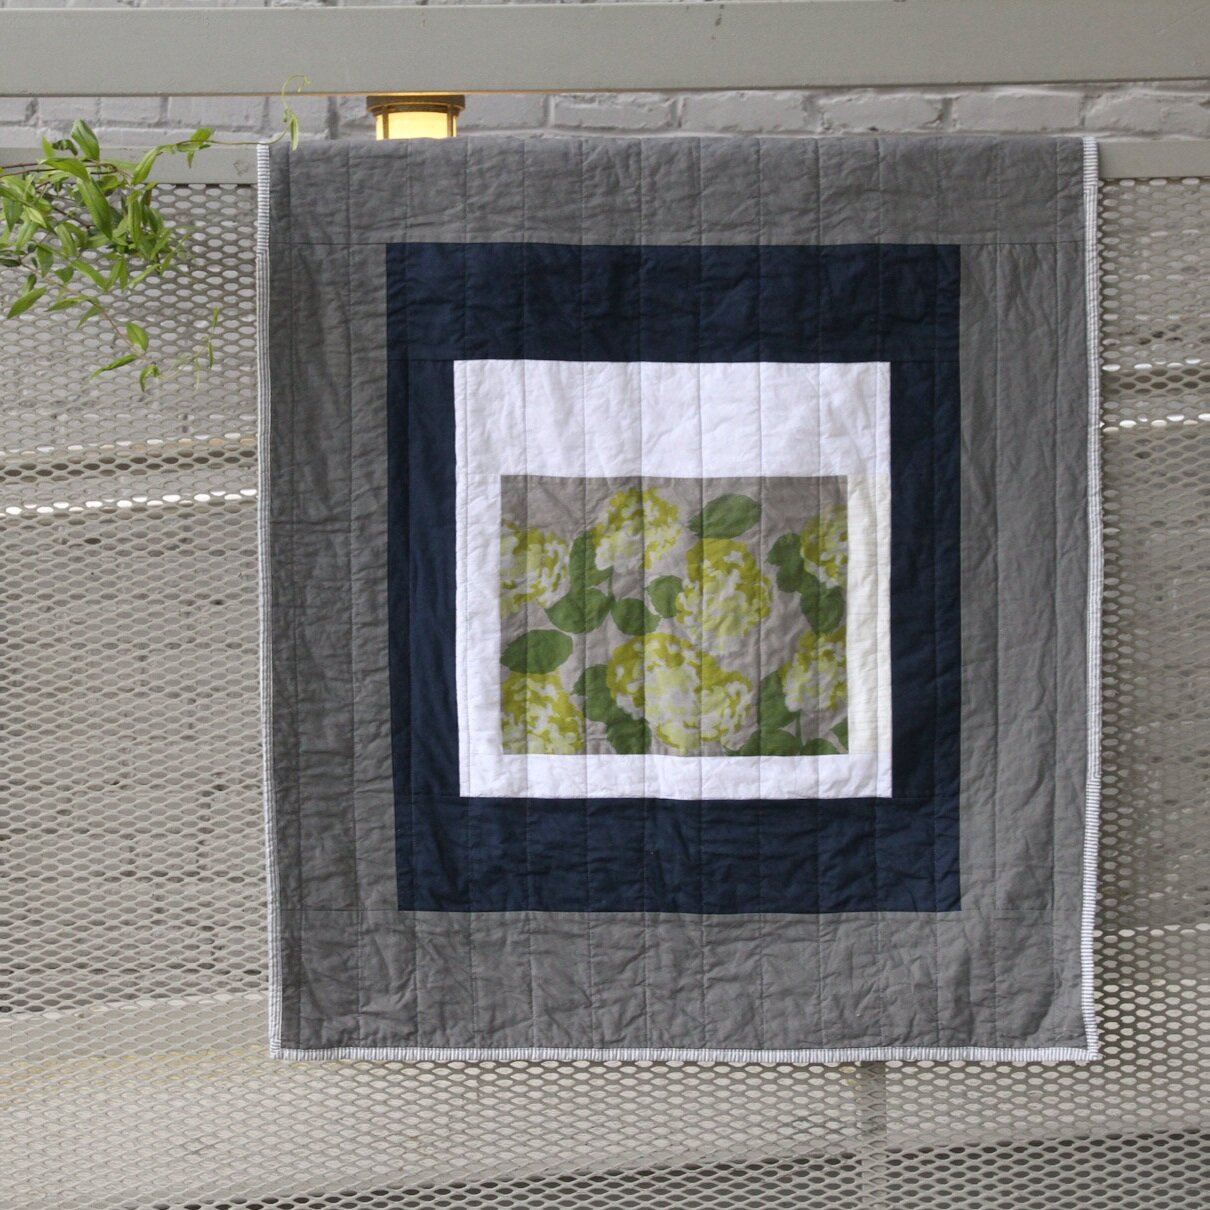
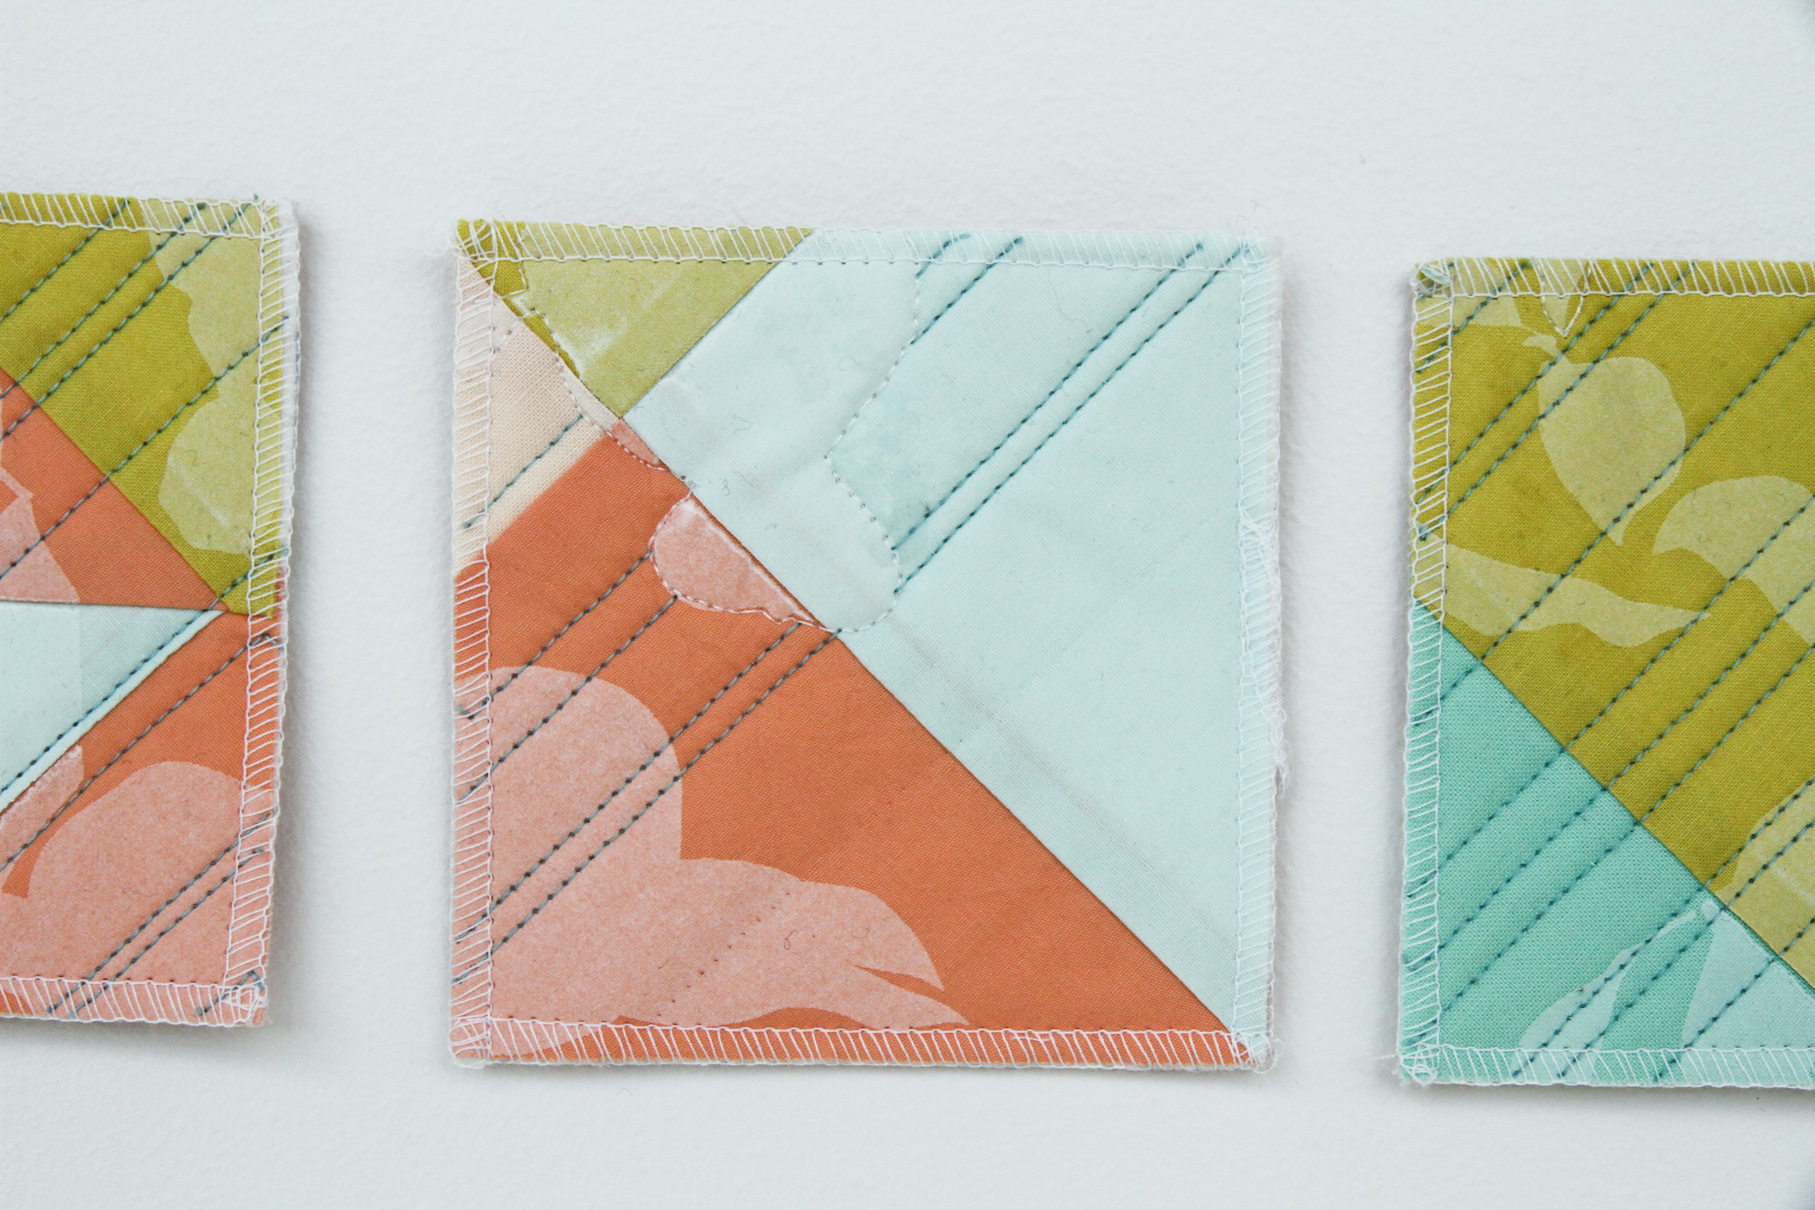
After all this thought-filled preparation, when it came time to wrap the quilt around the canvas, I realized that I liked the quilt composition better with the borders that I had added (borders that would be lost to the edges and back of the canvas). Not to mention, I love how the gold printing is cropped by the outermost border. With this in mind, I padded upstairs to discuss the predicament with my partner and resident art-hanging expert. As a gallery director and once-art-museum-preparator, my husband is a treasure trove of expertise and talent when it comes to hanging artwork.

After some discussion, he suggested I mount the quilt on a 1/4” piece of plywood and then use French cleats on the back to float it in a frame. Enthused by this new idea (experiment #4), we drove to the store to get some MDF, short screws, and short staples. We don’t own a table saw, so my husband will cut the board and French cleats for me when he’s at work tomorrow. I am excited and hopeful that this system might provide a straight-forward and professional system for mounting and framing my art quilts. Stay tuned!
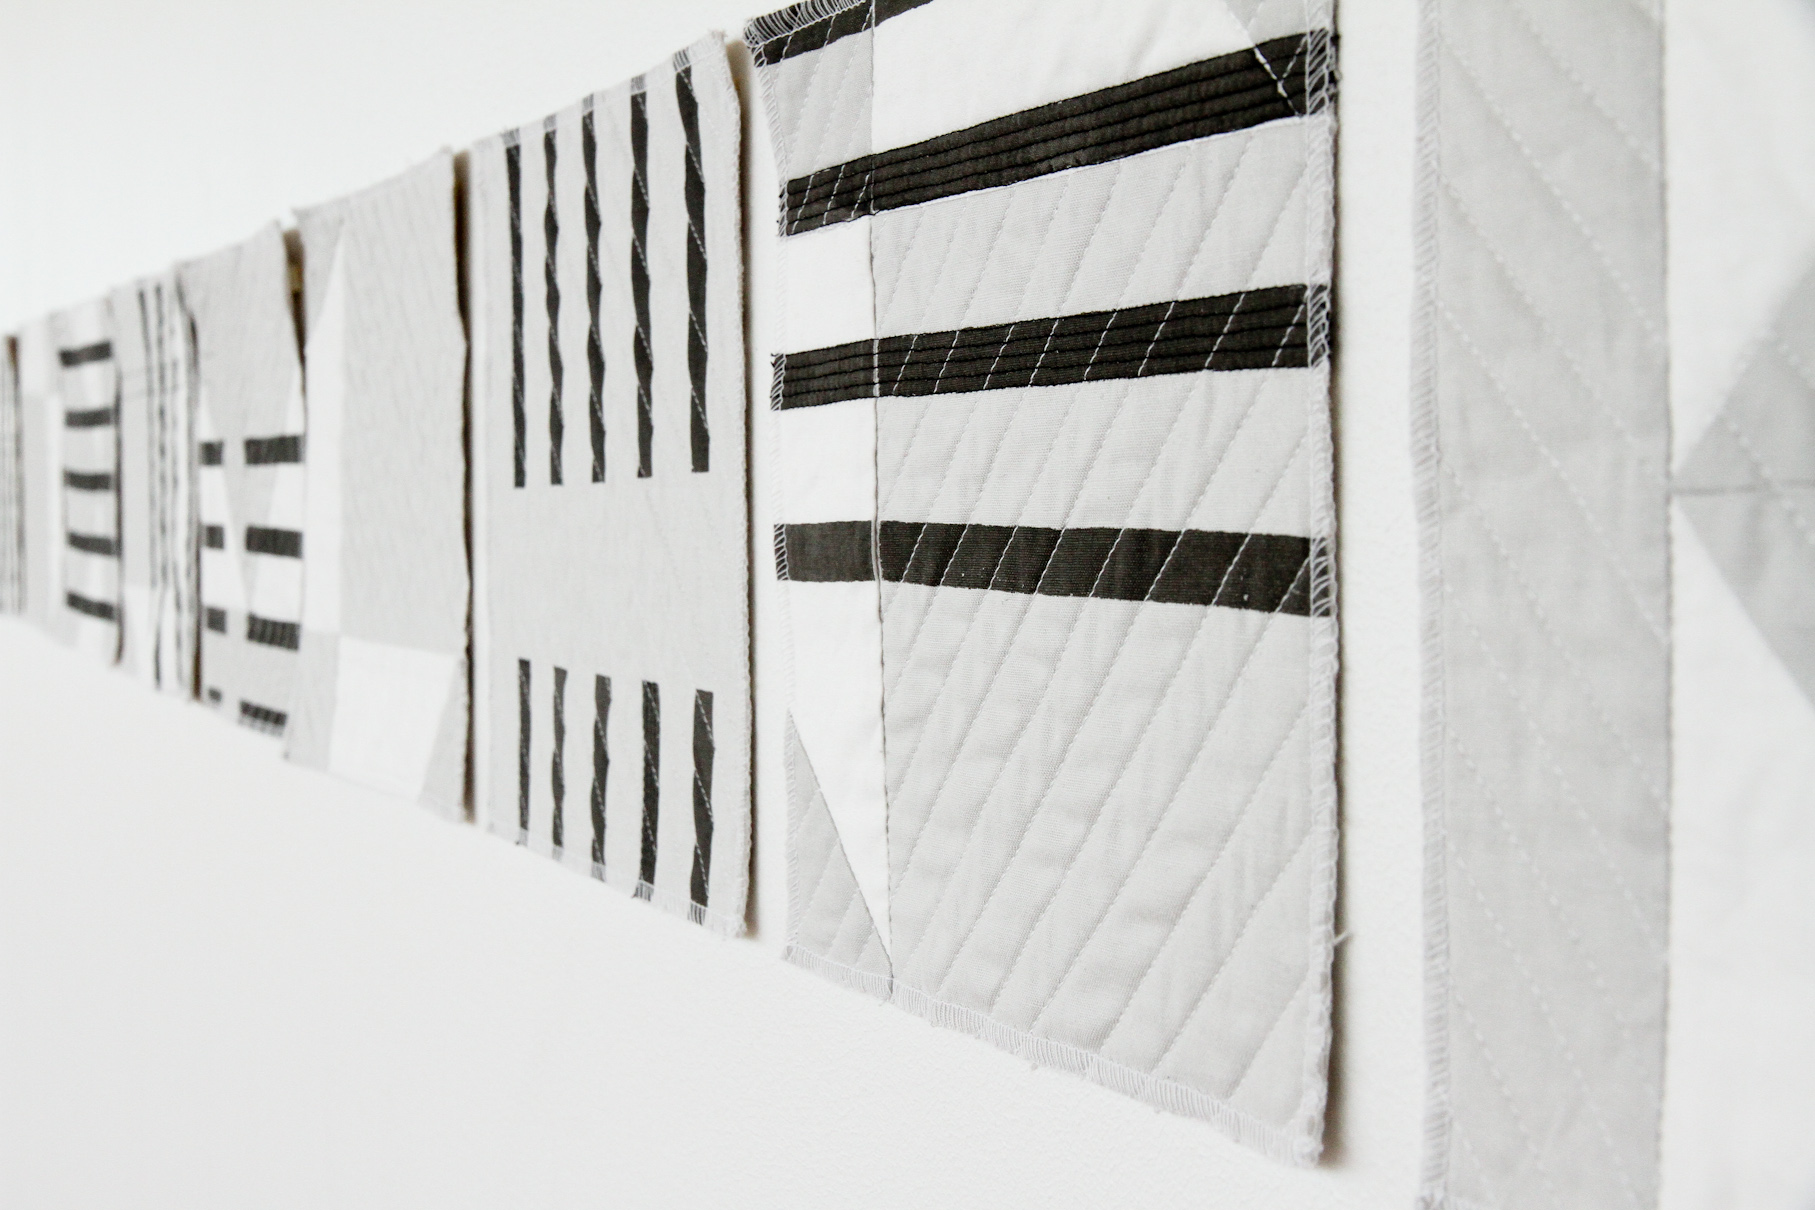
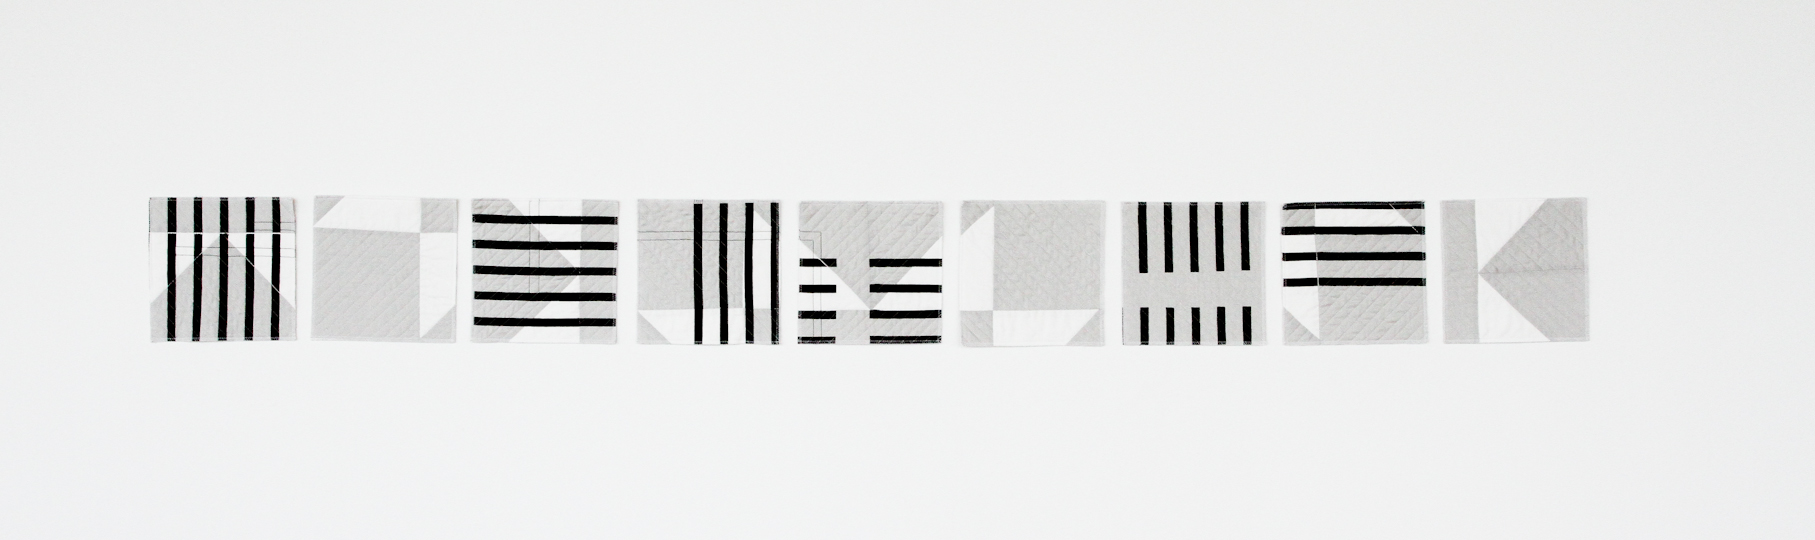
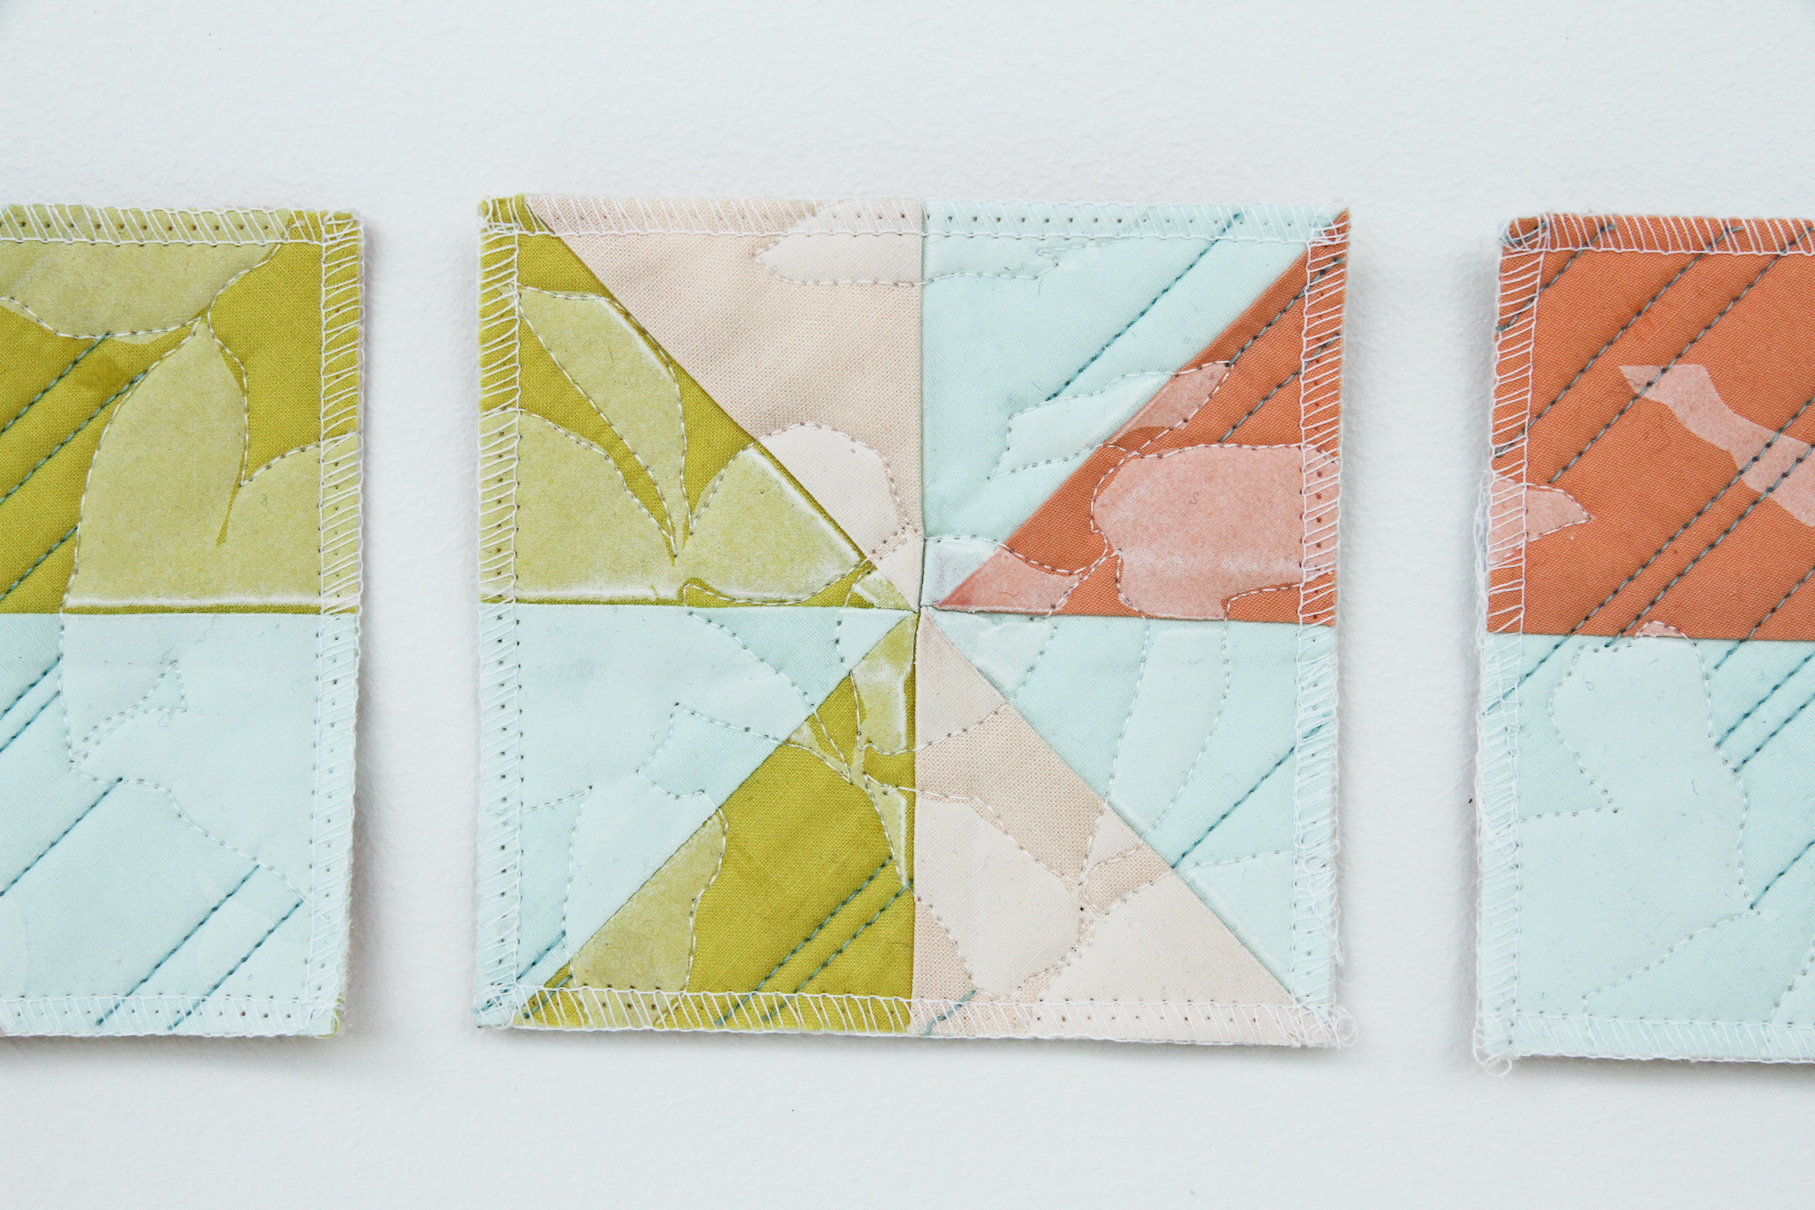
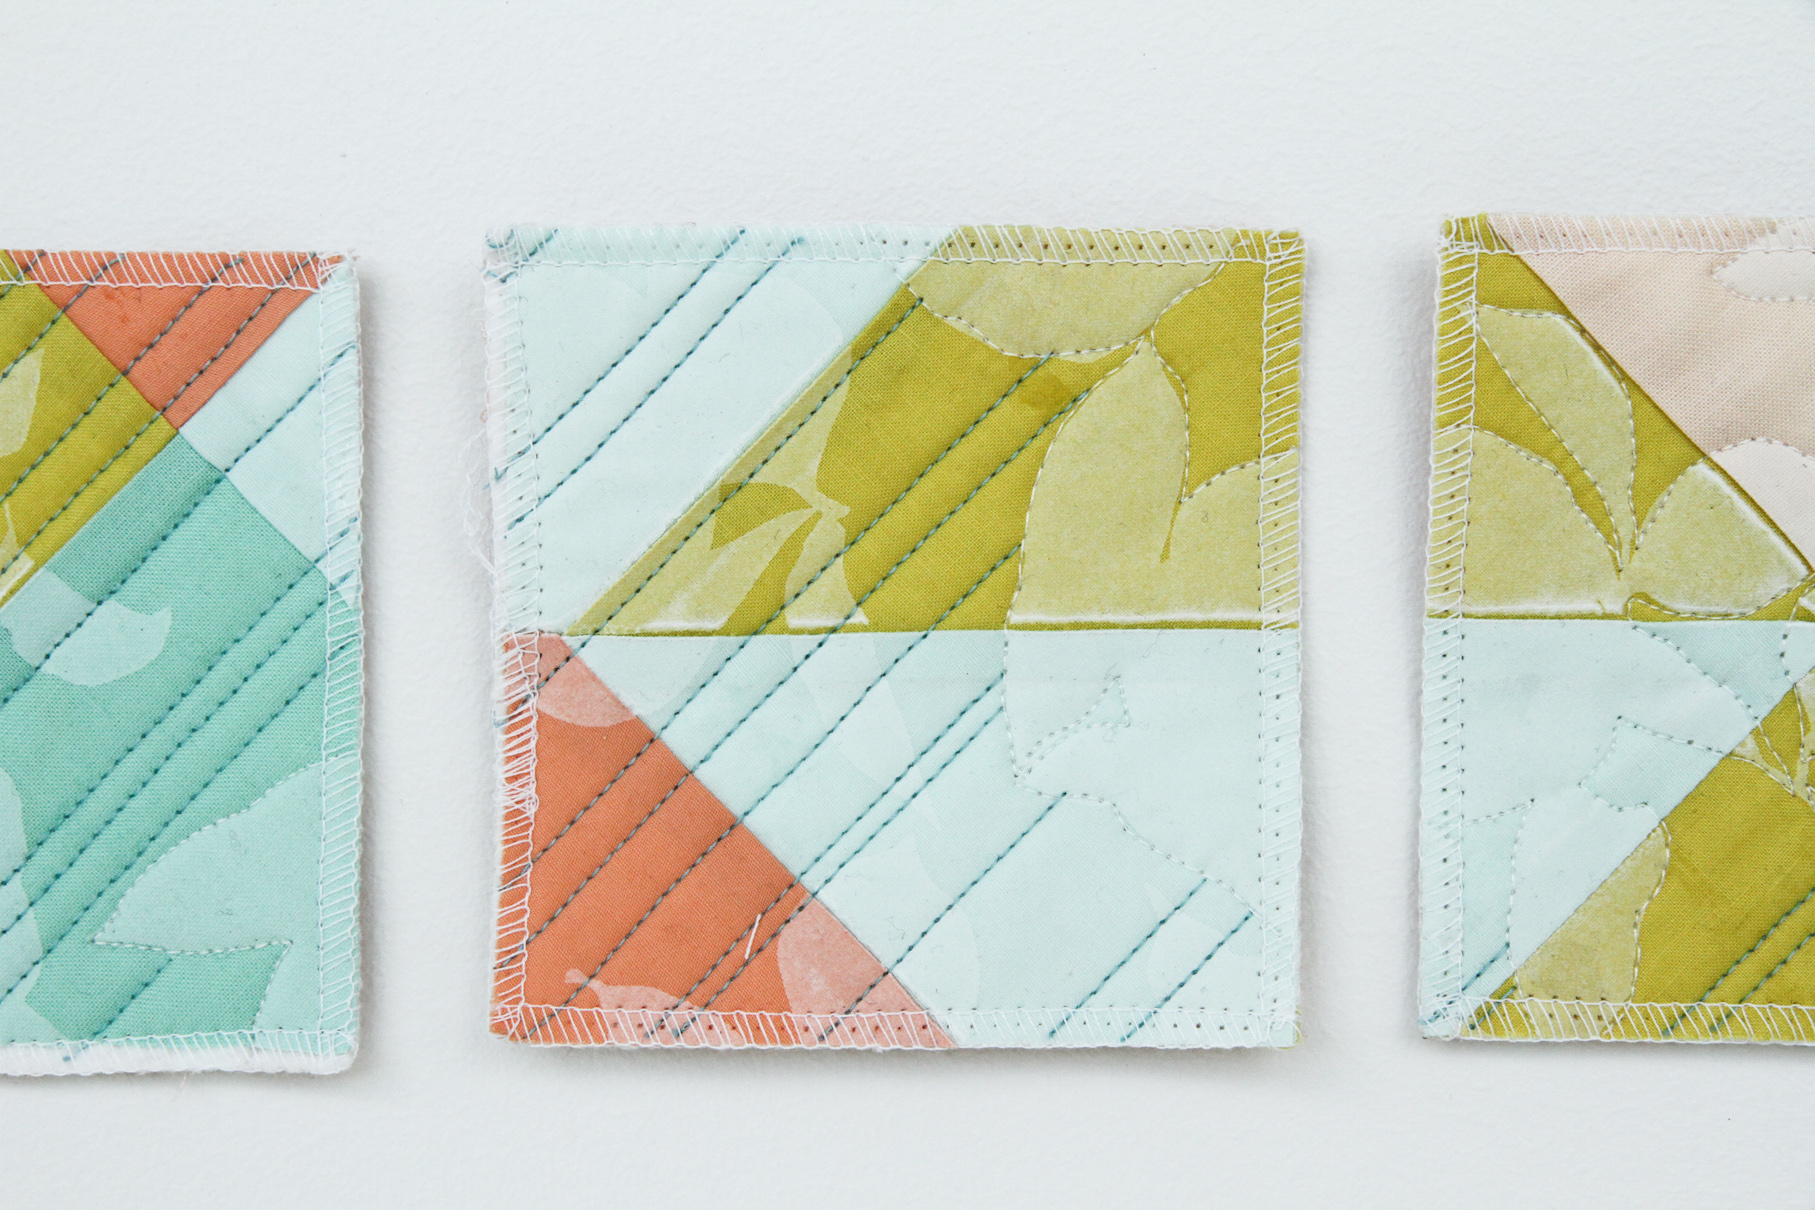
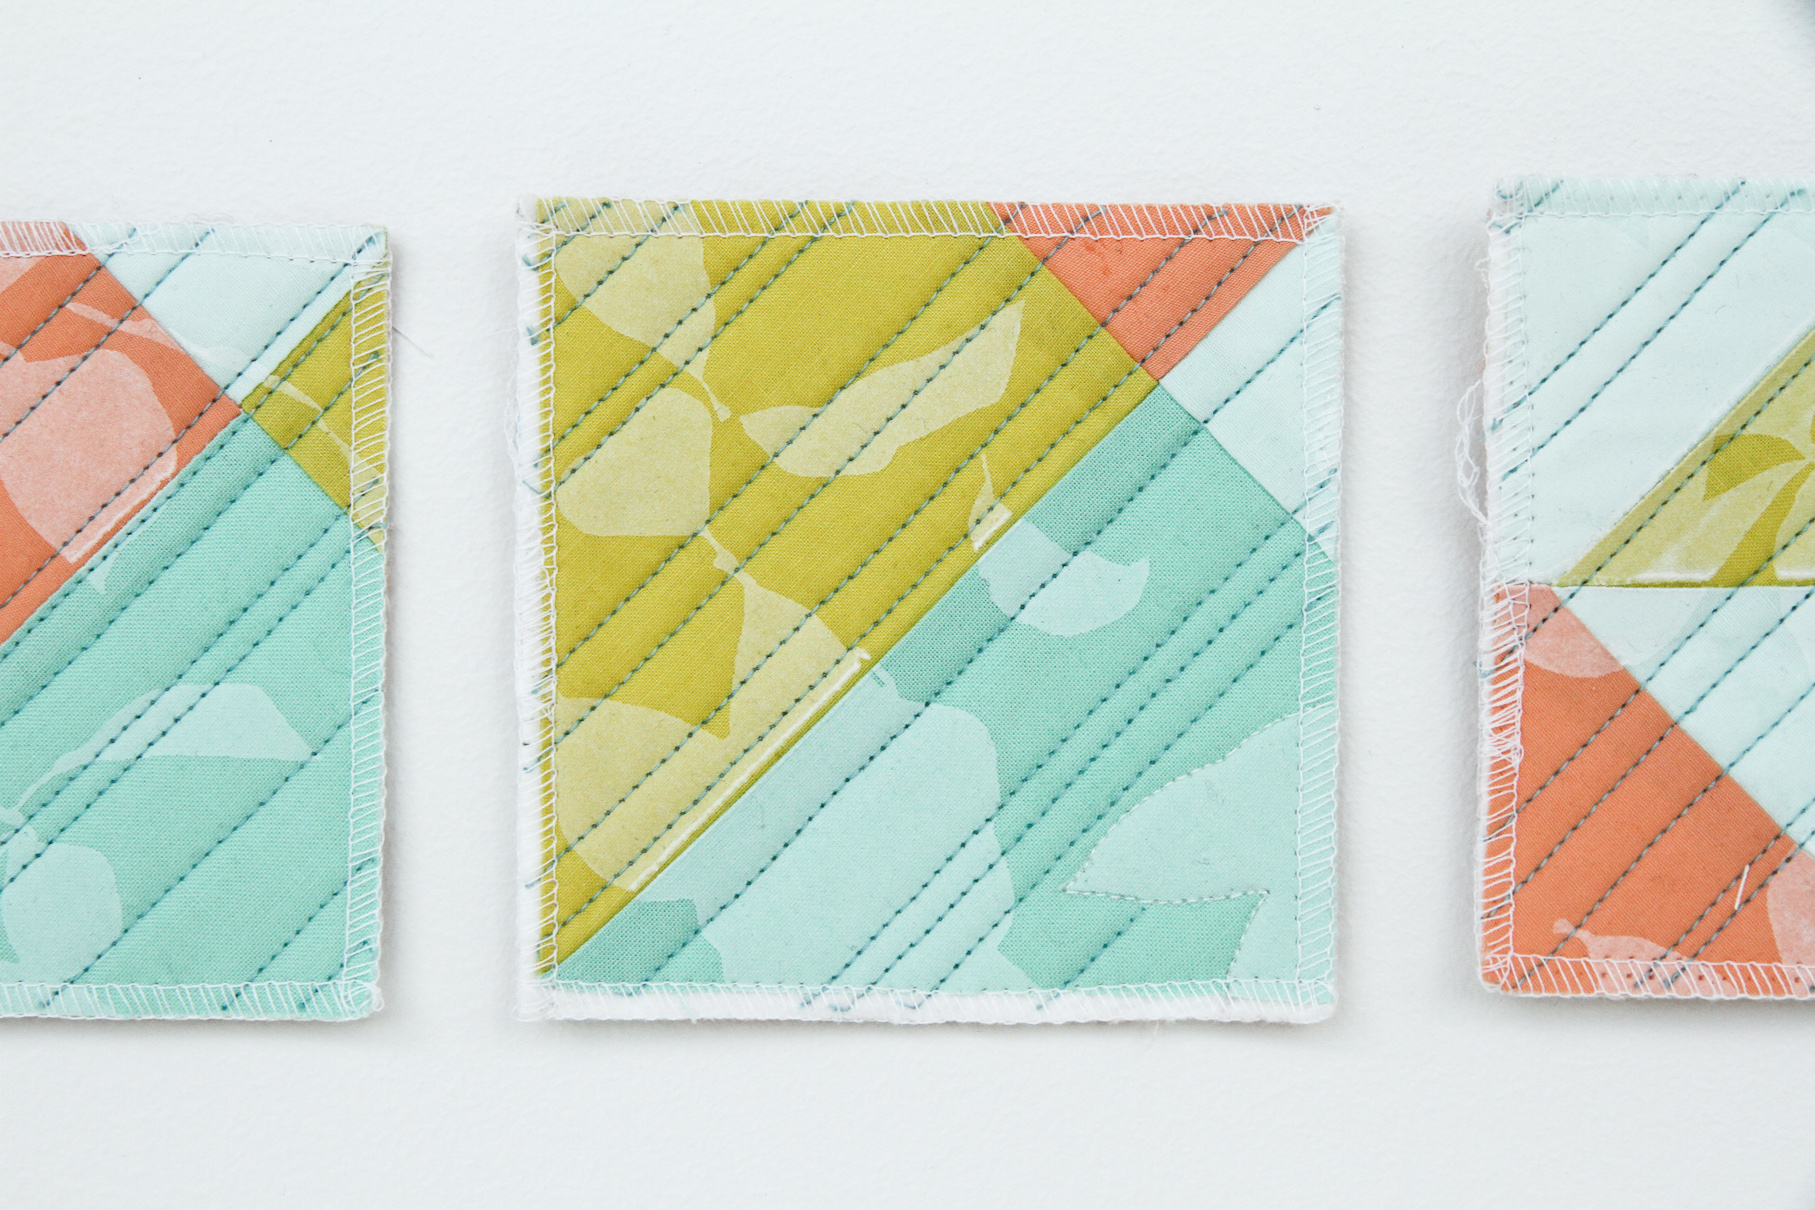
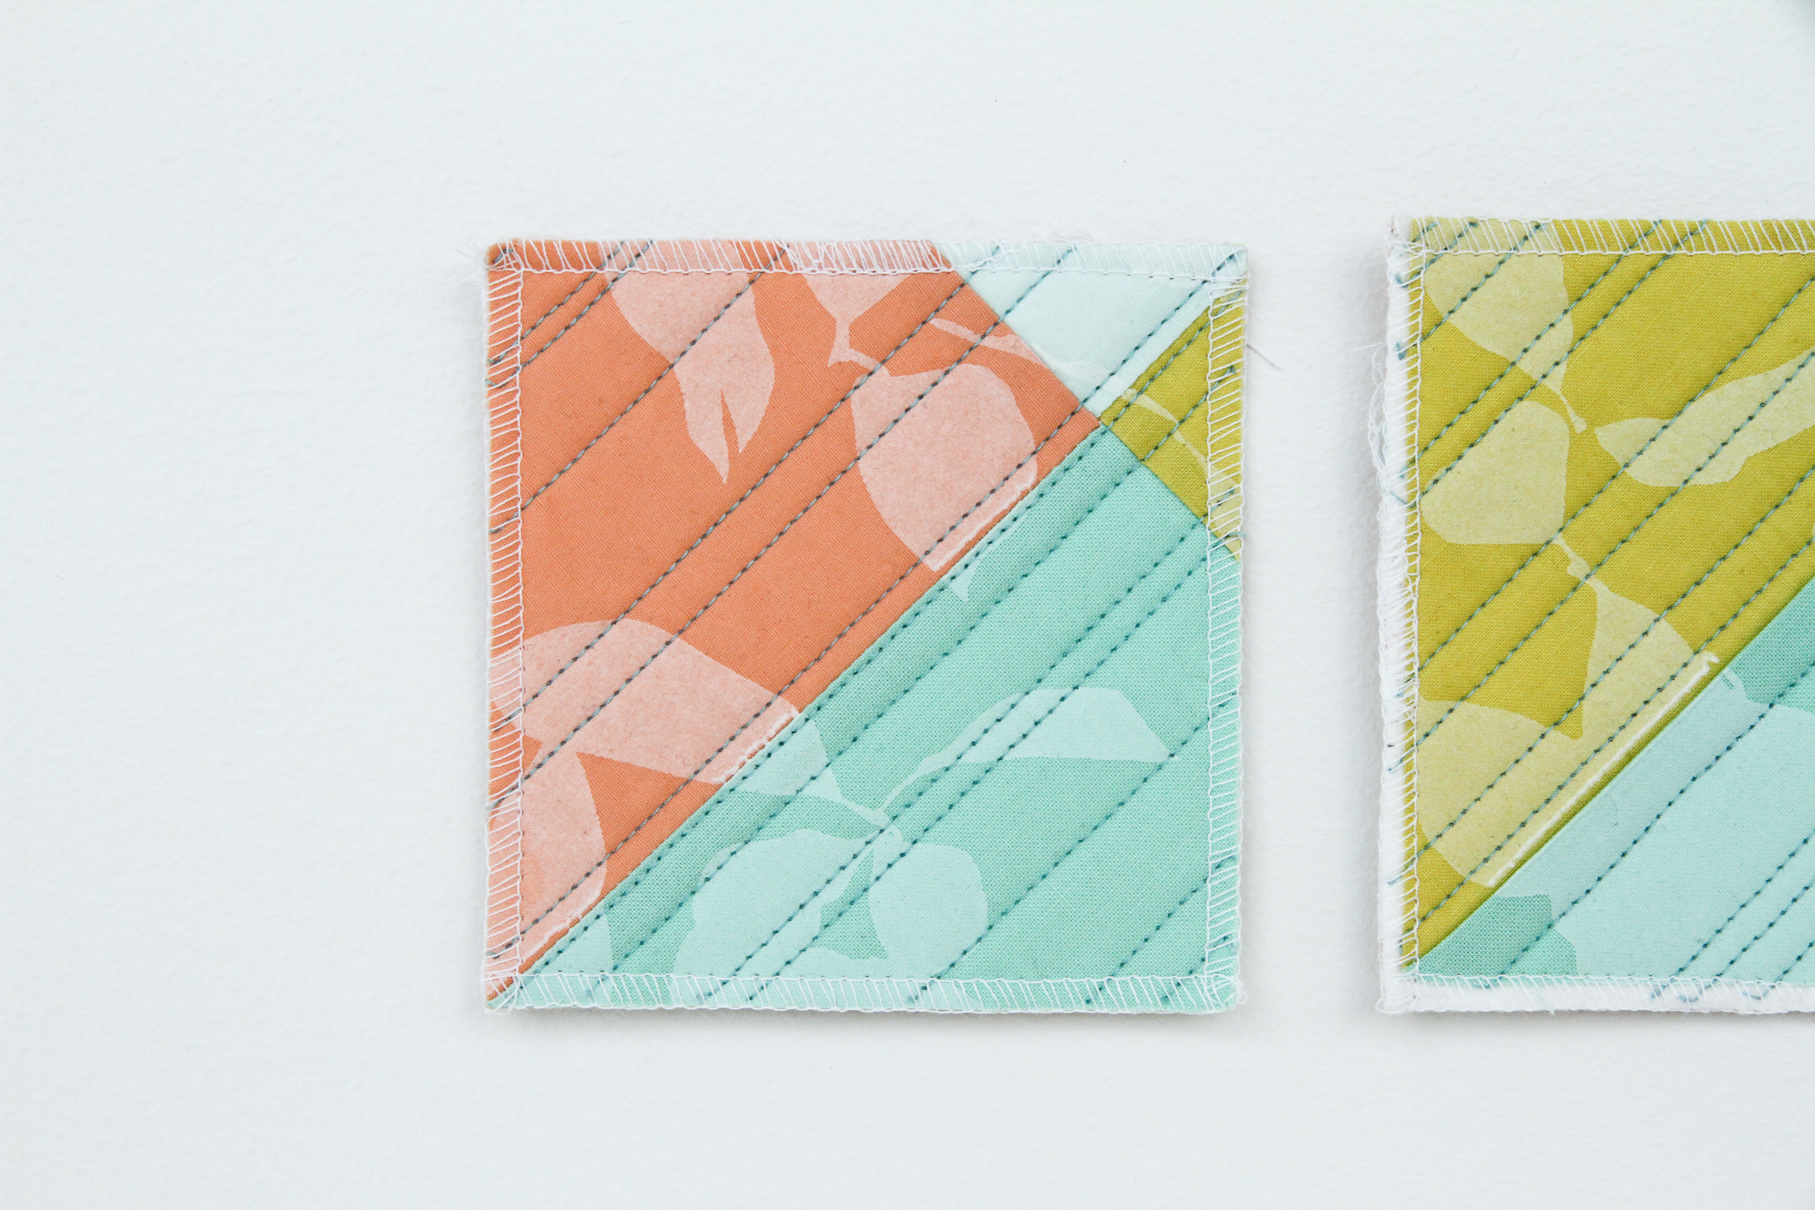
IMG_8119.jpg
C68E3AE9-DD9F-4242-93F2-E0E96FDB4FF9.PNG
Lovely-and-Enough-Art-Quilt-Lenten-Twelves-2021.PNG
 

Lenten Twelves 2021

Follow the links below to read more about this quilt series or check out #LentenTwelves and #LentenTwelves2021 on Instagram. Curious what “Lenten Twelves” are? Check out this introductory post: Lenten Twelves: a Creative Practice.

Lenten Twelves 2021 : Black and White Beginning

Back After a Two-Year Hiatus

It was been two years since I celebrated the Lenten season with weekly quilt meditations. But in 2019, I had just begun my full-time job as a project manager at a biomedical research institute, and 2020 was, as we know, incredibly turned upside down with the COVID19 pandemic hitting a few weeks into Lent. With that in mind, I return to Lenten Twelves in 2021 with grace for myself for the two-year gap in this practice.

Curious what “Lenten Twelves” is? Check out my landing page for this meditative quilt series – Lenten Twelves: a Creative Practice.

Theme: Variations on an Irish-Chain Quilt

This year, I am exploring variations on a theme with an Irish chain quilt as the starting point for my creative explorations. My color palette draws inspiration from my large Black and White Twelves quilt, using black, white, and a variety of creams to explore pattern, focal points, and layering. You can follow along these series on Instagram through the hashtag: #LentenTwelves2021.

Quilt theme: Irish Chain quilt, inspired by the Campfire Glow quilt

Color palette: black, white, and cream, inspired by my Black and White Twelves quilt

Reading: The Cure for Sorrow: A Book of Blessings for Times of Grief by Jan Richardson

IMG_7749.jpg
IMG_7810.jpg
IMG_7807.JPG
IMG_7813.JPG
IMG_7829.JPG
IMG_7848.jpg

The Cure for Sorrow

Having lost so much this year—even if the loss feels intangible—I am taking this season of waiting to read The Cure for Sorrow by Jan Richardson. The book is full of blessings written surrounding the early death of Jan’s partner. Many feel poignant in this time of separation of loss of closeness and normalcy. In response to these readings, I have been writing short poems of my own, and I will share these here and in my Instagram stories. I have included some of my instagram stories at the end of this post if you are not instagram savvy or have given up social media for Lent.

IMG_7816.jpg
IMG_7844.JPG
IMG_7832.JPG
IMG_7863.JPG

Printed, Then Overprinted

I started by printing the entire quilt with white hydrangeas. I love the texture it added. However, the all-over quilting didn’t lend a focal point to the quilt, and the white printing ended up being more subtle than I expected with such a contrasty background. This led me to experiment with overprinting the quilt after it was quilted, choosing a dark burgundy for my overprinting. Success was mixed… The quilting had shrunk the quilt a bit, so the burgundy overprinting did not align well to the original white blooms. Plus, the burgundy feels a bit out of left field in terms of design concept.

I don’t have a good picture yet, but will try to post later. I am waiting to make a final judgment on the quilt until I have finished the whole series. If worse comes to worst, I will cut it up and salvage the section of the quilt (about 9” square) that doesn’t have any printing on it.

IMG_7879.jpg
IMG_7897.jpg
IMG_7938.jpg

Variegated thread adds movement

I also experimented with my thread choice, trying a variegated thread for the first time. My mom recently used a variegated thread to quilt one of her art quilts to great effect. Inspired, I ordered some black and white variegated Aurifil thread (Graphite 4665). Good news: I love it! The variegation is subtle when sewn over a black and white background, but I love how the thread disappears on the black in some places, while showing up bright white against the black in other places. It adds subtle movement to the quilt, guiding your eye across the straight-line quilted sections. Note: Aurifil Graphite 4665 has a bit of a blue cast to it that I wasn’t expecting but didn’t end up minding.

I am already scheming about ordering a second spool of variegated thread in cream/tan/white.

IMG_7979.JPG
IMG_7992.jpg
IMG_8005.JPG
9ED45E07-53C3-47DC-8A56-0266581F1326.PNG
0A036C2C-B0B7-41F6-937B-ACA1BB35F648.PNG
5C34CBB6-989D-415B-B49E-9C88DC901F63.PNG

Plan to Quilt: a Project-Planning Quilter's Review

Keeping track of quilt projects

Do you find yourself surrounded by unfinished quilts projects? Are you always delivering quilt gifts weeks, months (or years…) after the occasion? Having been on the giving and receiving end of this predicament, I can empathize. Not only did I receive my “21st birthday” quilt when I was 27, but I have gotten the call that a friend’s baby was born, only to realize the stack of fabric for that baby quilt still sits uncut (or hasn’t even been ordered yet…!). Well, Plan to Quilt, the newest of the quilt planner offerings provides just what you (and I) might need to keep track of our quilt projects.

Several quilt planner offerings

As a Project Manager in my day job and as a member of the team that designed and produced the first edition of the Quilter’s Planner, I have some experience with thinking about we manage our projects and ourselves to accomplish our goals. I don’t think there is a solution that works for everyone, so I encourage you to consider the following:

  • Do I want to keep track of my quilt projects separately from my other daily tasks?

  • Would I like to have an ongoing record of what quilts I have made and to whom I sent them?

  • Do I feel energized by colorful, inspirational planners? Or do I enjoy the zen of simple, neutral planners?

Quilter’s Planner

If you answered NO + YES/NO + and COLORFUL, then the Quilter’s Planner could be a good fit for you. Check out my original blog post discussing the Quilter’s Planner.

Get to Work Book

If you answered NO + YES/NO + and NEUTRAL, then maybe check out the Get to Work Planners. Although not quilt-specific, I used this planner for several years and quite enjoyed it. In this category, I have also enjoyed the simplicity of Moleskine planners.

Plan to Quilt

If you answered, YES + YES + and COLORFUL, then I think Plan to Quilt could be a good option for you.

Plan to Quilt: the ultimate calendar-free project-based organizer

Plan to Quilt is not a day planner but instead a way to keep a record of your ongoing and finished quilt projects. With the catch-phrase “the ultimate calendar-free project-based organizer”, Plan to Quilt lets you keep your regular schedule and daily tasks separate from your quilt-related tasks and in this way is a project-planner that you can used year after year. Plan to Quilt has generously sent me a copy of their quilt planner, so read on to hear my thoughts on how Plan to Quilt could help you to keep track of your quilt projects.

Plan-to-quilt-coupon-code-Lovelyandenough.jpg
 

Thoughtful step-by-step lists to organize quilt projects

Project Checklist

Right at the beginning of Plan to Quilt, there is a Project Checklist page, where you can list in-progress and upcoming quilts to visually keep track of project completion. I love visual tools for project tracking, so this page is my jam. (There is a similar page in the Quilter’s Planner). Even since I took this picture, I have finished quilting and binding my Caprock Quilt, and my to-do list loving self want to go in and finish that line. The option to write a due date for your quilt project is valuable, in my opinion, because it reminds you of when the quilt needs to be ready for gifting or finished for pattern testing. Leaving it blank if it is a passion project helps to emphasize the quilts that really do need to be finished by a certain date.

On the previous page, there is space to keep track of quilt patterns on your wish list. That’s probably a good idea or else I would fill the Project Checklist page with all the quilts I want to do, rather than the quilts I’m actually sewing.

Color-coded Quilt Projects

As you can see, each quilt project that you log in Plan to Quilt has a color dedicated to it that carries through the entire planner from Project Checklist to Shopping List to later quilt-planning pages that have the color on the edge of each page. This makes the Project Checklist page function as a very useful table of contents so that you can quickly look up an ongoing or previously finished project.

IMG_7363.jpg
 

Shopping List

On the page opposite your Project Checklist is a spread dedicated to your Shopping List. The Shopping List page helps you to keep track of notions or fabric you need to complete your quilting projects. I like this page, as it reminds me to go buy backing. Many a quilt has languished in my work-in-progress pile because I haven’t taken the time to pick out and purchase a backing fabric.

Note: There are duplicates of all of these pages so that you can keep track of up to 42 quilts in this single planner.

IMG_7364.jpg
 

Fabric Wishlist

At the beginning of the planner, next to the Pattern Wish List, is a place to keep a record of fabric lines that you’re crushing on. As a fabric designer myself, I love being able to jot down fabric lines that are inspiring me. This is a good place to reference when I am picking fabric for a new quilt or am finally buying a backing for a quilt.

IMG_7373.jpg
 

Quilt-Planning and Recording Pages

The rest of Plan to Quilt is dedicated to 5-page sections to plan and record each quilt project. As mentioned before, they are color-coded on the page edges for easy look-up. The first page provides space to record pattern, pattern designer, difficulty, finished size, recipient, occasion for quilt making/gifting, start date, piecing method, fabrics chosen, color palette, thread used, stitch used, and quilting method chosen. Some of these are extraneous to me. For example, I will probably always be checking the box for “pieced”, but that’s okay. I appreciate that the pages are designed to cover a wide variety of quilting styles and projects.

I took the opportunity to staple swatches of my fabric, and I love that Plan to Quilt encourages you to staple, tape, and adhere pictures and swatches. This makes Plan to Quilt unique in that it does not become obsolete after a single calendar year but instead becomes a record of your quilting projects that you can reference for years to come.

Store Your Quilt Patterns: The second page of the quilt recording section offers a spot to glue an envelope to hold your pattern. You can buy these envelopes on the Plan to Quilt website or use your own.

Finished Quilt Photo: Page 2 can also be used to attach a picture of the finished quilt. This is how I would use it because it creates such a wonderful record of the quilts you have made, especially if you are giving the quilt away.

Quilt Sketching and Binding Calculations: Pages 3 and 4 have grid paper for sketching your block design/layout and quilt ideas. It also offers an easy calculator to determine how much binding you will need and how much fabric you need to make that amount of binding. It even allows you to choose the width of your binding.

Quilt Story and Notes: The final page provides lined paper for notes with a prompt to record your quilt story. “Record a little bit about the inspiration or story behind the quilt here. Why did you choose those colors or fabrics for this project. Who is it for? Why did you make it for them?” As I said before, I think this is what makes Plan to Quilt stand apart from other planners. This quilt planner not only helps you to keep track of quilt projects as you work on them, but also keep a record of the quilt project for posterity.

IMG_7329.jpg
IMG_7348.jpg

Plan to Quilt is unique in that it creates a record of your quilts

a beautiful and valuable record for a maker


Plan to Quilt: guided record-keeping for the quilter

In summary, I think that Plan to Quilt is a functional project organizer to help you keep track of your quilt projects. That said, there are many planners and quilt planners available that can help you stay on task and keep projects organized. What makes Plan to Quilt unique is that, as it guides you through project planning, it also invites you to create a record of your quilt projects. This record of the quilts you have made, the choices that went into them, and the people that received them is a beautiful and valuable record for a maker to have and sets Plan to Quilt apart.

If you’re interested in purchasing Plan to Quilt, click the button below and use code LOVELYANDENOUGH to get 10% of your order.

IMG_7375.jpg

Quilt Mittens – Modern Quilts Interpreted as Mittens

Not Ready for a Quilt Coat? 

Have you been eyeing the quilt coat trend? If you’re like me, you kind of want to join in but you’re not sure you have the interest or capacity to tackle a full-blown coat. Or maybe you’d like warm-up round before diving into a full coat? Well, you’ve come to the right place. Quilt mittens are the perfect gateway project to quilted garments.

Perfect Handmade Gift for Friends and Family

These mittens are a cozy and quick make. They are the perfect gift as winter rolls in; great for your parents’ aging hands, your teenager headed back to college, your trendy friend living in snowy New York City, or your friend tending chickens in freezing rural Saskatchewan. Maybe you just want a pair of quilt mittens for yourself. Well, be prepared to make yourself a second pair when someone purloins the first pair!

Quilt-Mittens-Lovely-and-Enough-04.jpg

Modern Quilts Interpreted as Mittens

I have been making mittens based on modern quilt patterns I have been crushing on but don’t have time to make in full. This way I get to have fun making a single block without adding another big project to my never-to-be-finished project pile. My first pair of quilt mittens was patterned after the Christmas Joy Quilt by Brittany of Lo & Behold Stitchery. The Christmas Joy Quilt caught my eye a few years ago for its simple beauty and classic, minimalist Christmas charm, so when I started looking for a quilt to make into mittens, I knew this would be my first.

FullSizeRender.jpg

After that first pair, I couldn’t wait to make more. I started mocking up possible quilt mittens in Adobe Illustrator. Some would be beautiful but much too complicated, like the Interwoven quilt by Lo & Behold Stitchery (middle bottom). Others are 100% on the docket. I just haven’t found time yet! Make sure to stop back by, as I will keep adding inspiration pictures to this post as I stitch up more quilt mittens.

Quilt mitten mockups:

  1. Reflections Quilt by Suzy Quilts

  2. Prince Quilt by Riane Elise

  3. Maypole Quilt by Suzy Quilts

  4. Guest Pillow by Riane Elise

  5. Gathering Quilt by Riane Elise

  6. Sola Quilt by Riane Elise

  7. Stone + Bloom by me

  8. Interwoven Quilt by Lo & Behold Stitchery

  9. Grid Quilt by Riane Elise

Quilt Mitten Ideas (for blog)-01.jpg


Can you tell I crush on Riane Elise quilt patterns a lot?


Composing Your Quilt Mitten

If choosing a more traditional quilt block, you’ll want to ask yourself two questions:

  • What size mitten am I making?

  • Do I want the quilt block to go off the edges of the mitten?

Typically in graphic design, I am a big fan of full-bleed: images that go right to the edge of a page and designs that completely fill a shape with no border. However, when it comes to quilt mittens, it can be nice to have some breathing room in your composition that allows the quilt block to shine without its points being lost off the mitten edges.


Full-bleed Quilt Mittens

This first pair of Christmas Joy Quilt mittens that I made (below) the quilt block filled the whole mitten back and spilled over the edges.

IMG_6492.jpg
IMG_6429.jpg
IMG_6495.jpg


Quilt Mittens with More Negative Space

This second pair (below), I shrunk the block a bit, inversed the colors, and added a border so that the foreground of the block would float on the mittens with the background of the block seamlessly blending to the color of the palms of the mittens. Both are nice, just different!

IMG_6414.jpg
IMG_6412.jpg


Sizing Your Quilt Block

For a large mitten, you will need a 12” x 12” quilt block. Medium: 11” x 11”. Small: 10” x 10”. However, if you want the whole quilt block to be visible on your mittens, consider sewing a quilt block that finishes at 9” x 9” or less. Then add a border to each side of the block to achieve the size block you need for your chosen size of mitten.


More Quilt Mitten Inspiration

After finishing my Christmas Joy Quilt mittens, I knew my next pair would be with my extra Shine Quilt block. I am still not finished with that whole quilt, but since I am using a combo of wool fabric and peppered cotton, I wanted to make sure the finished quilt would wash well. I took one of my blocks, sandwiched and quilted it, then threw it in the washer and dryer. What resulted was crinkly goodness! No issues with odd shrinking or felting. It also left me with a single crinkly Shine Quilt block: perfect for a quilt mitten!

IMG_6440.jpg


Quilt Mitten Tutorial

If you’re ready to make your quilt mittens, pop over to my Quilt Mitten Tutorial on the Lo & Behold Stitchery blog. In that post, I detail how to incorporate your chosen quilt block into your mittens. Note that you will need to purchase my Adult Mitten Pattern to download the mitten pattern pieces and the instructions for constructing the non-quilt part of your mittens.

To check out other people’s quilt mittens, you can peruse #QuiltMittens and #LovelyEnoughMittens on Instagram.

Quilt-Mittens-Lovely-and-Enough-01.jpg

Mitten Sewing Pattern – Cozy and Quick Handmade Gift

Sew a pair of warm, cozy mittens for you or for a gift.

Are you looking for a last-minute handmade gift for a friend or family member? Perhaps you would like to get ahead on Christmas gifts this year? You have come to the right place. Mittens are the perfect gift for anyone living in less than balmy climes: great for your parents’ aging hands, your teenager headed back to college, your trendy friend living in snowy New York City, or your friend tending chickens in freezing rural Saskatchewan. Warm and cozy with a simple silhouette, these mittens will look like a pair of bespoke mittens bought from an artisan market. Your giftee will be tickled and overjoyed.

Versatile mitten sewing pattern

Flexible to be sewn with new, scrap, or thrifted fabrics, this mitten pattern also includes alternates to accommodate preferences for finishing your mittens by hand or by machine.

Check out #LovelyEnoughMittens on Instagram to see examples of the beautiful and varied mittens people are making with the pattern.

Download your pattern and start making mittens for you and your loved ones today!

Materials for Sewing Mittens

(for a pair of mittens, any size)
my downloadable mitten pattern
– mitten fabric, ⅓ yd (wool suggested, woven or knit)
– batting, ⅓ yd (optional, cotton or wool)
– lining, ⅓ yd (any soft woven or knit)
– elastic, 8” (¼” – ¾” wide)
– embroidery floss and needle, if you choose to attach elastic and finish wrist by hand

Skill Level – Advanced Beginner

Cozy and quick mitten pattern for your or for a gift! | by Lovely and Enough
mitten-sewing-pattern-easy-lovely-and-enough.jpg
modern-mitten-sewing-pattern-lovely-and-enough.JPG
 

Make Mittens from Old Sweaters

Have you wandered through a craft fair and coveted the cozy patchwork mittens made out of old sweaters, only to flip over the price tag and experience sticker shock? Well, here’s your chance to make your own pair for a fraction of the cost. Swing by your local thrift store or pull an old sweater out of your closet that you never wear and get to work making your very own sweater mittens.

Sizing your sweater mittens

The stretchiness of the sweater will provide a more pliable mitten. This might feel looser than a mitten of the same size made out of woven fabrics. Thus, even if you are using a bulky lining fabric, like minky or sherpa, you probably don’t need to size up like you would otherwise.

That said, if you use a layer of batting, this will remove all stretch again, so plan accordingly. Adding a layer of batting can be nice to keep your hands warmer, especially if the sweater has a loose weave that could let through wind and cold drafts.

Felt your sweater before making

Another option for looser weave sweaters is felting. The easiest way to go about this is to wash your wool sweater in hot water and dry on high. The felting process makes the wool fibers open up (when hot) and then close around each other as they cool, creating a denser fabric. Take note that this will shrink your sweater and could affect whether you have enough material for your mittens. Check out this post at Instructables for more on felting sweaters.


Perfect Scrap Buster

This mitten pattern is a perfect scrap buster. The pieces can quite easily be cut out of scrap fabric from another garment project. Leanne of The Bristol Stitchery whipped up a beautiful pair of mittens from her garment sewing scraps. She used waterproof fabric for the exterior and double-lined them to make an ultra-warm and weatherproof pair of mittens. You can check them out and ask her more questions on her Instagram.

Beautiful mittens made using scraps from other garment projects. Mittens and image by Leanne of The Bristol Stitchery.

Beautiful mittens made using scraps from other garment projects. Mittens and image by Leanne of The Bristol Stitchery.


Quilt Mittens

Have you been ogling those quilt coats that are all the rage? Well, take it a step at a time and start with some quilt mittens! My mitten pattern is easily adapted to using a quilt block for the back of the hands. Check out the mitten below made with a Christmas Joy Quilt block.

You can find more quilt mitten inspiration on my Quilt Mittens post, as well as a free tutorial for pattern hacking my mitten pattern to make quilt mittens on Lo & Behold Stitchery.

IMG_6492.jpg
IMG_6430.jpg
IMG_6412.jpg
 

Tips for Sewing Your Mittens

As I have sewed mittens and experimented with the pattern, I have developed a few tips for success.

Tip 1: How to secure a long zigzag stitch in the seam allowance

Use a very wide and long zigzag stitch, as this helps to maintain the elasticity. However, using a very long zigzag stitch makes it tough to reverse at the start and the stop of the seam inside of the seam allowance. To remedy this, I came up with a little trick.

 In order to squeeze reversing a long zig-zag stitch into the seam allowance, start with your machine set to a very very short, wide stitch. Sew a handful of stitches in the seam allowance, reversing. Then lengthen the stitch to sew across the wrist, without cutting the thread. Finish the seam by shortening the stitch again and reversing in the seam allowance.

Modern-quilt-mitten-lovely-and-enough.JPG
modern-quilt-mitten-sewing-pattern-Lovely-and-Enough.jpg
IMG_6194.jpg
 

Tip 2: How to create a neat, secure seam at the base of the thumb

Start by pinning the thumb to the thumb-palm seam so that you don’t accidentally sew it into the edge seam. A binding clip or straight pin is perfect for this job. In order to more easily stitch these seams open, wait to trim the thumb seam until after you have attached the front of the mitten to the back. Lastly, make sure to reverse when crossing the junction at the base of the thumb. This is a seam that will take a lot of strain during wear and benefits from the extra reinforcement

modern-quilt-mitten-sewing-pattern-Lovely-and-Enough.JPG
 

Tip 3: How to keep the wrist elastic taut while hand sewing

Cut a piece of cardboard to slide inside the wrist to keep the wrist elastic taut while hand sewing. The size of the cardboard will depend on the size mitten you are making. It should be about 3–4” long. The widths are as follows: small–4”, medium–4½”, large–5 ⅛”. I also like to put a piece of painter’s tape on the edges to keep it from snagging the batting.

Slide the cardboard inside the wrist, and use a binding clip to secure the elastic at either end of the cardboard. Voila, you are ready to hand tack the elastic!

modern-quilt-mitten-sewing-pattern-Lovely-and-Enough.JPG
IMG_6198.JPG
IMG_5404.jpg
 

Tip 4: How to avoid fluffy linings poking through blanket stitches

I found that when blanket stitching my wrist edges that if my stitches were initiated from the inside of the mitten, then I would inevitably pull fluffy white Sherpa tufts through with each stitch. This left me with a finished edge that didn’t look as neat as I wanted. To avoid this, sew the blanket stitch by pushing needle from the outside of the mitten to the inside as this avoids pushing fuzzy lining through to the outside with each stitch.

In the picture below, the top mitten was stitched from the outside and the bottom mitten was stitched from the inside. I know it’s subtle, but the white fluff balls at the base of each blanket stitch are more visible in person.

modern-quilt-mitten-sewing-pattern-Lovely-and-Enough.JPG
 

Share Pictures of your Handmade Mittens

I would love to see what you make, so tag your pictures on Instagram with #LovelyEnoughMittens. Can’t wait to see the mittens you create! Stay warm and cozy.

lovely-and-enough-mitten-pattern-inspiration.png
 
Mittens-Pattern-DIY-Lovely-and-Enough-04.jpg
Mittens-Pattern-DIY-Lovely-and-Enough-02.jpg
Mittens-Pattern-DIY-Lovely-and-Enough-03.jpg
Mittens-Pattern-DIY-Lovely-and-Enough-07.jpg
Mittens-Pattern-DIY-Lovely-and-Enough-06.jpg
Mittens-Pattern-DIY-Lovely-and-Enough-08.jpg

2020 Gift Guide for the Quilter in Your Life

When the holidays roll around, it can be difficult to know exactly what the quilter or sewist in your life might appreciate as a gift. Would they like a pair of scissors in their stocking? Is thread a good idea for a Hanukkah gift? With one of my StrengthFinders strengths being Individualization, one of my passions is finding the perfect gift for my friends and family. This year, I have channeled that passion into providing a few gift guides so that you too can find the perfect gift this holiday season.

Gift Ideas for a Quilter or Sewist

Without further ado, please enjoy perusing my 2020 gift guide for what the quilter or sewist in your life might be tickled to find under the tree. Or wrapped for another holiday. Or waiting for them on the brunch table at Mother’s Day. My joy of gift giving extends across religions and seasons!

Note: these links are Amazon Affiliate links, and as such I may receive a small commission if you use my link to purchase the product. I highly recommend checking out your local quilt shop (sometimes abbreviated LQS, for those learning the lingo) and shopping local, especially to support little shops that have been hit hard this year. I have included links to some of my favorite small shops where I could find them.

2020 Gift Idea Guide for the Quilter or Sewist in Your Life. Find the perfect gift for under $50. | curated by Kelsey of Lovely and Enough
 

1. Scissors - high-quality, SHARP sEWING SCISSORS

A good pair of high-quality sharp scissors make every project easier. They slice through fabric like a breeze and don’t leave small threads hanging on that could pull and ruin your fabric. These scissors should also be reserved for just cutting fabric and thread (no paper) as these maintains their sharp edge.

Top Scissor Brands

There are several companies that make excellent scissors for quilting. I, personally, have Gingher brand scissors, a US-based company that has been around for over 50 years. I love that they offer scissors sharpening services for all of their products, as this is an excellent way to take care of your tools and minimize consumption of cheap, expendable scissors. LDH is also an excellent scissors company based in Canada that has been around for 30 years. They have some beautiful finishes on their scissors (rainbow, all black) that can make your gift of scissors feel extra special. Different size and shape scissors come in handy for different tasks, look below for my top four scissors types.

What Type of Scissors You Should Buy

  • 6”+ Fabric Shears
    • These scissors are the sewing workhorse and can be used to cut everything from fabric to batting to thread. A pair of scissors with nice long blades makes cutting fabric even faster and easier. Here are two examples of good pairs:
  • Little “Snips” Scissors
    • These scissors are handy to have sitting near your machine or nearby when hand-sewing. They are great for snipping threads as you finish a seam or after tying off a knot. Stork embroidery scissors are a sewing classic, but thread snips, like those linked at LDH, are a mainstay for many sewists.
  • Appliqué Scissors
    • These scissors are uniquely shaped to make it easy to cut fabric or thread at a 90º angle to your hand. This is perfect for when trimming fabric during an appliqué project or snipping threads on the back of the quilt. I love these scissors.
2020 Gift Idea Guide for the Quilter or Sewist in Your Life. Find the perfect gift for under $50. | curated by Kelsey of Lovely and Enough

2020 Gift Idea Guide for the Quilter or Sewist in Your Life. Find the perfect gift for under $50. | curated by Kelsey of Lovely and Enough


2. Modern Quilting Books

A new book with can be the perfect inspiration for starting a new project or learning a new sewing skill. The ones listed below also include gorgeous swoon-worthy photos and insightful tips from some of my favorite sewists. A few of my favorites are:

For the modern minimalist quilter

Inheritance: Minimal Quilts for Modern Home by Riane Menardi Morrison is a beautiful book full of gorgeous simple quilt designs that are primed to become modern heirlooms.

Buy it from Amazon: Inheritance or straight from the author, Riane Elise: Inheritance.

Inheritance: Minimal Quilts for the Modern Home by Riane Menardi Morrison is a beautiful book full of gorgeous quilt that are primed to become modern heirlooms.
 

For the quilter who loves hand sewing

check out Savor Each Stitch by Carolyn Friedlander. Carolyn's beautiful needle-turn applique quilts open up a whole new world of quilt design possibilities, and her modern architecture-inspired quilt designs are unlike any else.

Buy it from Amazon: Savor Each Stitch or my local bookstore, Literati: Savor Each Stitch.

2020 Gift Idea Guide for the Quilter or Sewist in Your Life. Find the perfect gift for under $50. | curated by Kelsey of Lovely and Enough

For mastering a new skill

For mastering a new skill, try Walk: Master Machine Quilting with your Walking Foot by Jacquie Gering. This book teaches skills surrounding machine quilting your modern machines, providing excellent tips, practice exercises, and inspiration.

Buy it at Amazon: Walk or my local bookstore, Literati: Walk.

For the sewist who doesn’t quilt

Try Anna Graham’s Handmade Style: 23 Must-Have Basics to Stitch, Use, and Wear. This book has quilts, clothes, and some of the cutest bag patterns you can find. Her beautiful pictures and great instructions make for the perfect weekend projects.

Buy it from Amazon: Handmade Style; my local bookstore, Literati: Handmade Style; or straight from the author, Anna Graham: Handmade Style!

For More Ideas

Check our Anna Graham’s website to see her other book and all her excellent patterns! Photo credit: Anna Graham of Noodlehead.

Check our Anna Graham’s website to see her other book and all her excellent patterns! Photo credit: Anna Graham of Noodlehead.

Walk-Jacquie-Gering
 

3. Non-slip Ruler

There is nothing more frustrating than slicing into new fabric only to have your ruler slip and steer your rotary cutter astray. Sometimes this just means a little bit of fabric lost, but sometimes this spells disaster for a project. There are two great ways to avoid this nightmare:

For several years now, I have had non-slip stickies from TrueGrips attached to the back of my 6” x 24” ruler, and they have worked well. However, they began falling off about a month ago, close to when I purchased a new 12.5” x 12.5” ruler by Creative Grids that had built-in rough patches on the back. This new ruler NEVER SLIPS. It’s incredible. So, this Christmas season, I am treating myself to a new Creative Grids 6” x 24” ruler.

Not sure what size ruler they want?

If you’re not sure which ruler your gift recipient uses, 6” x 24” or 6.5” x 24” are both safe bets as they are quite standard. Otherwise, you can sneak into their sewing space and see which size ruler they have sitting out, as this is probably one they use the most! If you don’t want to risk buying the wrong size ruler, pick up a pack of non-slip stickies from TrueGrips, and they will be able to add them to whichever ruler they please.

2020 Gift Idea Guide for the Quilter or Sewist in Your Life. Find the perfect gift for under $50. | curated by Kelsey of Lovely and Enough

More Gift Ideas for Your Quilter or Sewist

If you’re still looking for more gift ideas, check out my more extensive gift idea list on Amazon:

2020 Quilter’s Gift Guide on Amazon

And as always, if you have any questions, drop them in the comments below or shoot me an email.

2020 Gift Idea Guide for the Quilter or Sewist in Your Life. Find the perfect gift for under $50. | curated by Kelsey of Lovely and Enough

Modern Summery Palette | Loome Quilt

Modern, summery palette for a strip-based baby quilt. This fabric pull has watermelon vibes and can't wait to be squeezed!

Summery+Quilt+Color+Palette+-+Lovely+and+Enough

Minimalist Quilt Patterns

Riane Elise Menardi is an inspiration to me. Her soothing minimalist quilts and exquisite photography—both process shots and finished quilt recording—soothe my soul. When her book Inheritance came out in 2017, I knew I was preordering it, and when she asked for pattern testers several weeks ago, I couldn’t think of a better quilter to partner with to get myself quilting again.

This year she is releasing monthly minimalist quilt patterns. So far, she has released the Sola quilt and the Harte quilt, pictured below (photo credit: Riane Menardi). See what I mean about her quilts and photography?

One of the next quilts in her series is the Loome Quilt, which will be released Sept 18, 2020, and I am honored to be testing the pattern before its release. Although, I can’t show you the full quilt yet, I can tell you that it is strip-based, and that Riane does a great job to provide a suggestions for where to put light/medium/dark colors to amp up the composition.

Color Palette

I opted for a summery color palette with watermelon vibes. These are some of my favorite solids that I’ve been vibing with for several years now! Pictured below (left to right):

  • Swirling - from my fabric collection Coastal Orchards by Benartex Fabrics

  • Empire Yellow - Art Gallery, Pure Elements solids

  • Peach Sorbet - Kona Cotton

  • Coral - Michael Miller, Cotton Couture solids

  • Soft White - Michael Miller, Cotton Couture solids (not pictured)

modern summery color palette for a baby quilt in peach, coral, and lime | Lovely and Enough

As I started cutting fabric, I realized that I had one fabric too many in my palette since I was planning to use white for the background. Empire Yellow got nixed because I really wanted that peach-coral color play.

modern fabric strips in citron, coral, and peach; great summery vibes for a peppy palette | Lovely and Enough

Next Up: Strip Piecing

Just finished pinning the strips together during a Zoom call. Maybe I can sneak in some quick seams and a few more pics today! Follow other pattern testers and quilters making this quilt on Instagram with #LoomeQuilt and follow my progress @LovelyandEnough

modern summery color palette for a modern quilt, perfect for a fresh make for you or that upcoming baby shower | Lovely and Enough

Flitting Quilt Pattern

To celebrate my new quilting fabric collection, Coastal Orchards for Benartex, I designed a free quilt pattern! It is called Flitting.

Flitting Quilt comprised of modern Hourglass Blocks in Coastal Orchards fabrics | by Kelsey Williams of Lovely and Enough

Inspiration

Flitting was inspired by the swooping of butterflies as they flutter through orchards and gardens. When photographing a butterfly in flight, it is almost impossible to get a crisp shot that showcases the butterfly’s wings. Instead each snapshot captures the butterfly at a different angle with their wings at different levels of extension. This quilt represents that beautiful but erratic flight.


Difficulty Level: Beginner

This quilt pattern is definitely beginner-friendly but offers a finished product that looks more difficult than it is.

Confession: The hardest part for me was remembering which of my light-colored fabrics corresponded to which fabric in the pattern. That’s why in the pattern I suggest creating a cheat sheet for yourself!


Block Highlight: Hourglass Block

This quilt introduces the hourglass block (also sometimes referred to as the quarter-square triangle), and it is one of my favorite blocks. I love how easy it is to make four hourglass blocks at once, and I enjoy playing with how much white fills each block. Check out my Hourglass Block Tutorial to see pictures and read tips.


I’m working on my sample for the quilt, so check back next week to see a finished Flitting Quilt or

follow along on Instagram at #LovELyFlittingQuilt

Black and White Quilt Finished

It’s done!! My Black and White Twelve Quilt, inspired by Piecework Collective’s Black and White quilt show in 2016, is the largest overprinted quilt I have tackled to date!

With the creative restrictions of black and white, I strayed from my standard light grey and white geometric quilt top and played with a different neutral: cream. Although it felt like a stretch at the time, I now regularly keep cream in my quilting line-up. The resulting subtle play between the cream and white and the dark grey and black adds gentle movement while imbuing the quilt with a warmth that a cooler lighter grey does not provide.

modern black and white quilt being screen printed with hydrangea blooms | by Kelsey Williams of Lovely and Enough

For this quilt, I also experimented with piecing the quilt top halfway, screen printing blooms, and then finishing the piecing process. Previously I either printed on a completely pieced top or a completely pieced and quilted top, never part way through the piecing process! It definitely adds some waiting time as the screen printed blooms need to dry before the quilt can be stitched up further, but I love how this printing process causes the flowers to weave through the quilt, contrasting organic with the architectural.

modern black and white quilt screen printed with hydrangea blooms | by Kelsey Williams of Lovely and Enough

The quilting took me years. Literally. Started in 2016, this quilt has been in process a long time, but while trying to finish my PhD last year, the seemingly endless straight-line quilting offered me a methodical and restful rhythm.

quilting plans for a modern black and white quilt screen-printed with hydrangea blooms | by Kelsey Williams of Lovely and Enough
straight-line quilting on a modern black and white quilt screen printed with hydrangea blooms | by Kelsey Williams of Lovely and Enough
modern black and white quilt screen printed with hydrangea blooms | by Kelsey Williams of Lovely and Enough

I am excited to have it finished at last, and I am pondering what it would mean to tackle a quilt of this magnitude again. Although I enjoyed the process, I think I may collaborate with a long-arm quilter next time. That said, it would be hard to let go of total control…I guess only time will tell!

Follow the progress of this quilt with the links below:

Piecing

Printing

Lenten Twelves 2018

Every Lenten season, I take a break from my current quilting projects to feast into creativity. The first year, this meant a 12"x 12" mini quilt every week (hence the original name "Lenten Twelves"). The next year was a series of baby quilts. Last year was a series of printed quilts. This Lenten season, I am exploring double wedding ring quilt blocks and the stations of the cross.

Lenten Twelve double wedding ring quilt block in black and white

The double wedding ring block carries double meaning for me. For one, it has significance as I plan my wedding and prepare for marriage. However, it also feels like an apt block to explore during Lent as we contemplate Jesus coming to the world to take the church as his bride.

While visiting the National Gallery of Art in Washington, DC last fall, I came across Barnett Newman's Stations of the Cross. Minimal in black and white, the room was incredibly meditative, and I have mulling over their simple power ever since gallery. With Barnett as inspiration, I am spending this Lent working in shades of black and white and loosely exploring the stations of the cross. The 14 stations of the cross are intended to be meditations that center around the day of Jesus crucifixion, following the story from when he is condemned to die to when he is placed in his tomb. 

Barnett Newman's Station's of the Cross (4 of 15)


My first block is titled: Prayers in Gethsemane.


At this moment in the story, Jesus has finished the Last Supper with his friends, and the full weight of what awaits him next is sinking in. Since he is God, he knows that he needs to die in order to atone for the sins of the world, but he is also human and is overwhelmed at the thought of being crucified. Together with his friends, he goes to the Garden of Gethsemane and asks them to stay awake with him as he contemplates his impending death.

"Then Jesus went with his disciples to a place called Gethsemane, and he said to them, 'Sit here while I go over there and pray.' He took Peter and the two sons of Zebedee along with him, and he began to be sorrowful and troubled. Then he said to them, 'My soul is overwhelmed with sorrow to the point of death. Stay here and keep watch with me.'

Going a little farther, he fell with his face to the ground and prayed, 'My Father, if it is possible, may this cup be taken from me. Yet not as I will, but as you will.' Then he returned to his disciples and found them sleeping. 'Could you men not keep watch with me for one hour?' he asked Peter . . .

He went away a second time and prayed, 'My Father, if it is not possible for this cup to be taken away unless I drink it, may your will be done.' When he came back, he again found them sleeping, because their eyes were heavy." - Matthew 26: 36–40, 42–43

When Jesus needs his friends' support, they fall asleep. This block depicts the twelve sleeping disciples in grey with Jesus awake at the center. Dark printed foliage covers the entire piece, obscuring the disciples and blending into the night sky.

Lenten Twelve double wedding ring quilt block screen printed with black foliage

Step Up Your Quilt Photo Game

Do you wish you could take better photos of your quilts? If purchasing a DSLR camera is out of your price range or you want to be able to snap quick, high quality photos with your iPhone, I offer you a solution: a lens for your iPhone.

Moment iPhone lens

Check out Moment iPhone lenses. They come in a variety of types: wide angle, tele, fisheye, and macro. I have the wide angle lens. It lets me take awesome flat lay photos without having to stand on a chair (as well as gorgeous landscapes when I'm traveling). I have also used my sister's fisheye lens, which adds clarity and flare to any photo, even your thread snippings.

Plus, best of all, their lenses are affordable and easy to use. I know I sound like an infomercial right now, but I mean it. Check out the video I made below. Each lens easily clicks onto my phone with the mounting plate stuck to the back. The mounting plate is slim, so it can go inside almost any case you already have. Lenses start around $59.

To top it off, Moment is just an awesome company. Moment believes in the opportunity to empower the creative in everyone through mobile photography.

I am honored to be selected as one of their Moment50 this year, a collection of up-and-coming creatives chosen for their unique work and innovative use of mobile photography. Check out a snapshot of the 49 other creatives below and follow the link to the Moment50 website to see more of their photography and hear their stories. You can see all the photos taken with Moment lenses with #ShotonMoment on Instagram.

7 Ways a Hobby Can Make You Feel Better

Guest Post by Maria Cannon

For many people, having a hobby is a way to reduce stress and fill the days after work is over. But what you may not know is that hobbies can evoke creativity, boost mood and self-confidence, and help raise positivity and mental health levels. These days, it can be difficult to find positivity in the world; a single scroll through your newsfeed can darken your entire day. Having a hobby that you enjoy doing can be a great way to feel better about yourself, your life, and your relationships.

The wonderful thing about most hobbies is that they can help with depression and other mood disorders. In fact, art therapy is often used to treat depression in individuals who are battling substance abuse or PTSD.

There are many different ways you can get creative or simply find something you’re good at and enjoy doing. Here are a few of the best ways having a hobby can help you feel better.

1. It can help you get social

Particularly if you suffer from depression, it can be difficult to be social sometimes. One of the symptoms of depression is withdrawal from friends and family, and many individuals find it hard to get motivated when it comes to spending time with others. Having a hobby that you can share with others is a great way to get out there, meet new people, and spend time with people who enjoy the same things you do. Consider joining your local MQG to get out of the house once a month and meet with people who love the same things you do.

2. It can teach you about your community

Hobbies can offer the opportunity to discover new things about your community. For example, if you’re a hiker, you’re in the perfect position to find new places to explore. If you enjoy the art of upcycling, try visiting salvage yards in unfamiliar parts of town. If you enjoy quilting, check out shop hops in your area or road trip to a new fabric store. Better yet, take a few friends with you as you explore local quilt shops.

3. It can boost self-esteem

Finding something you’re good at—quilting, drawing, singing, dancing, creative writing—can be enormously helpful in boosting your self-esteem and can help you find new things to like about yourself. There’s a great feeling of accomplishment when you finish a quilt (particularly your first one) or when you complete a big knitting project. Not only does this make you feel good about your abilities, it keeps you coming back for more.

4. It can help you unplug

It can be difficult to unplug these days, between smartphones, tablets, and laptops. Staying connected all the time can be damaging to your mood and can even lead to sadness and depression, so it’s important to find ways to fill your time that don’t include a constant update of your newsfeed. Sewing is a great way to unplug. Whether it’s by machine or by hand, you can allow yourself to fall into your project. And because both of your hands will be busy with a needle and thread, you will be less inclined to answer texts or emails. If you’re new to sewing, here are a few great tips on how to get started.

5. It can get you active

It can be hard to find the time to exercise every day, but it’s important to stay active and get in a workout as often as possible. Having a hobby that gets you moving can help you stay active and improve your health, as well as reduce stress.

6. It can help you give back

There are many hobbies that help you give back to your community or to the charity of your choice; in fact, if you enjoy planning events and bringing people together, consider joining a fundraising group that will allow you to give back. There are quick and easy ways to raise awareness and spread your message through social media and email outreach. If you’re a knitter, maybe you can provide several afghan squares to Warm Up America. If you can crank out quilts in a flash, maybe there’s a lap quilt you can donate to a raffle or to a children’s hospital.

7. It can help you de-stress

Having a hobby can help you de-stress and get your emotions centered, so when you’ve had a long day, or a particularly tough week, work on your favorite hobby and feel the stress fall away. Pull out a sketch book and dream up your next quilt. If you’re not feeling like starting a new project, simply have fun pulling together a beautiful pile of fabrics from your stash; this can be a fun no-commitment creative exercise.

"If we start thinking about that beneficial carryover effect day after day, year after year, it starts to make sense how leisure can help improve health in the long term. Stress causes a buildup of higher heart rate, blood pressure, and hormone levels, so the more we can prevent this overworked state, the less of a load it builds up,” says Dr. Matthew Zawadzki.

Remember that developing a hobby can take time; don’t be hard on yourself if it takes a while to find something you love to do. Try different activities, and don’t be disheartened if you’re not great at everything. Your mom may be a hand-sewing whiz, but you may be a machine quilter. Your brother loves to garden but you may love to do yoga. As Adriene, the modern yoga video phenomenon says, “Find what feels good.”

Black and White Deconstructed Quilt Finished

Quilt: Lenten Twelves Three

Watching: Season Two of Blue Bloods

Favorite Part of Quilt: diagonal straight-line quilting in just the grey areas

Place for Improvement: experimenting with the connective quilting after rearranging

black and white modern deconstructed quilt rearranged
 
deconstructed and printed black and white modern quilt
 
rearrangeabledeconstructed and printed black and white modern quilt
 
deconstructed and printed black and white modern quilt with DIY professional label
 
deconstructed and printed black and white modern quilt
 
deconstructed and printed black and white modern quilt

To read more about this Lenten Twelves series, follow the links below:

Introduction to Lenten Twelves

Printing Stripes on Quilts

Fresh Deconstructed Quilt Finish

Quilt: Lenten Twelves Two (2017)

Listening to While Quilting: Invisibilia (Season Three)

Favorite Part of Quilt: I love this quilt so much, it can't be just one.

Place for Improvement:

  • turning corners with serger and tucking in the loose ends
  • hiding white batting edges
printed and deconstructed modern wall quilt in fresh spring colors
 
printed and deconstructed modern wall quilt rearranged from grid to line
 

To read more about this Lenten Twelves series, follow the links below:

Introduction to Lenten Twelves

Lenten Twelves Two Progress (beginning)

Citrus Printing onto Lenten Twelve Two

Mustard Stripes Wall Quilt Completed

Quilt: Lenten Twelves One (2017)

Listening to While Quilting: Despacito (Remix Audio) ft. Justin Bieber on repeat

Favorite Part of Quilt: my first experiment with stripes printed on quilts

Place for Improvement: printing stripes with thinner ink for more even printing

mustard Lenten Twelves One printed, quilted, and faced

I have to write a lot for grad school. (One year from my PhD if anyone else is counting!) Because of that, writing on the blog does not bring me joy right now. However, formulas do, so in true scientist fashion, I am going to follow this formula of indexing my quilts with: the music/tv/podcast I was listening to while working on it, my favorite part of the quilt, and something I want to improve upon. Thanks for sticking with me.

mustard Lenten Twelves One modern quilt printed with stripes, quilted and faced
 
mustard Lenten Twelves One modern quilt quilted and faced
 
mustard Lenten Twelves One modern quilt printed with stripes, quilted and faced
 
mustard Lenten Twelves One modern quilt printed with stripes, quilted and faced

To read more about this Lenten Twelves series, follow the links below:

Introduction to Lenten Twelves

Lenten Twelves One Progress (beginning)

Printing Stripes on Quilts

Citrus Printing onto Lenten Twelve Two

New screen!!! I designed a new citrus pattern and made a screen of the one-color version to print on quilts. I love it!! I am so thankful that I have the resources at the College of Textiles to put patterns on acetate and then burn them onto screens. 

printed and quilted summery LentenTwelve modern quilt close-up | LovelyandEnough
 
new acetate for a citrus screen
 
making screens in the dark room | LovelyandEnough

With new screen in hand, I printed a translucent white onto my springy mini quilt.

a new citrus screen for printing quilts | LovelyandEnough
 

Then I free-motion quilted around a trailing path of fruits and leaves and finished off the background with scattered aqua straight-line quilting. I love how it is turning out! I will definitely be trying more of these this summer. Next up is chopping this quilt into teeny minis and then finishing them with my serger!

printed and quilt fresh modern mini quilt by LovelyandEnough

To read more about this Lenten Twelves series, follow the links below:

Introduction to Lenten Twelves

Lenten Twelves One Progress (beginning)

Lenten Twelves Two Progress (beginning)

Printing Stripes on Quilts