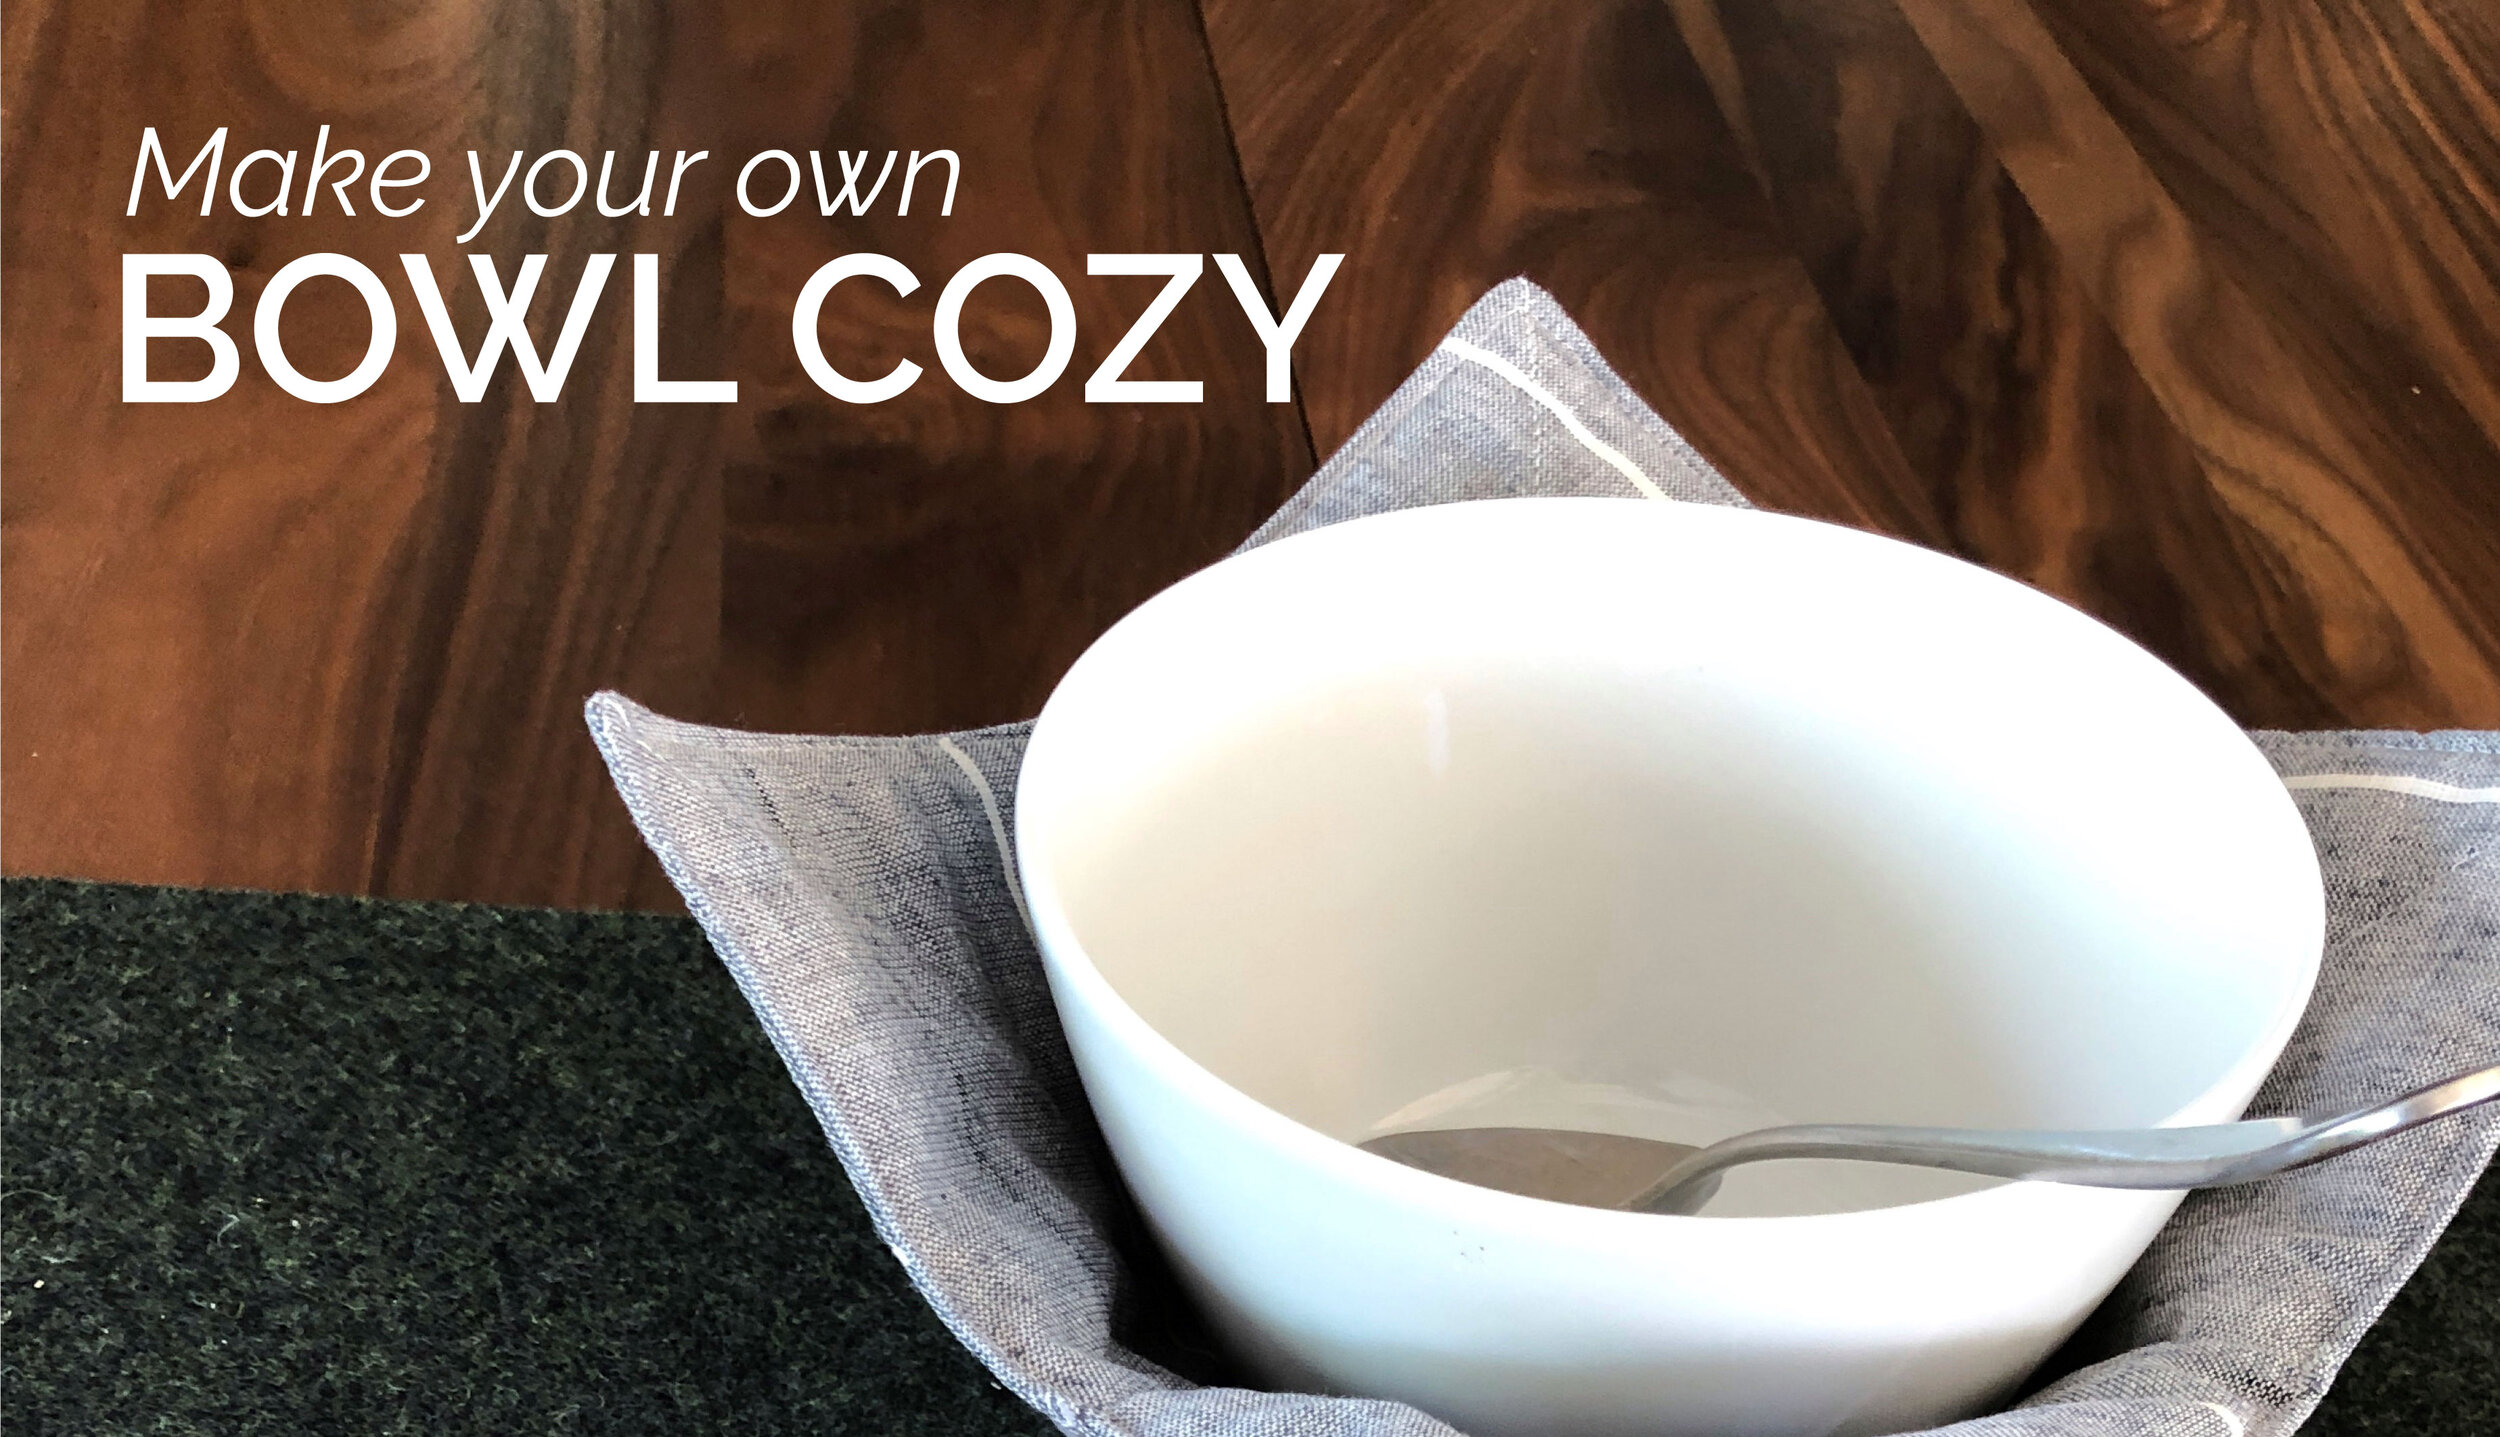
Perfect Handmade Gift
Microwave-safe Bowl Holder
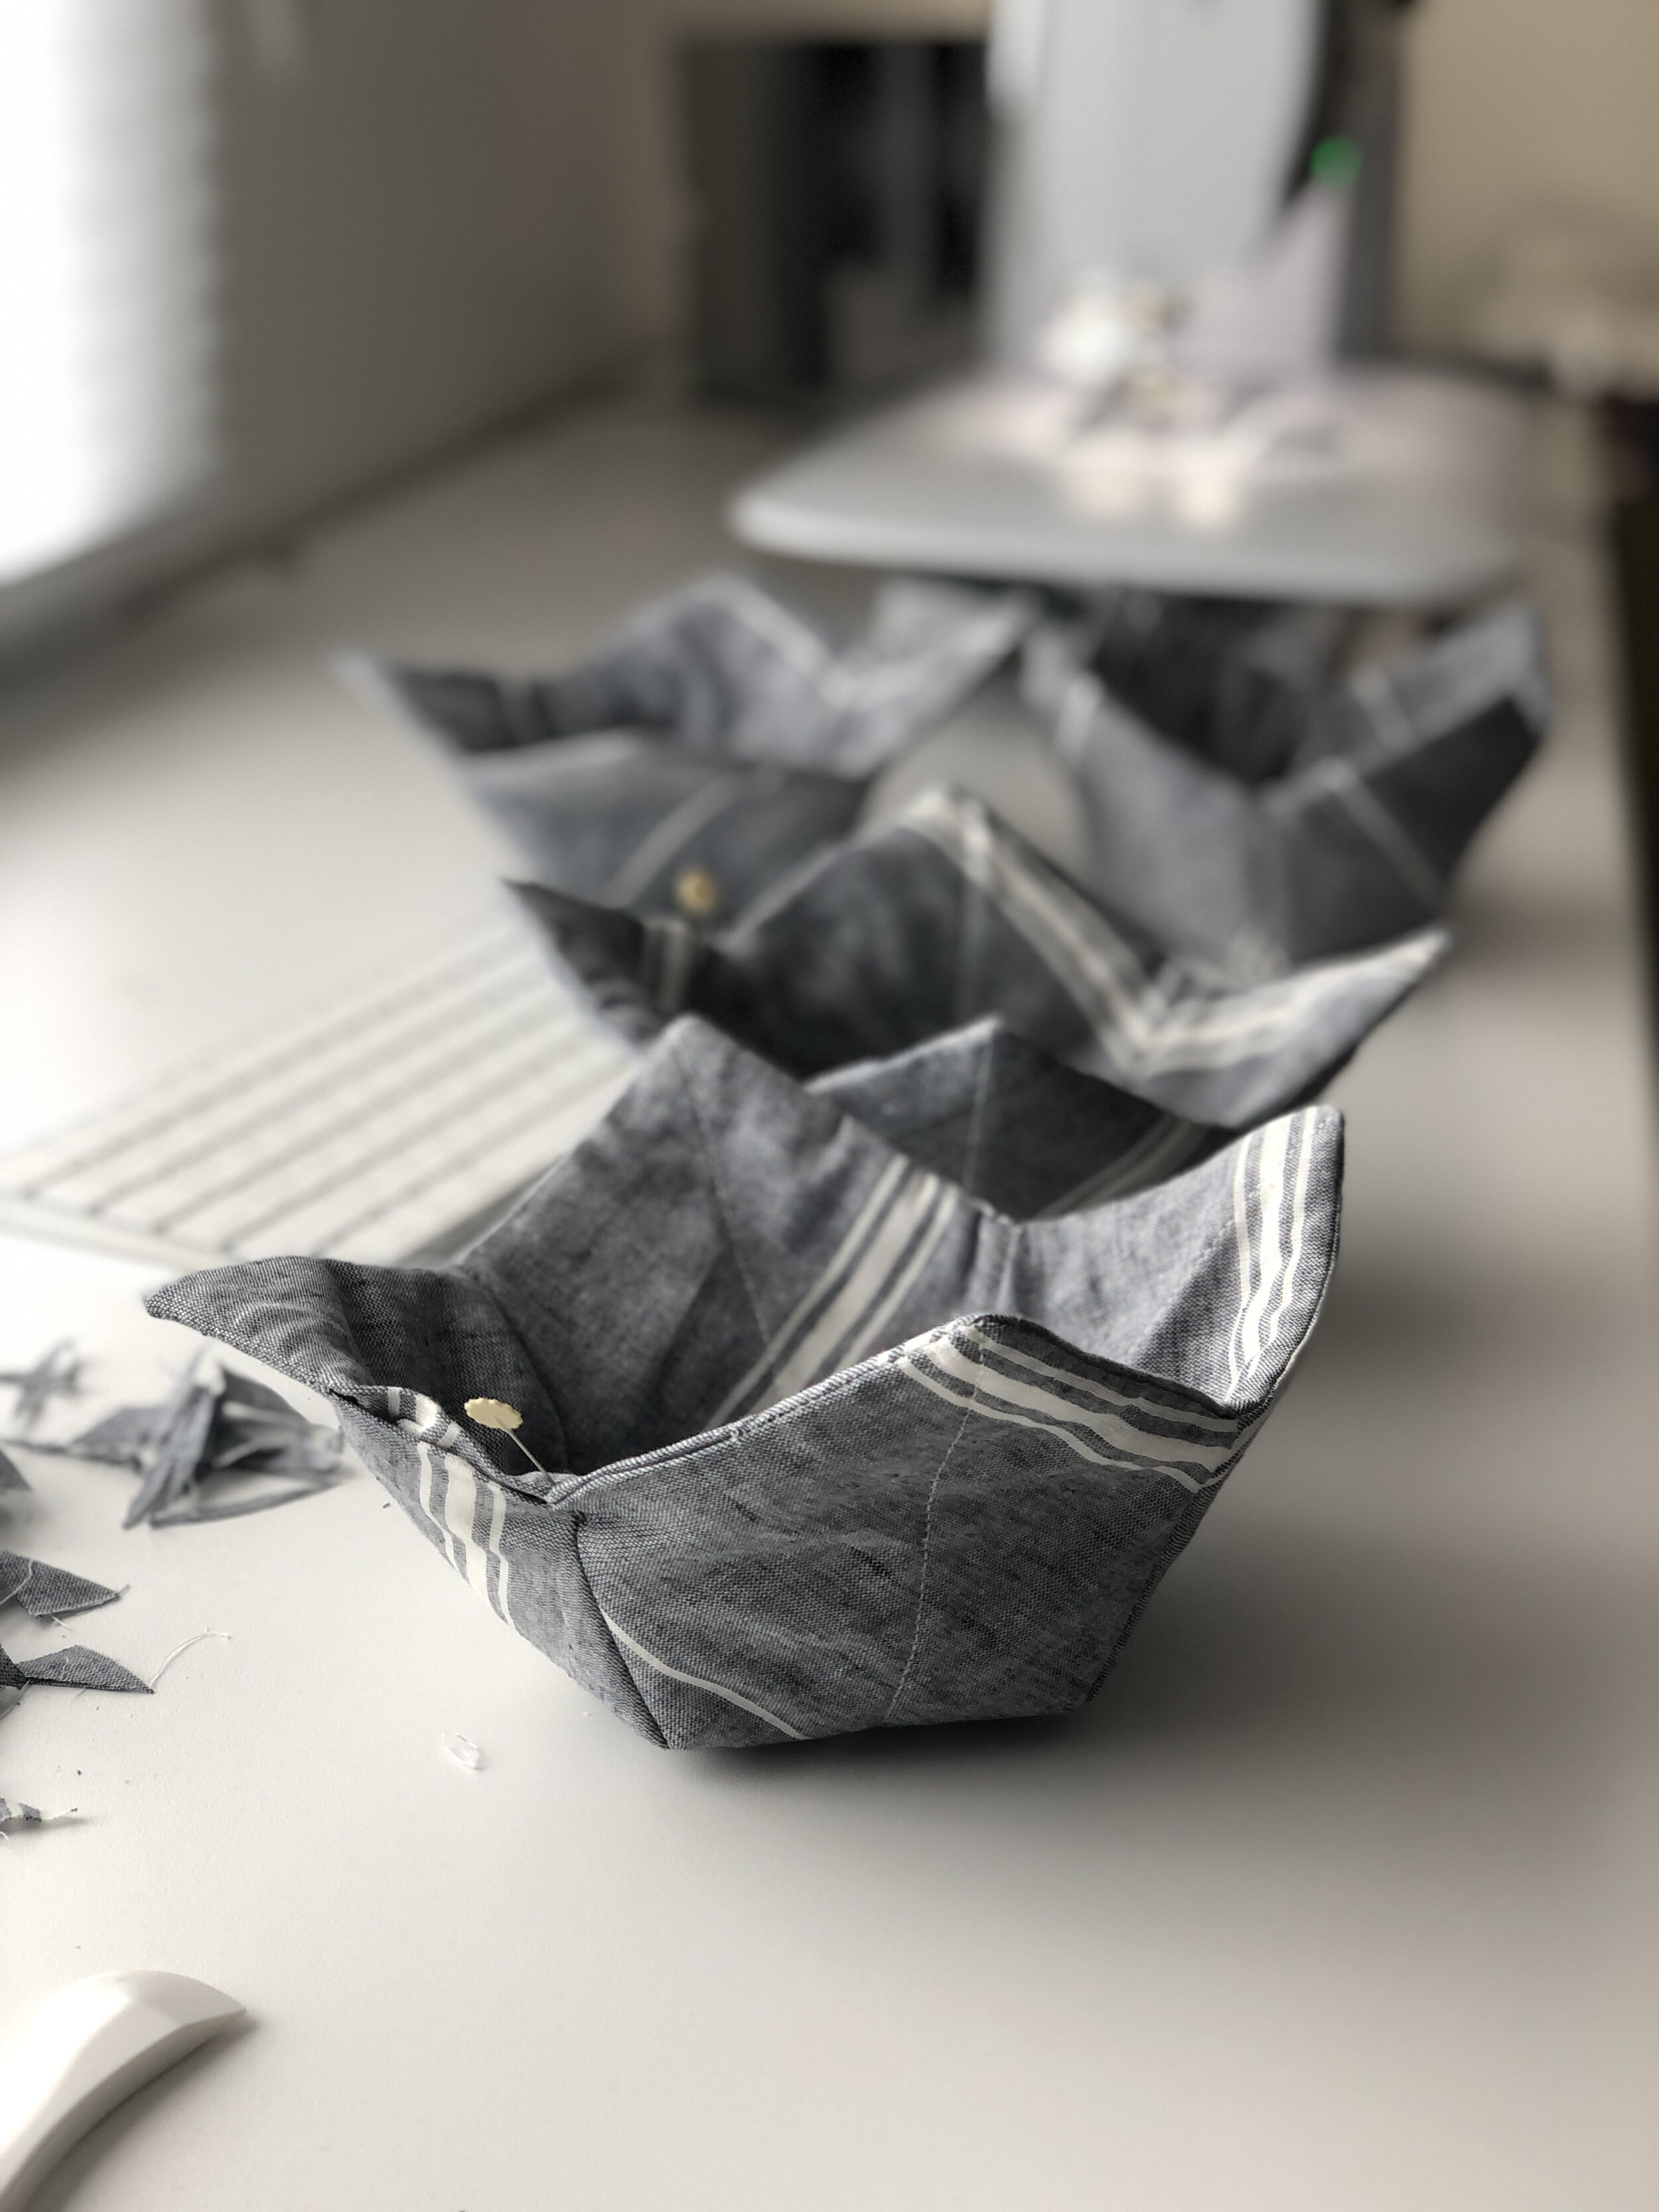
Bowl cozies are the little hug that holds your bowl through the hot and the cold. I use mine for holding my bowl of reheated leftovers. My brother-in-law uses his for everything from a chilly cereal bowl to hot leftovers to a cold ice cream sundae. For reheating leftovers, simply place your bowl in the cozy, pop bowl and cozy together into the microwave for up to 2 minutes, and then remove your bowl safely from the microwave without burning your fingers. Then carry reheated leftovers to the table for dinner with the family or to the couch to watch Parks and Rec without burning your hands or thighs.
Quick Make: <1 Hr
These bowl cozies are a hit as handmade gifts and shower favors. My aunt made these for my bridal shower, and almost everyone who received one asked where they could buy more or asked for instructions on how to make extras for themselves. They take less than an hour to make, are easy to make in multiples, and are perfect for the college student or a whole family.
Materials Needed for Bowl Cozy
To make one bowl cozy:
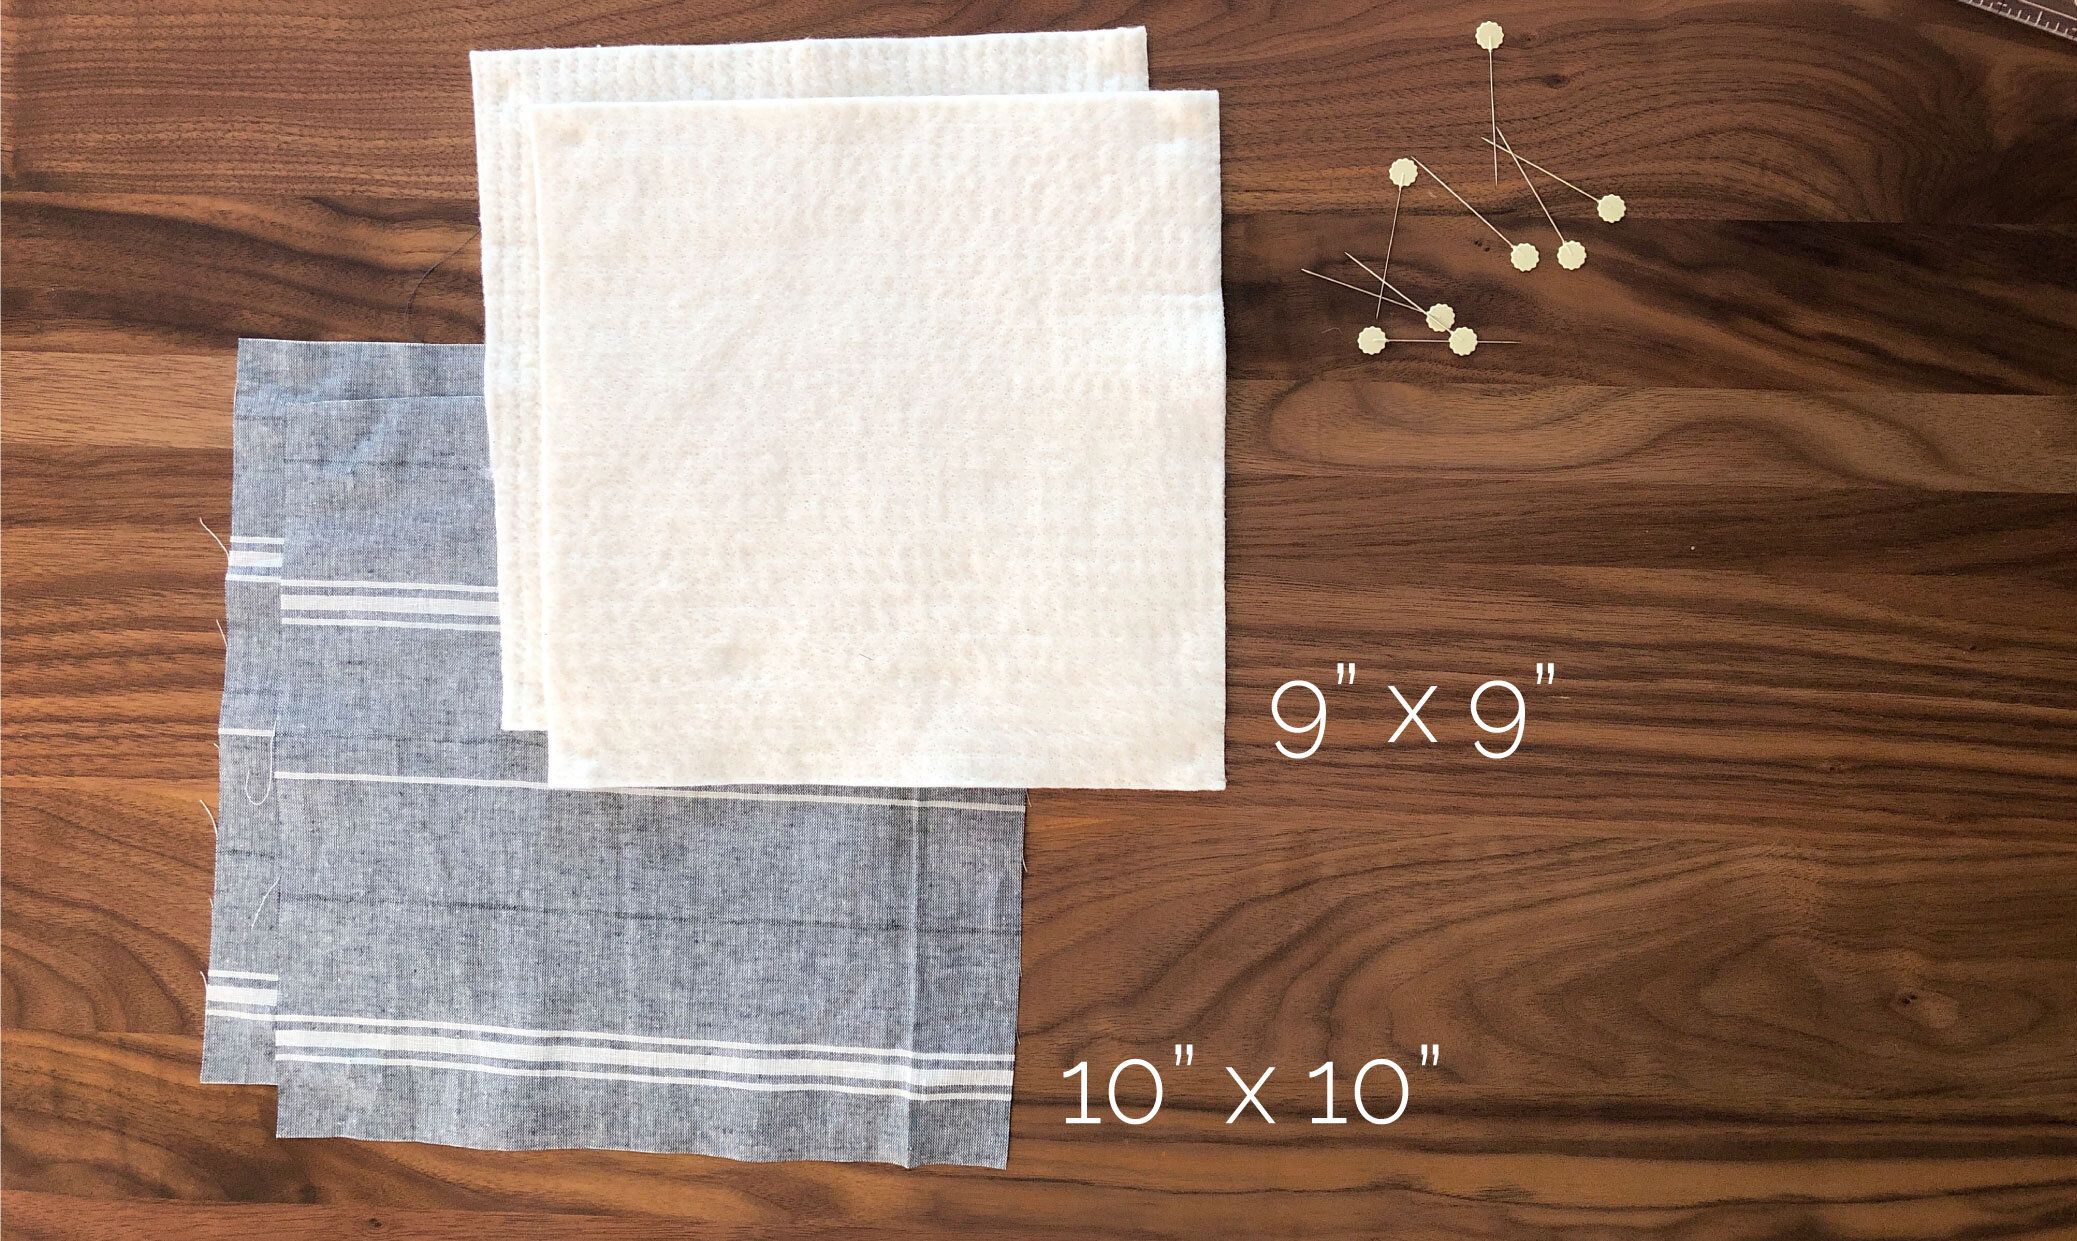
cotton fabric (two - 10”x10” squares)
cotton batting (two - 9”x9” squares)
To make four bowl cozies:
cotton fabric (2/3 yard)
cotton batting (1/2 yard)
Note: The fabric and batting MUST be all cotton so as to limit the possibility of the bowl cozy catching fire when you put it in the microwave.
Instructions to Make Your Own Bowl Cozy
These instructions are to make a single quilted bowl cozy. Repeat as necessary to make as many as you want! Click here for printable instructions.
Cut fabric and batting.
Cut 2 - 10”x10” squares of cotton fabric and 2 - 9”x9” squares of cotton batting (see photo below).
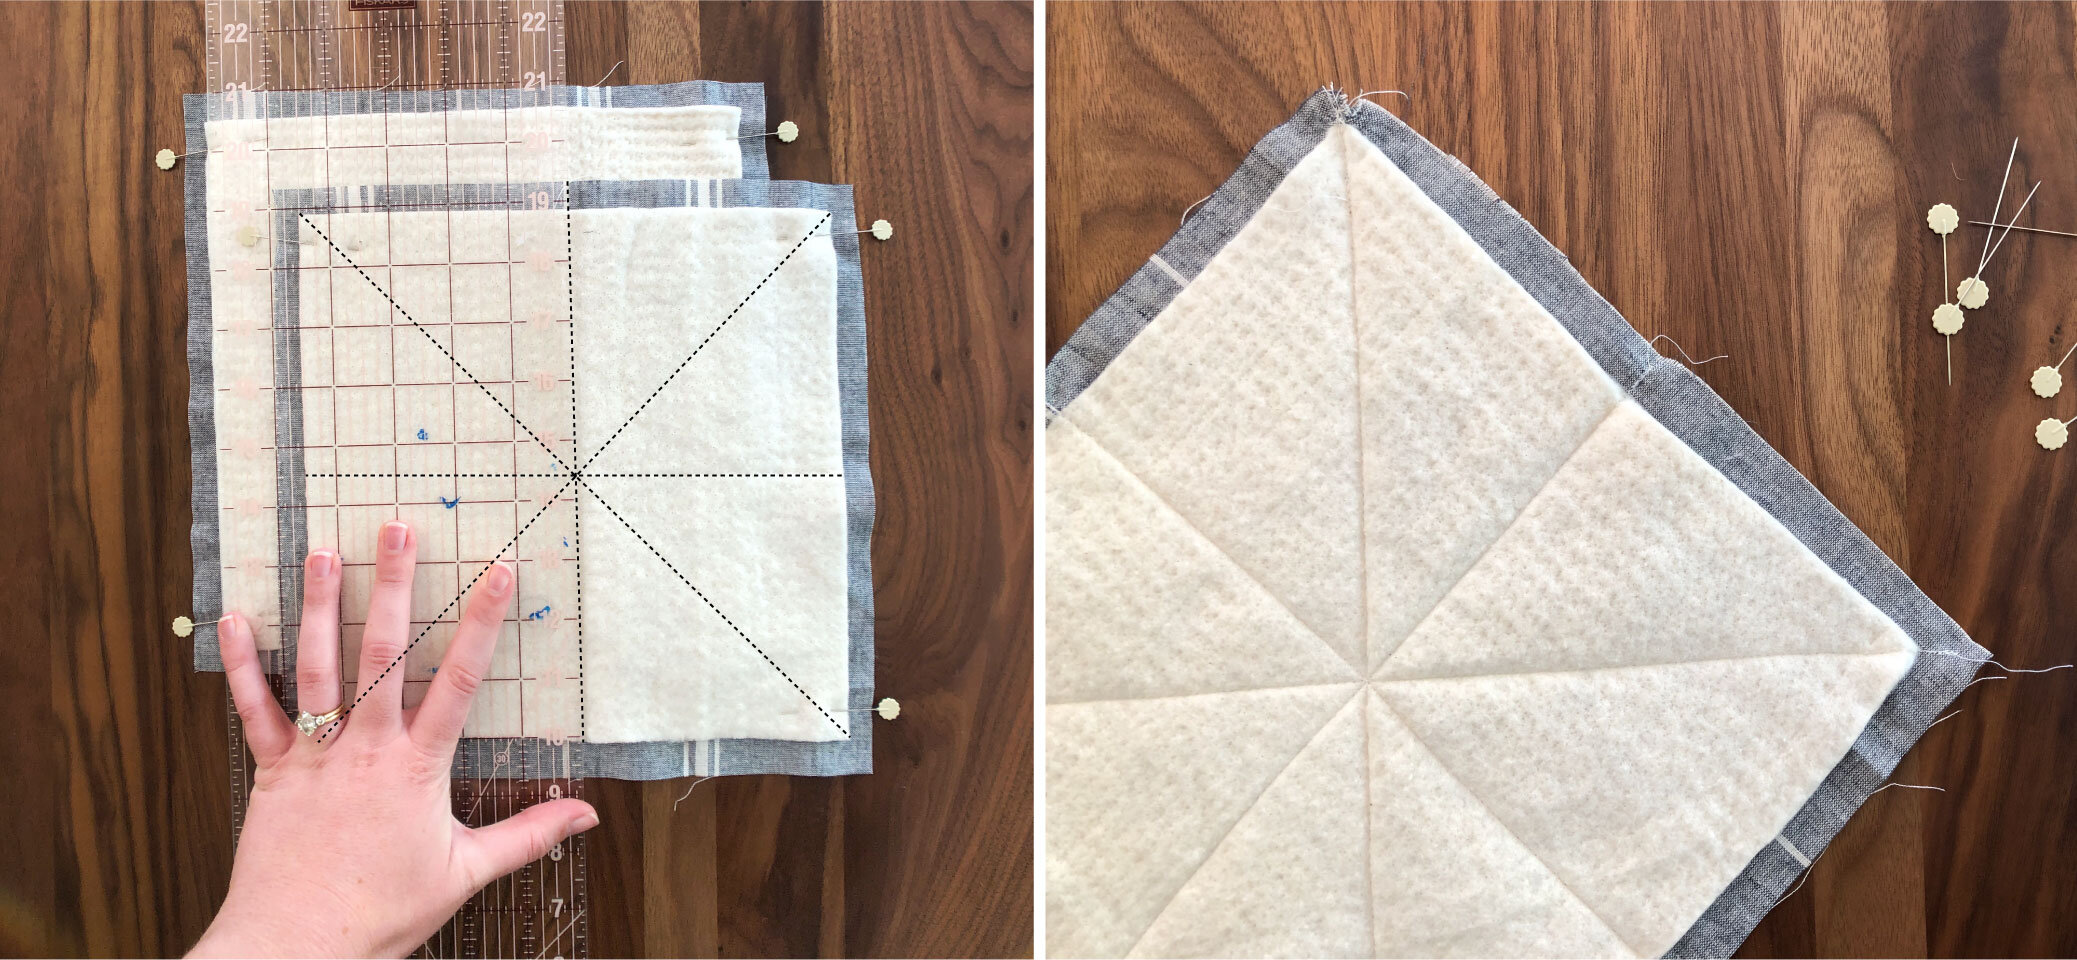
2. Sew X to join batting and fabric.
Center batting on the wrong side of the fabric and pin. Mark lines from corner to corner and from the center of each edge to the center of the opposite edge (see photo below, left). You should have 8 even pie slices marked. Note: I like to use a bone marker, but a permanent marker works as well.
Sew along these lines to join batting and fabric, sewing past the edge of the batting and all the way to the edge of the fabric (see photo below, right).
Repeat for both pieces of batting and fabric.
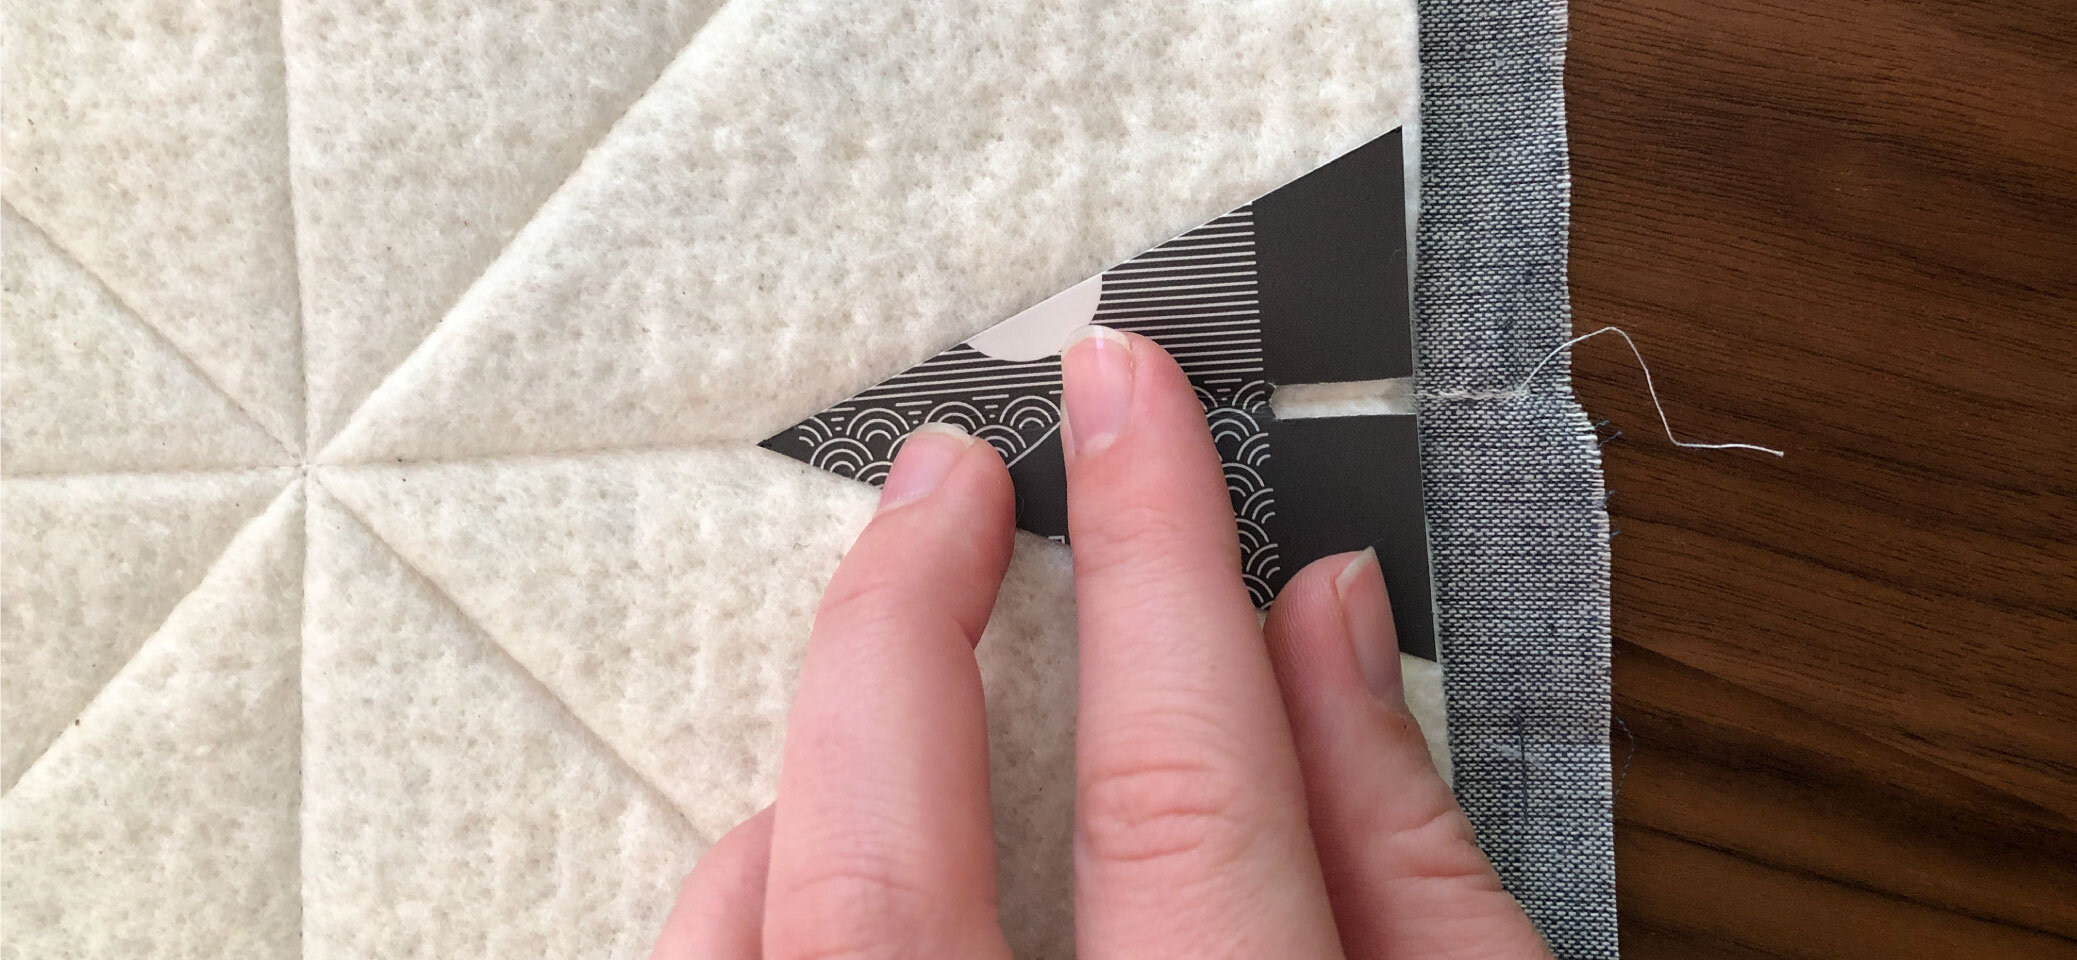
3. Mark darts at the middle of each edge.
Draw a triangle at the center of each edge that is 2.5” tall and has a base of 2” (see photo below).
Tip: Cut a triangle template (paper or cardboard) that you can quickly and easily trace for each dart. Download printable instructions and template here.
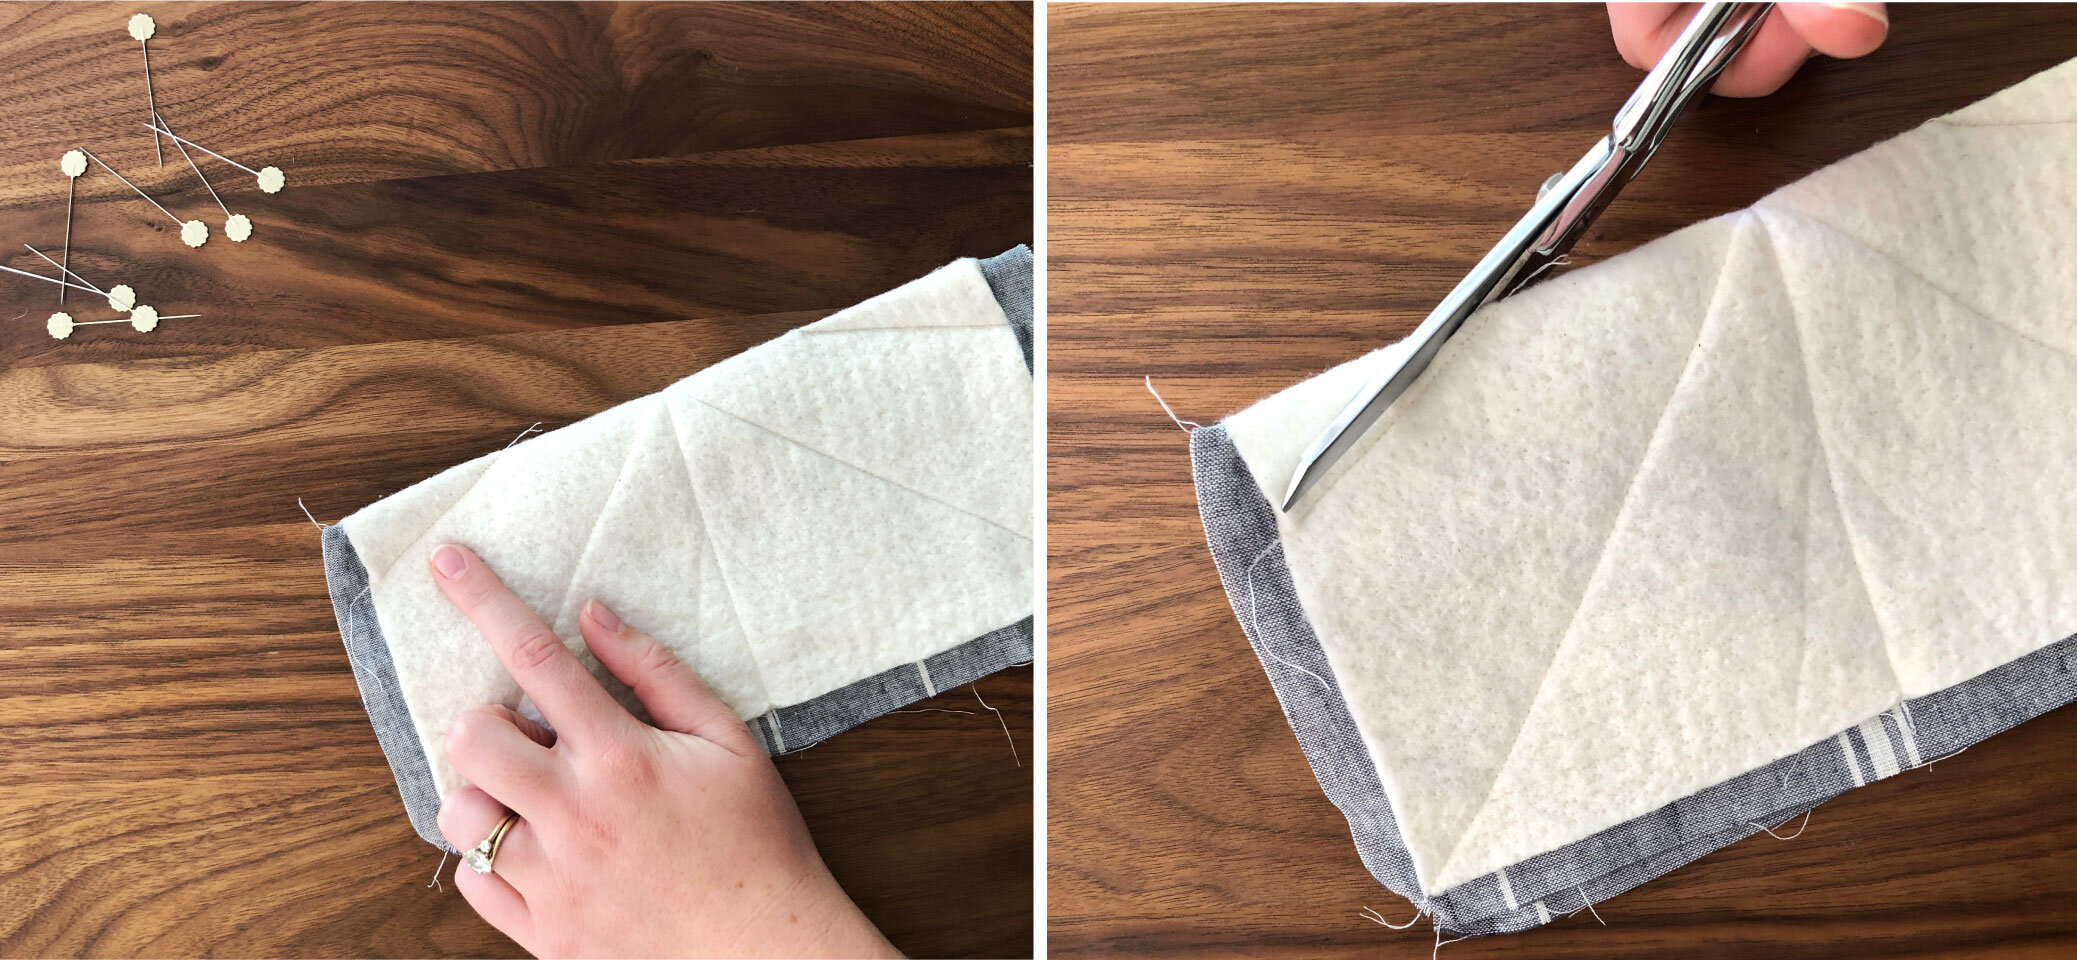
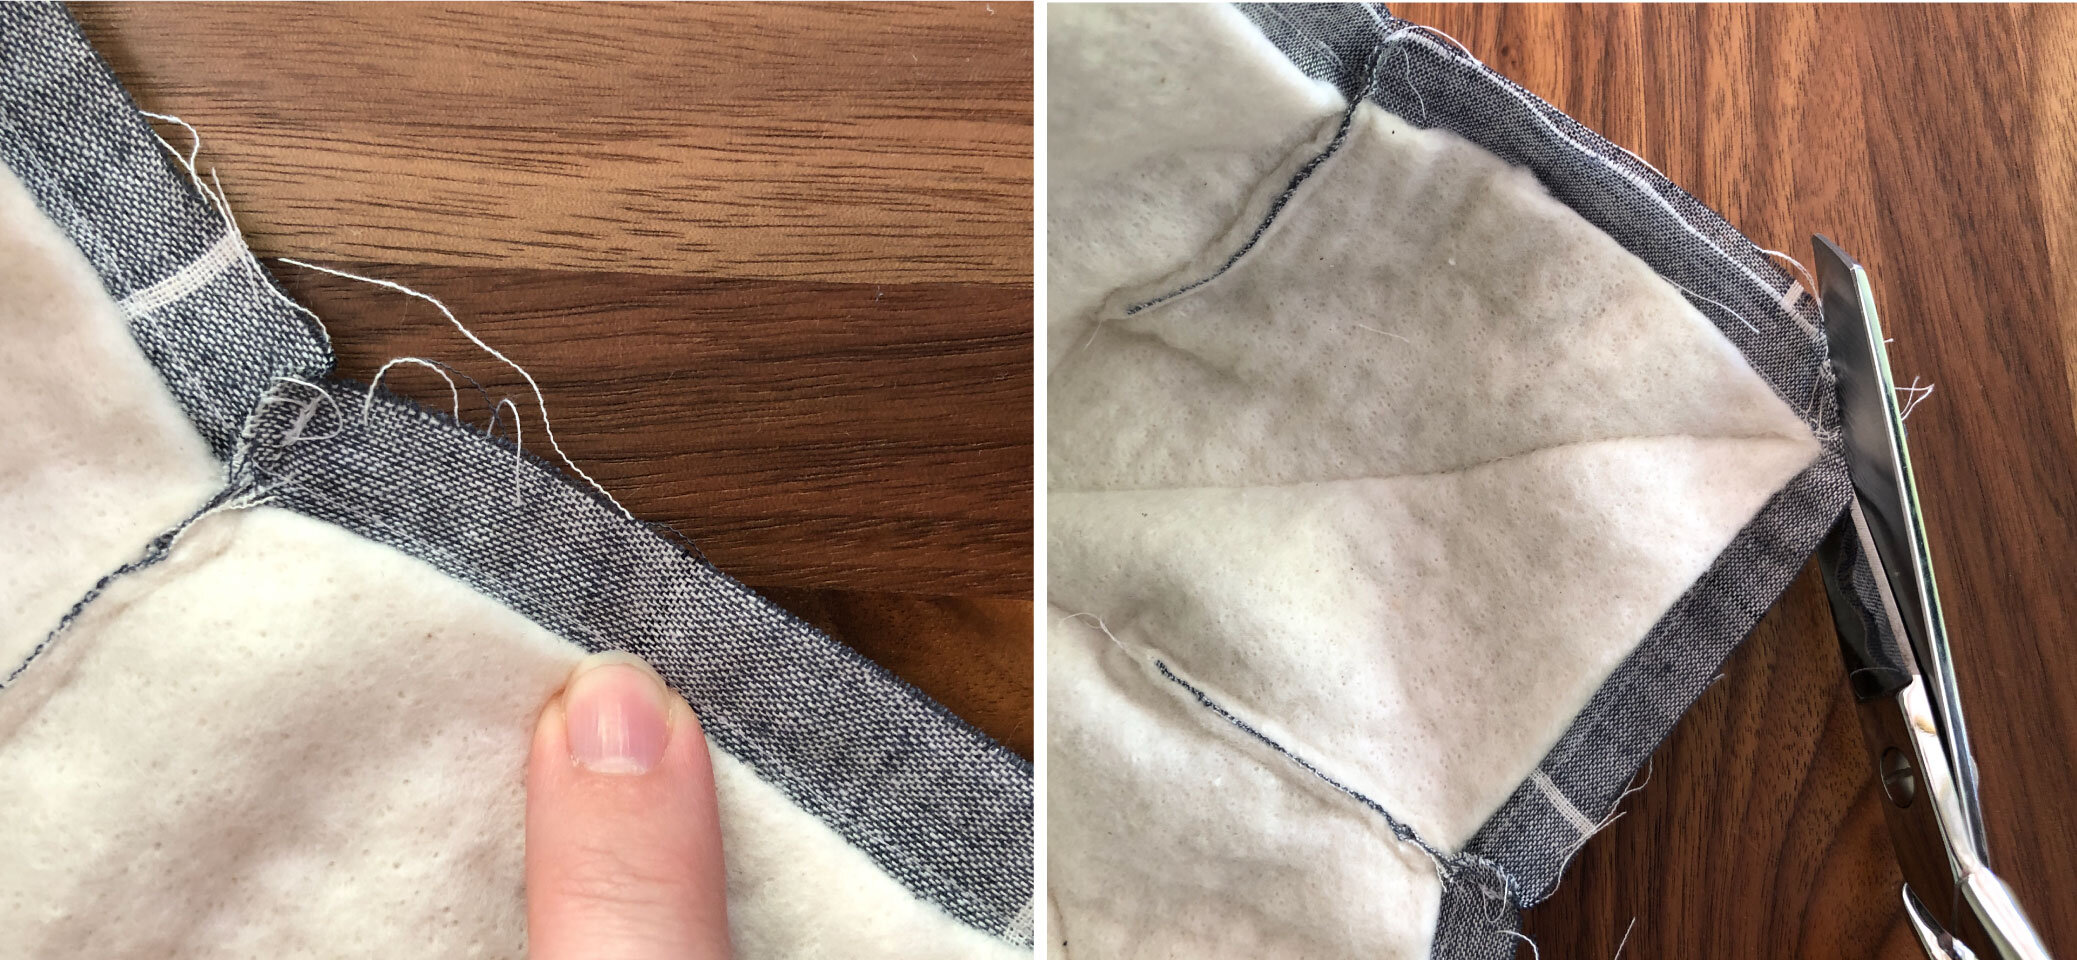
4. Sew darts to form bowl.
Fold the batting/fabric in half, right sides together. Stitch along the marked dart line, reversing at the start and end of each dart seam (see photo below, left). Repeat for all darts.
Trim the excess fabric and batting from each dart (see photo below, right).
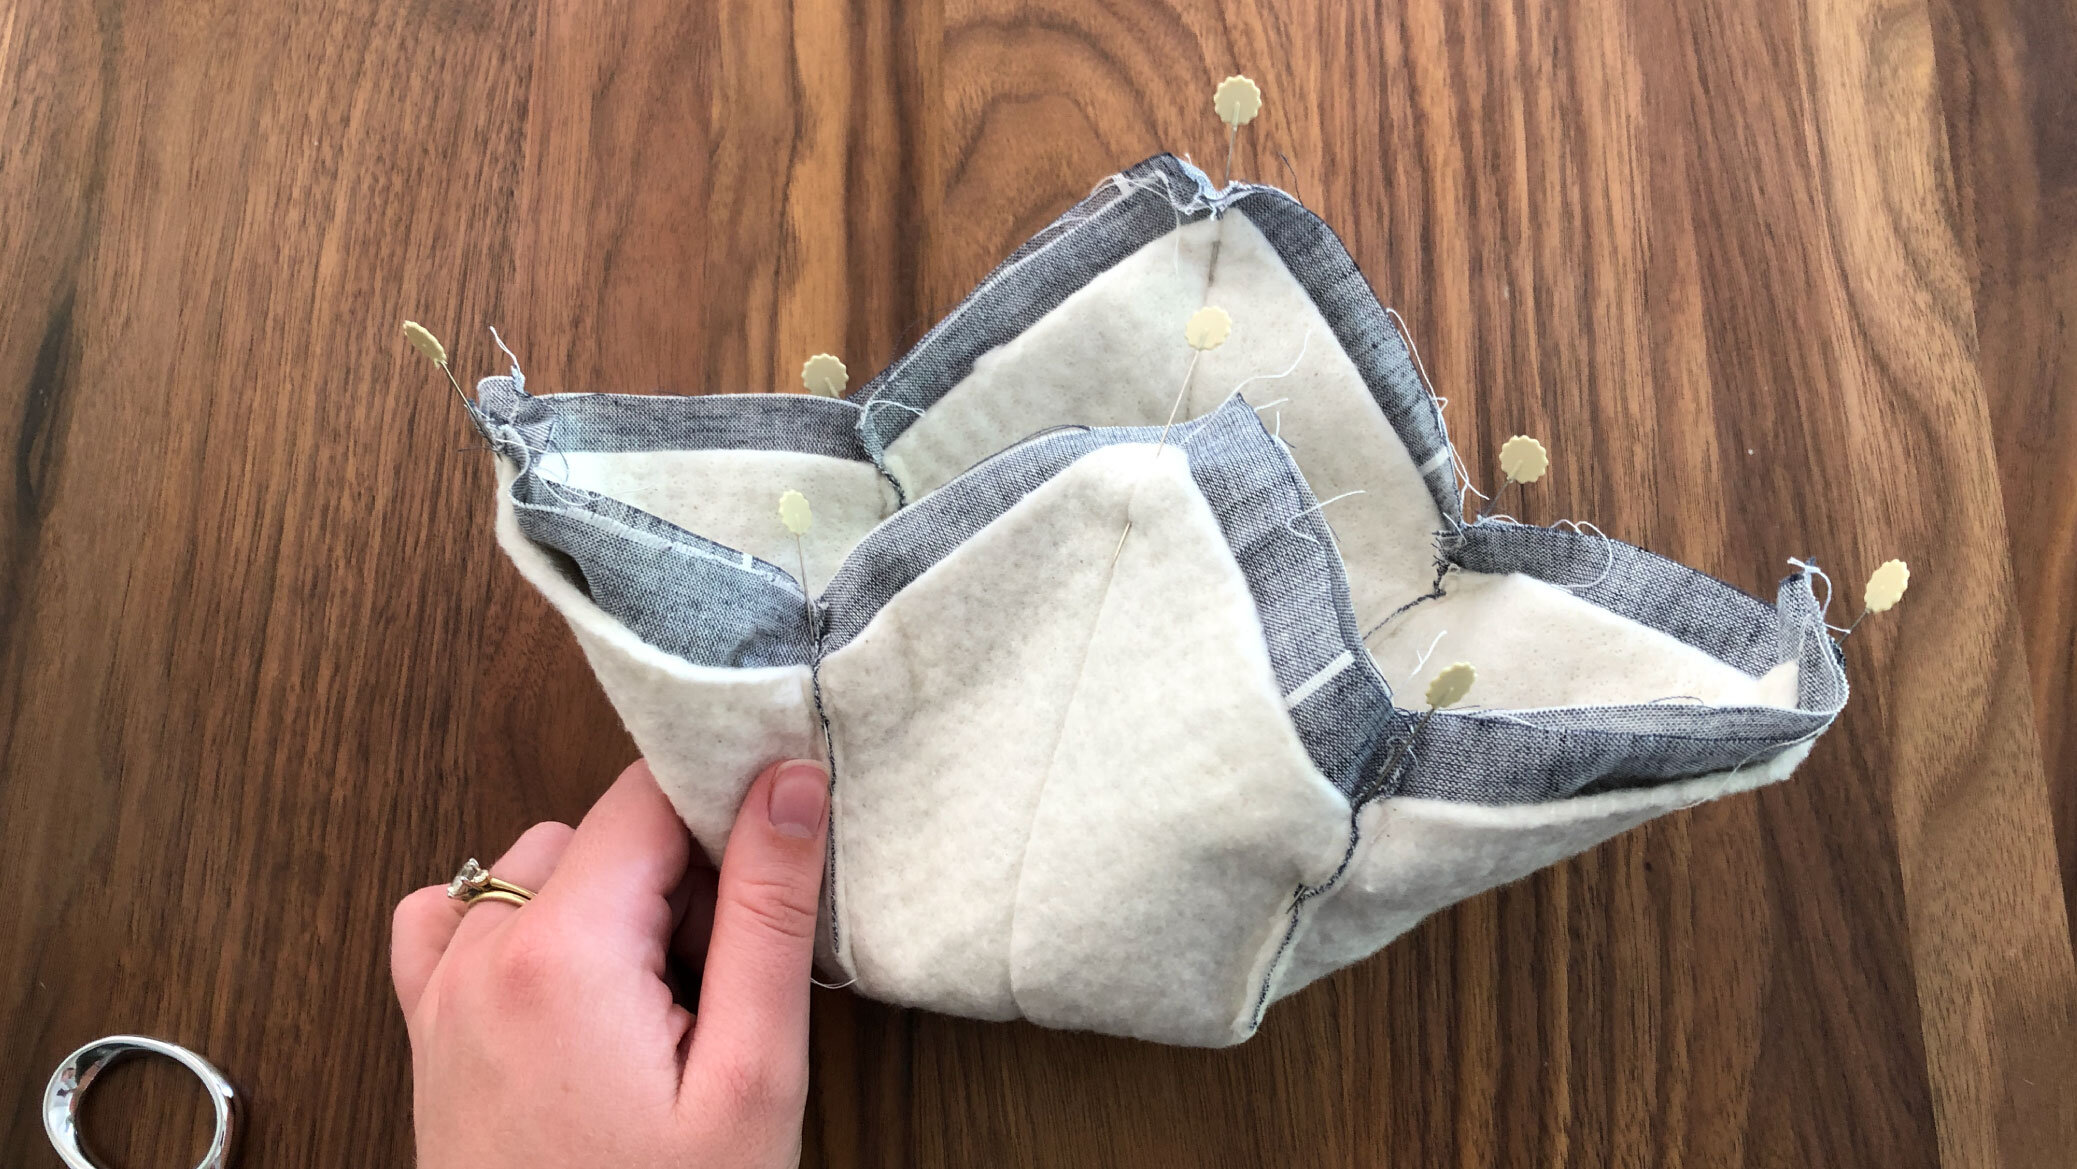
5. Pin together inside and outside of bowl cozy.
Inside-out one of the batting/fabric pieces and nest the two pieces right-sides together (fabric touching fabric), aligning the dart seams.
Pin at dart seams and corners (see photo below).
6. Sew together inside and outside of bowl cozy.
Sew around the edge of the fabric, 1/8” from the edge of the batting, leaving a 3” gap on one of the sides. Reverse at the start and stop of the seam. You should be sewing only through 2 layers of fabric and no batting to avoid a bulky seam (see photo below, left).
Trim excess fabric and batting from each corner (see photo below, right).
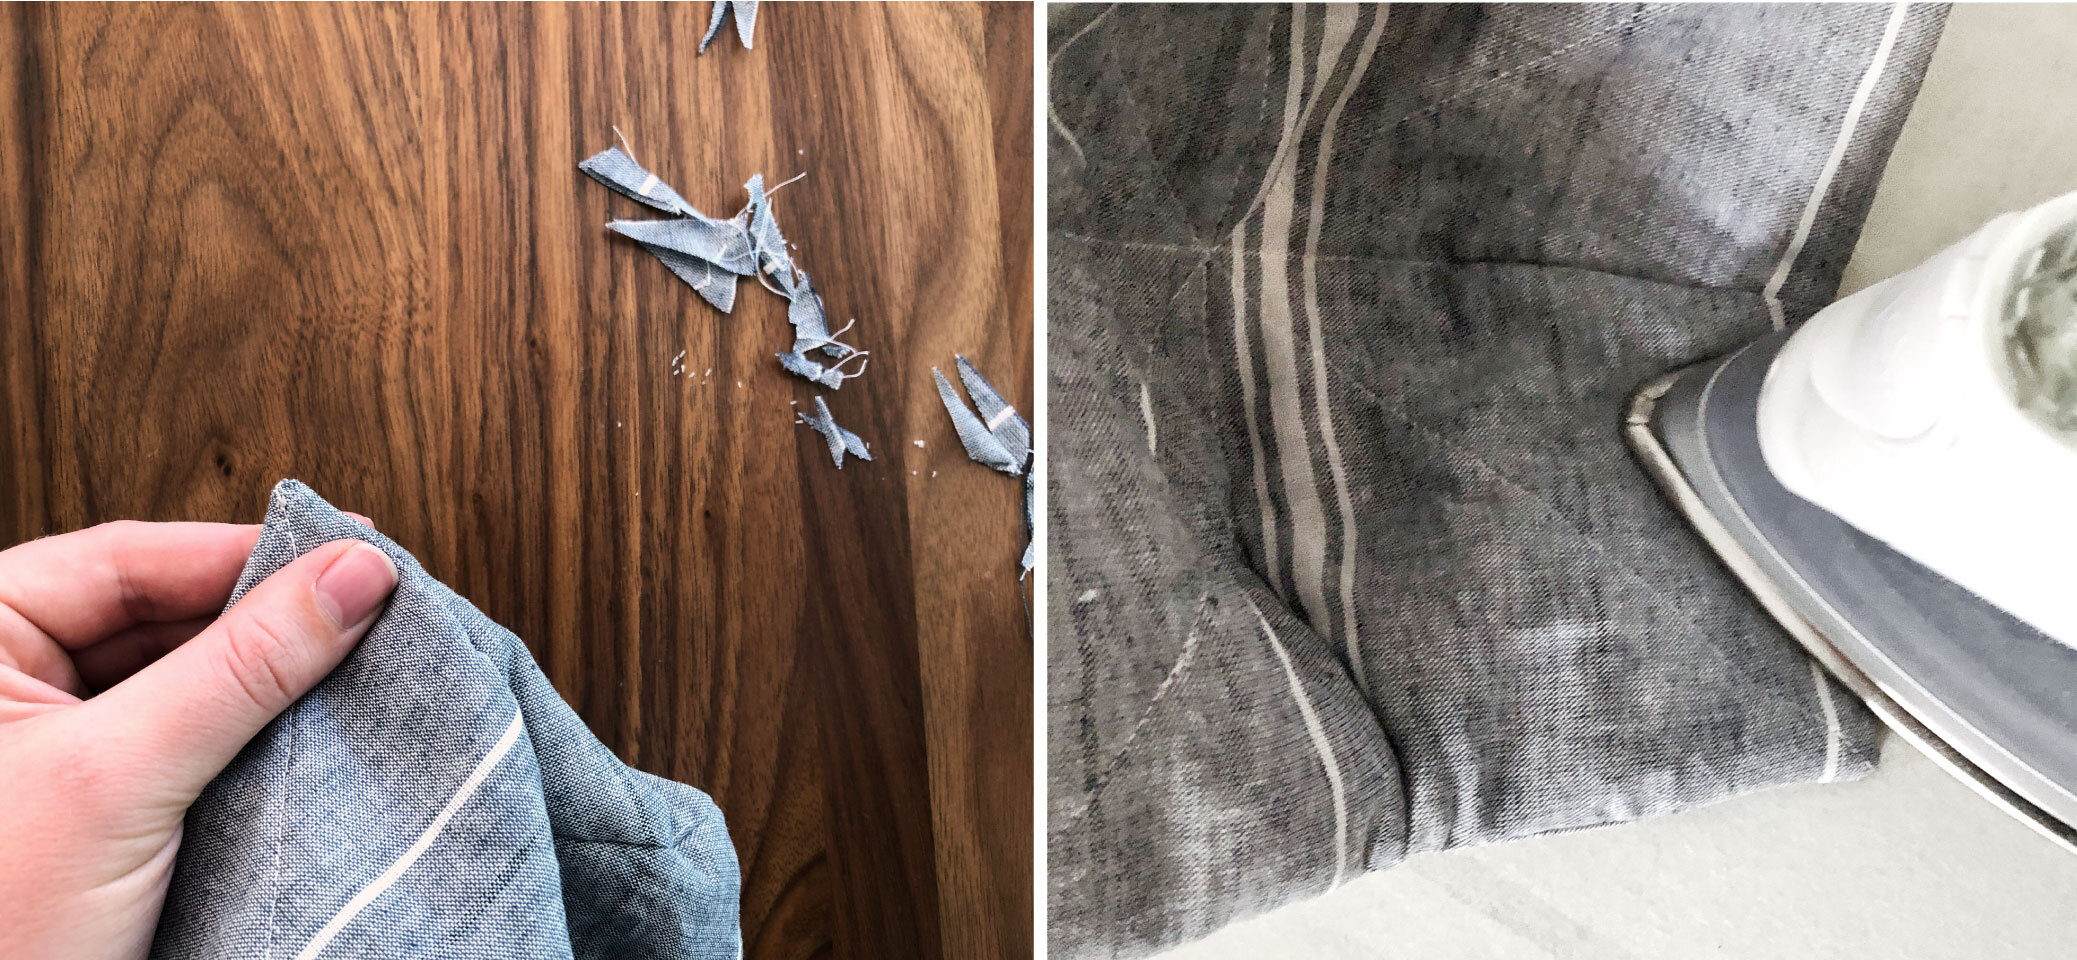
7. Inside out bowl cozy.
Inside-out the bowl cozy through the 3” gap, using a pencil or bone folder to poke the corners out to achieve a crisp finish (see photo below, left).
Press each side with the iron (see photo, right).
8. Topstitch around edge.
Topstitch around the edge (about 1/8” from the edge), reversing at the start and stop of the seam. This will close the 3” gap you left.
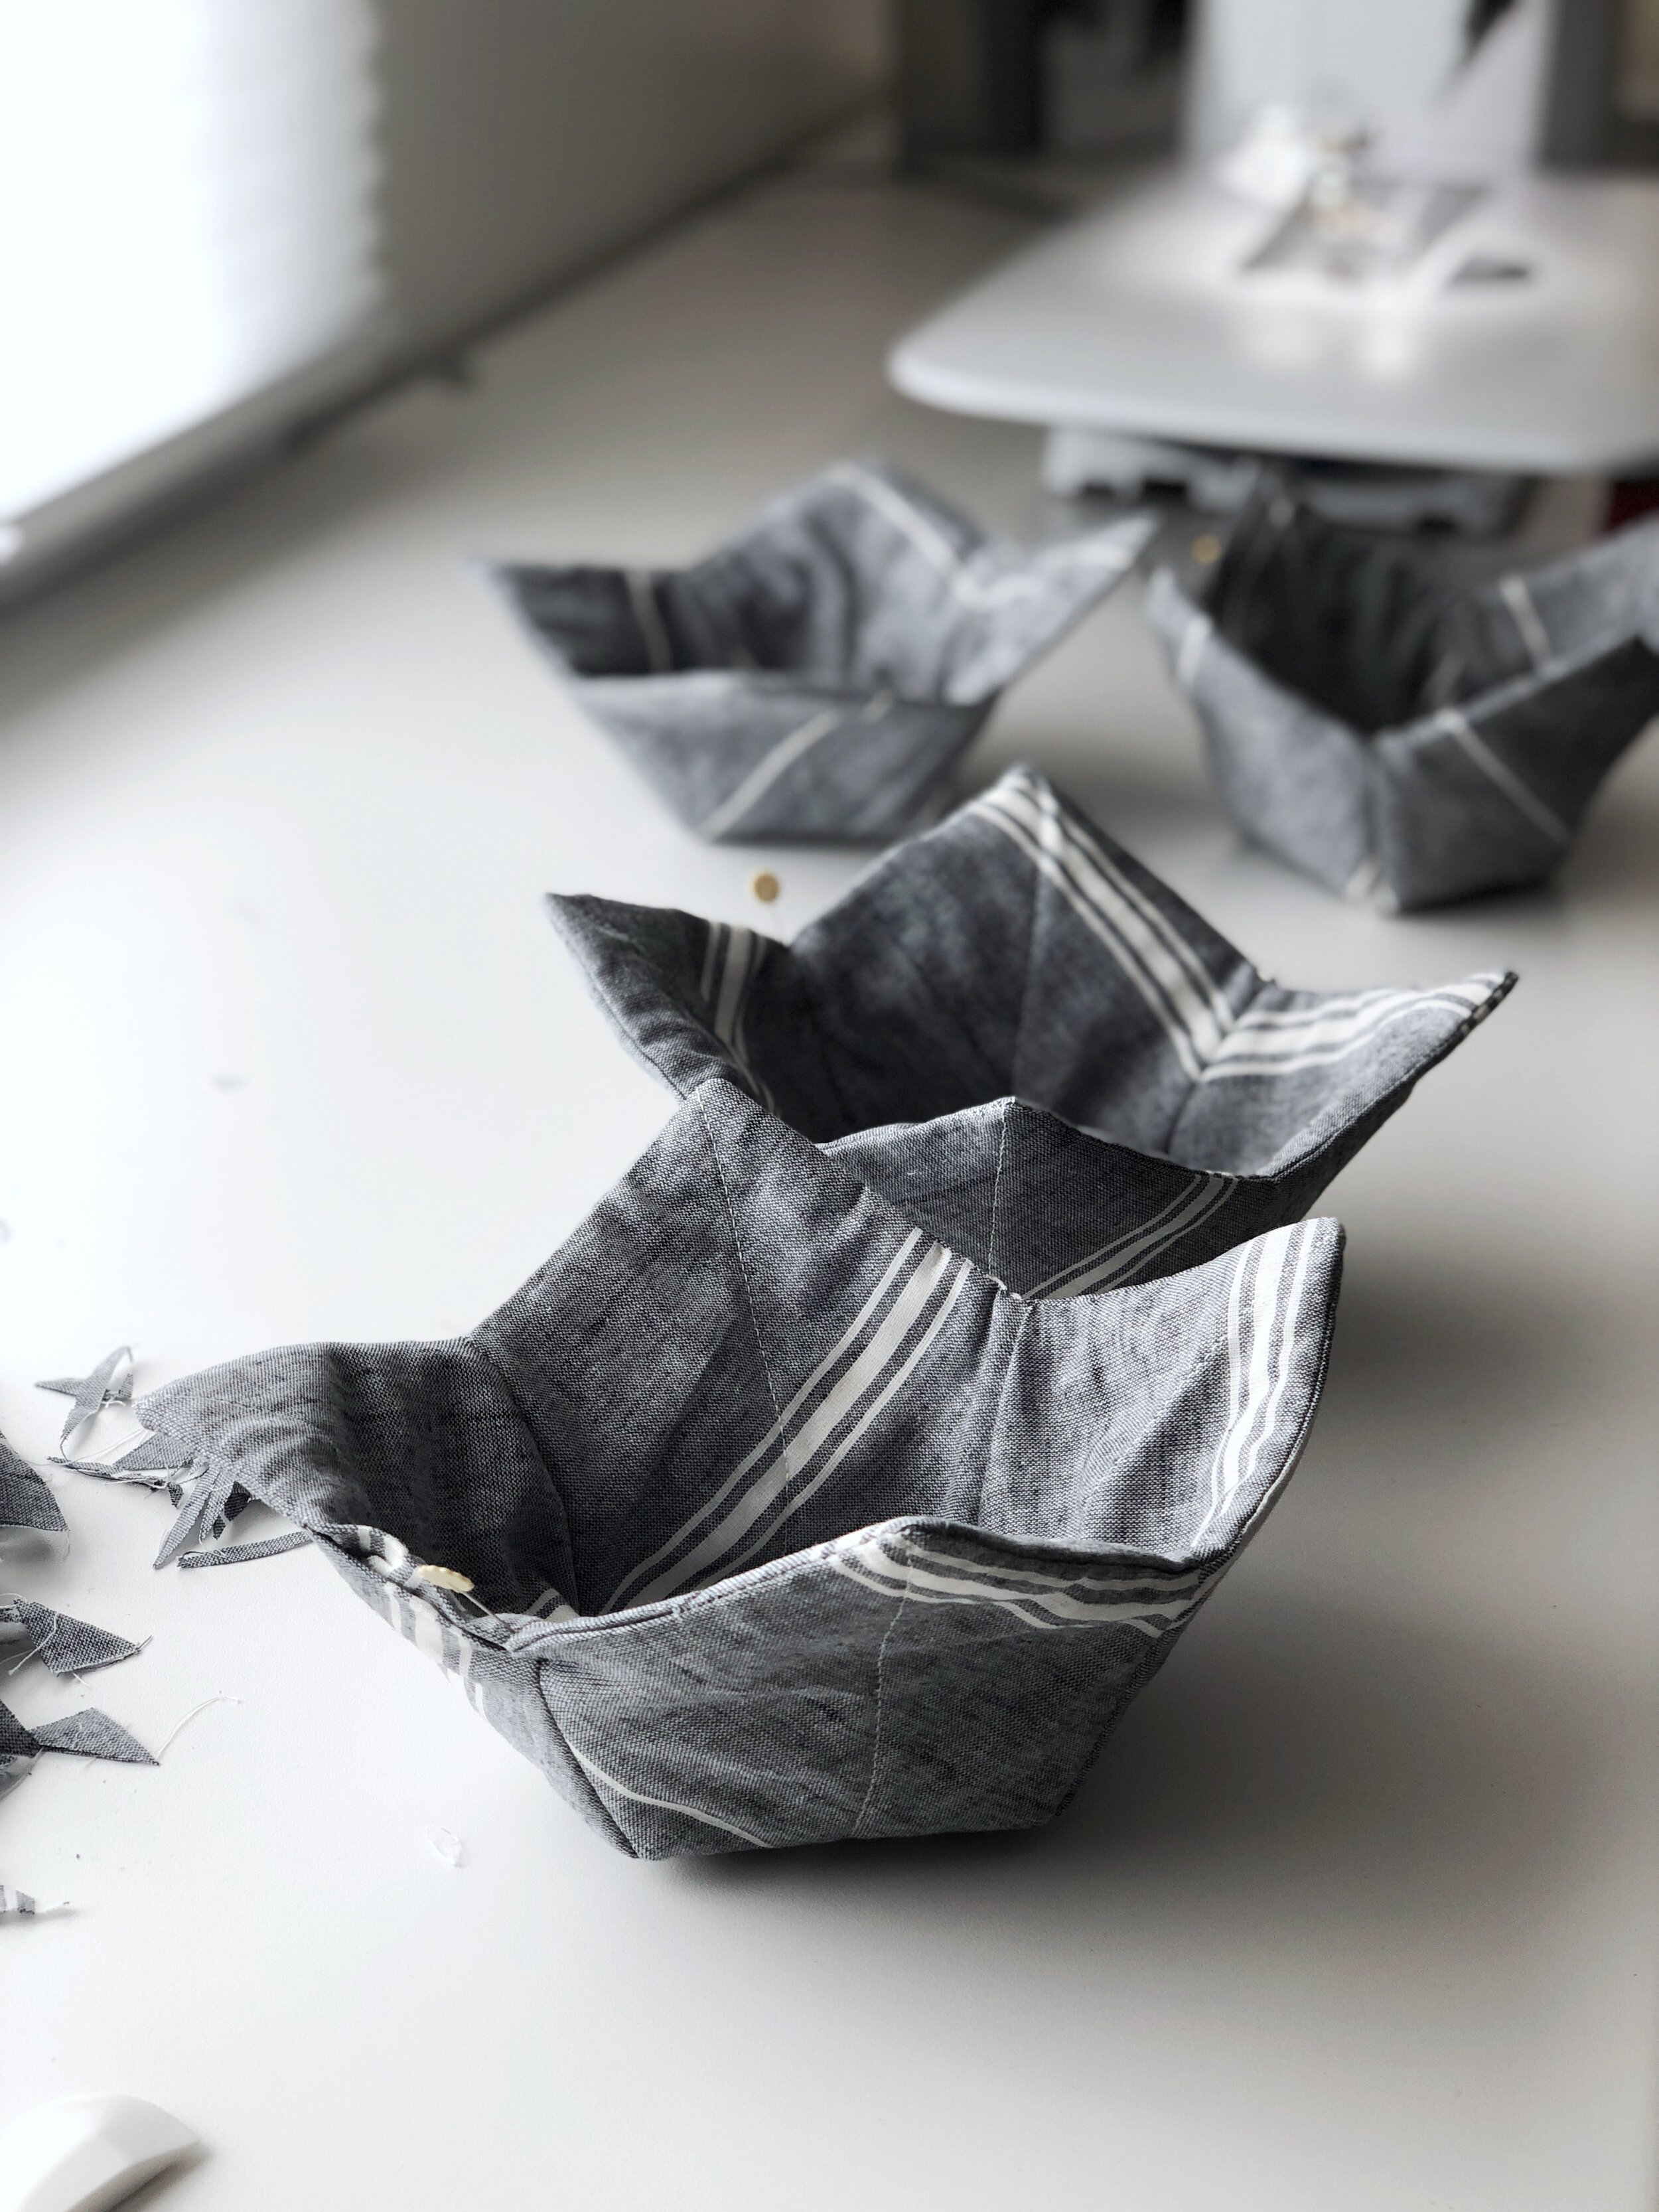
Voila! Your bowl cozy is ready to be gifted or used!

Instructions without Pictures
Once you’ve made your first bowl cozy, you can use these abbreviated instructions as a reference. Download printable instructions to make your own bowl cozy here.
Cut fabric and batting.
Cut 2 - 10”x10” squares of cotton fabric and 2 - 9”x9” squares of cotton batting.
Sew X to join batting and fabric.
Center batting on the wrong side of the fabric and pin. Mark lines from corner to corner and from the center of each edge to the center of the opposite edge.
Sew along these lines to join batting and fabric, sewing past the edge of the batting and all the way to the edge of the fabric.
Repeat for both pieces of batting and fabric.
Mark darts at the middle of each edge.
Draw a triangle at the center of each edge that is 2.5” tall and has a base of 2”.
Tip: Cut a triangle template (paper or cardboard) that you can quickly and easily trace for each dart. Download printable instructions and dart template here.
Sew darts to form bowl.
Fold the batting/fabric in half, right sides together. Stitch along the marked dart line, reversing at the start and end of each dart seam. Repeat for all darts.
Trim the excess fabric and batting from each dart.
Pin together inside and outside of bowl cozy.
Inside-out one of the batting/fabric pieces and nest the two pieces right-sides together (fabric touching fabric), aligning the dart seams.
Pin at dart seams and corners.
Sew together inside and outside of bowl cozy.
Sew around the edge of the fabric, 1/8” from the edge of the batting, leaving a 3” gap on one of the sides. Reverse at the start and stop of the seam. You should be sewing only through 2 layers of fabric and no batting to avoid a bulky seam.
Trim excess fabric and batting from each corner.
Inside out bowl cozy.
Inside-out the bowl cozy through the 3” gap, using a pencil or bone folder to poke out the corners.
Press each side with the iron.
Topstitch around edge.
Topstitch around the edge (about 1/8” from the edge), reversing at the start and stop of the seam.
Voila! Your bowl cozy is ready to be gifted or used!