
You know he's a keeper when he asks if he can pick your next project because he's been following some quilters on Instagram. Yep. That's exactly how it went. Brent has been following Modern Handcraft for several weeks now, and he is all about her hexie quilts. They are pretty awesome.

The thing is, I'm not into hand-sewing. It's not that I don't like it, but I like going faster than that. So, I decided if I was going to do hexies, I would do them "no sew." If you're just like me and don't like the hand-sewing but love the hexies, this is for you!
Supplies
fabric scraps
paper
printer
basting spray
starch
mini clothespins
(or other, be creative!)

1. Choose the size hexies you want.
Mine are about 1 1/4" flat side to flat side.
2. Print your template.
And cut them out.
Here are some free hexie templates, but I bet you can find more with a simple web search. (Or if you're feeling adventurous, whip up a template yourself for some Adobe Illustrator practice.) Print onto cardstock if you have it. If you don't you can always print onto normal paper and iron a piece of freezer paper to the back for extra stability. (You can also purchase them pre-cut many different places online.)

3. Cut scraps of fabric.
Aim for at least a quarter inch larger than the template on each side. I did about a half inch. And no need for it to be perfect; I just cut squares.
4. Spray on starch.
Line them all up on your ironing board and starch as directed. If you don't do the starch before the basting spray, the scraps fly all over the place...
5. Lightly spray with basting spray.
Then stick a template to the middle of each one. If you're worried about your aim or your ironing board, pop a piece of paper or something beneath your hexies before you start.
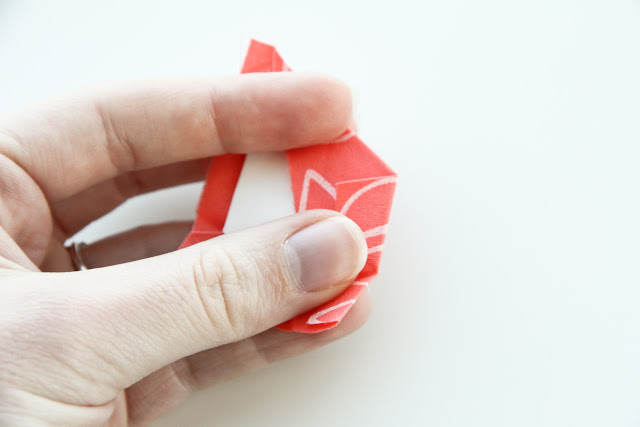
6. Start folding!
Pick up a hexie and simply start folding the edges over tight against the template. The basting spray helps the fabric stick to the both template and itself. Work your way around the edge. The more care you take here, the crisper your corners! Depending on how big your scrap was, you might have to trim the last piece you fold over. I just clipped a chunk off of a couple, very precise-like.
7. Now for pinning.
Clothespin-ing that is! Clip a little clothespin on the last fold. If your fabric is thicker, you might need two or three clothespins. Feel it out, but the fewer the clothespins, the easier to iron in the next step. I bet you could also use paper clips, binder clips, hair clips...be creative!

8. Spritz and press.
Spray a little extra starch onto each hexie and press it with a hot steaming iron. I found it best not to spray the starch onto too many at a time because it loosens them up, and you don't want to give the hexie a long time to relax and blossom before you can press it into submission and crispness. It may go without saying, but edge the iron onto half of your hexie and then unclip the clothespin before really hitting the hexie with a hot iron and a lot of steam.
9. Pull your papers out and voila!
Carefully unfold your last two folds and slip the template out. Don't worry; it may take a little tug due to the basting spray. Then you can press it again for good measure if you'd like. And ta da! No-sew hexie ready for use!

Once you have your little pile, you can head over the Modern Handcraft and see how she "no hand-sews" her hexies to quilts! I've already got mine sewn onto a quilt that I will share later this week!

